phoneid_iOS


Overview
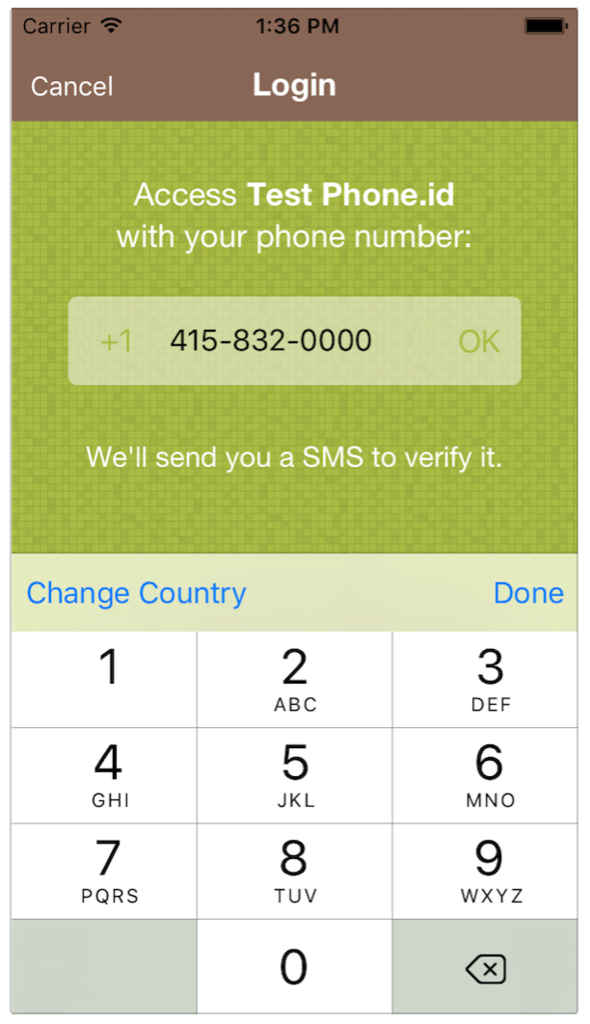
phoneid_iOS is lightweight and easy-to-use library for iOS 8 (written in Swift). It provides service to login users by phone number with verification code. See Fullscreen mode, Compact mode
Usage
To run the example project, clone the repo, and run pod install from the Example directory first.
Requirements
iOS 8, iOS 9, iOS 10
Versions
0.1.8 - supports XCode 8, Swift 2.3 Known issue: Control is not rendering properly in UI builder
Installation
phoneid_iOS is available through CocoaPods. To install it, simply add the following line to your Podfile:
use_frameworks!
pod "phoneid_iOS"
Table Of Contents
- Quick Start
- Configure phoneid client
- Integrate phoneid button
- Callbacks
- UI Customization
- User Profile
- Upload Contacts
- Author
- License
Quick Start
1. Configure phoneid client:
If your app is not yet registered with PhoneId and has a client ID, you should create it on developer.phone.id
In order to start work with phoneid SDK you should configure it with your client ID (replace "TestPhoneId" with your client ID):
#####Swift
import phoneid_iOS

@UIApplicationMain
class AppDelegate: UIResponder, UIApplicationDelegate {

//......
func application(application: UIApplication, didFinishLaunchingWithOptions launchOptions: [NSObject: AnyObject]?) -> Bool {

        //configure client
        PhoneIdService.sharedInstance.configureClient("TestPhoneId");
        return true
    }

}
//.....
#####Objective-C
#import "phoneid_iOS-Swift.h"

@implementation AppDelegate

- (BOOL)application:(UIApplication *)application didFinishLaunchingWithOptions:(NSDictionary *)launchOptions {

    // configure phone.id
    [[PhoneIdService sharedInstance] configureClient:@"TestPhoneId" autorefresh:YES];

    return YES;
}
@end
PhoneIdService.sharedInstance - returns a singleton instance of PhoneIdService.
2. Integrate phoneid button:
PhoneIdLoginButton is a UIView's subclass in the iOS SDK that allows users to log in and log out. It tracks the user's login state and automatically displays the appropriate message, Log in or Log out:
Put UIView to your view controller in the storyboard and change it's class to “PhoneIdLoginButton”. Pay attention that module of this button will be changed automatically to “phoneid_iOS”. This is correct, don’t change this value:
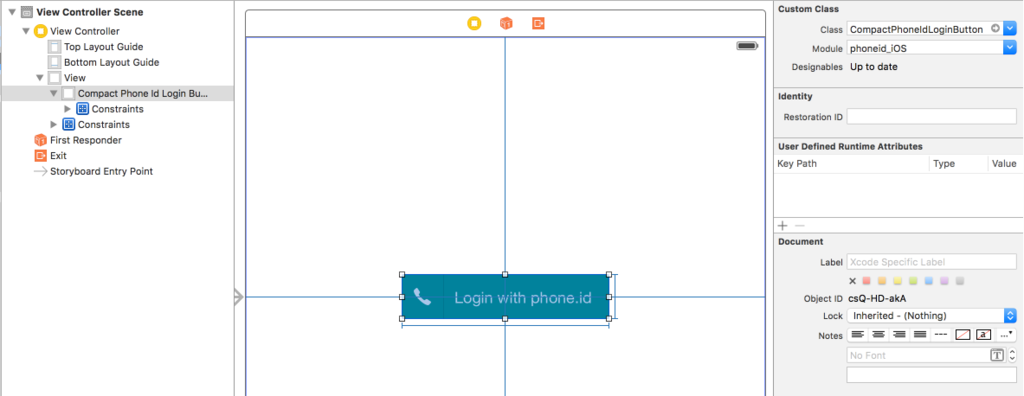
Note, you can use CompactPhoneIdLoginButton instead of PhoneIdLoginButton
After this step integration is almost completed.
3. Callbacks:
In order to be notified about interesting events like successfull login, logout, or some error happened, etc. you can set appropriate handlers on PhoneIdService.sharedInstance. Here is list if available handlers:
phoneIdAuthenticationSucceed - Here you can get authentication token info after user has successfully logged in ######Swift
PhoneIdService.sharedInstance.phoneIdAuthenticationSucceed = { (token) ->Void in

}
######Objective-C
[PhoneIdService sharedInstance].phoneIdAuthenticationSucceed = ^(TokenInfo* token){

};
phoneIdAuthenticationCancelled - phoneId SDK calls this block when user taps close button during authentication workflow ######Swift
 PhoneIdService.sharedInstance.phoneIdAuthenticationCancelled = {

}
######Objective-C
[PhoneIdService sharedInstance].phoneIdAuthenticationCancelled = ^{

};
phoneIdAuthenticationRefreshed - phoneid SDK calls this block every time when token refreshed ######Swift
PhoneIdService.sharedInstance.phoneIdAuthenticationRefreshed = { (token) ->Void in

}
######Objective-C
[PhoneIdService sharedInstance].phoneIdAuthenticationRefreshed = ^(TokenInfo* token){

};
phoneIdWorkflowErrorHappened - phoneid SDK calls this block whenever error happened ######Swift
PhoneIdService.sharedInstance.phoneIdWorkflowErrorHappened = { (error) ->Void in
    print(error.localizedDescription)
}
######Objective-C
[PhoneIdService sharedInstance].phoneIdWorkflowErrorHappened = ^(NSError* error){
    NSLog(@"%@", error.localizedDescription);
};
phoneIdDidLogout - phoneid SDK calls this block on logout ######Swift
PhoneIdService.sharedInstance.phoneIdDidLogout = {

}
######Objective-C
[PhoneIdService sharedInstance].phoneIdDidLogout = ^{

};
UI Customization
Color scheme of phone.id UI can be easily customized. This can be achieved via ColorScheme object. ColorScheme object defines set of named colors used inside of phone.id.
All fields of ColorScheme objects are UIColor's. This fields are separated on two groups: common colors and specific colors.
Common colors are used to define main color theme of phone.id UI and provide default values for specific colors. Common colors never user directly inside of phone.id, they only provide default values for specific color fields.
This separation was done in order to to provide more flexible way of theming: You can change only main colors - and there is no need to change every UI control color, however, if you need to set specific colors for some UI controls you can override default values.
You can see detailed mapping of fields of ColorScheme to colors of UI controls here
Phone.id SDK provides customization point via the componentFactory property of PhoneIdService instance. The customization of colors&background can be done in two steps:
- Create your own instance of component factory and setup colorScheme with colors you like: ######Swift
    func customComponentFactory() -> ComponentFactory{

        let factory:ComponentFactory = DefaultComponentFactory()
        factory.colorScheme = ColorScheme()

        // You can change main colors
        factory.colorScheme.mainAccent = UIColor(hex: 0xAABB44)
        factory.colorScheme.extraAccent = UIColor(hex: 0x886655)
        factory.colorScheme.success = UIColor(hex: 0x91C1CC)
        factory.colorScheme.fail = UIColor(hex: 0xD4556A)
        factory.colorScheme.inputBackground = UIColor(hex: 0xEEEEDD).colorWithAlphaComponent(0.6)

        factory.colorScheme .applyCommonColors()

        // But also, if some of main colors don't fit to your color solution,
        // you can specify your own colors for certain UI element:

        factory.colorScheme.buttonHighlightedImage = UIColor(hex: 0x778230)
        factory.colorScheme.buttonHighlightedText = UIColor(hex: 0x778230)
        factory.colorScheme.buttonHighlightedBackground = UIColor(hex: 0xBBC86A)

        factory.defaultBackgroundImage = UIImage(named:"background")!

        return factory

    }
######Objective-C
- (id<ComponentFactory>)customComponentFactory{

    id<ComponentFactory> factory = [[DefaultComponentFactory alloc] init];

    ColorScheme* colorScheme = [[ColorScheme alloc] init];
    colorScheme.mainAccent = [[UIColor alloc] initWithHex:0xAABB44];
    colorScheme.extraAccent = [[UIColor alloc] initWithHex:0x886655];
    colorScheme.success = [[UIColor alloc] initWithHex:0x91C1CC];
    colorScheme.fail = [[UIColor alloc] initWithHex:0xD4556A];

    colorScheme.inputBackground = [[[UIColor alloc] initWithHex:0xEEEEDD] colorWithAlphaComponent:0.6];
    [colorScheme applyCommonColors];

    colorScheme.buttonHighlightedImage = [[UIColor alloc] initWithHex: 0x778230];
    colorScheme.buttonHighlightedText = [[UIColor alloc] initWithHex: 0x778230];
    colorScheme.buttonHighlightedBackground = [[UIColor alloc] initWithHex: 0xBBC86A];
    factory.defaultBackgroundImage = [UIImage imageNamed:@"background"];
    factory.colorScheme = colorScheme;

    return factory;
}- set your own component factory to phoneid service, as early as possible, preferable in didFinishLaunchingWithOptions: ######Swift
    func application(application: UIApplication,
        didFinishLaunchingWithOptions launchOptions: [NSObject: AnyObject]?) -> Bool {

            // configure phone.id
            PhoneIdService.sharedInstance.configureClient("TestPhoneId");

            // UI theming
            PhoneIdService.sharedInstance.componentFactory = customComponentFactory()
            return true
    }
######Objective-C
- (BOOL)application:(UIApplication *)application didFinishLaunchingWithOptions:(NSDictionary *)launchOptions {

    // configure phone.id
    [[PhoneIdService sharedInstance] configureClient:@"TestPhoneId" autorefresh:YES];

    // UI theming
    [PhoneIdService sharedInstance].componentFactory = [self customComponentFactory];

    return YES;
}User Profile
Phone.id SDK provides User Profile management.
In order to request user's profile call to loadMyProfile method of PhoneIdService. User can also edit her profile: setup screen name, profile picture, and date of birth. The component factory provides profile editing UI for you, see example below:
######Swift
   // load user profile
   PhoneIdService.sharedInstance.loadMyProfile{ (userInfo, e) -> Void in

       if let user = userInfo{

           // present user editing profile UI
           let profileController = PhoneIdService.sharedInstance.componentFactory.editProfileViewController(user)
           self.presentViewController(profileController, animated: true, completion: nil)
       }
   }
######Objective-C
    // load user profile
    [[PhoneIdService sharedInstance] loadUserProfile: ^(UserInfo* userInfo, NSError* e){

        if (userInfo){
            // present user editing profile UI
            UIViewController* profileController = [[PhoneIdService sharedInstance].componentFactory editProfileViewController: userInfo];
            [self presentViewController:profileController animated:YES completion:nil];
        }

    }];
User profile pictures are uploaded to s3.amazon.com which does not copmletely supports requirements of Apple App transport security yet (more details). So in order to make it workable following snippet need to be added into application's Info.plist
######Info.plist
    <key>NSAppTransportSecurity</key>
    <dict>
        <key>NSExceptionDomains</key>
        <dict>
            <key>s3.amazonaws.com</key>
            <dict>
                <key>NSExceptionRequiresForwardSecrecy</key>
                <false/>
            </dict>
        </dict>
    </dict>
Upload Contacts
Phone numbers from user's address book are stored on Phone.id servers and used to build the Social Graph. You can upload user's address book using following call:
######Swift
    PhoneIdService.sharedInstance.uploadContacts() { (numberOfUpdatedContacts, error) -> Void in

    }
######Objective-C
   [[PhoneIdService sharedInstance] uploadContacts:^(NSInteger numberOfContacts, NSError * error) {

   }];
If user's address book was not changed since last upload, method will not reupload the book once more.
Author
Federico Pomi, federico@pomi.net
License
phoneid_iOS is available under the Apache License Version 2.0. See the LICENSE file for more info.

