React native paytabs library is a wrapper for the native PayTabs Android and iOS SDKs, It helps you integrate with PayTabs seamlessly.
Library Support:
- iOS
- Android
Library Version:
- React Version: 18.1.0
- React-Native Version: 0.70.6
$ npm install @paytabs/react-native-paytabs@2.6.5 --saveexpo install @paytabs/react-native-paytabs-
Android
- Add
packagingOptionsto modulebuild.gradlefile
android { ... packagingOptions { pickFirst '**/*.so' } } - Add
-
iOS
- Add
libswiftWebKit.tbdto your Link Binary With Libraries - Navigate to the iOS folder and run the following command:
pod install - Add
Import @paytabs/react-native-paytabs
import {RNPaymentSDKLibrary, PaymentSDKConfiguration, PaymentSDKBillingDetails, PaymentSDKTheme, PaymentSDKConstants, PaymentSDKSavedCardInfo} from '@paytabs/react-native-paytabs';- Configure the billing & shipping info, the shipping info is optional
let billingDetails = new PaymentSDKBillingDetails(name= "John Smith",
                                  email= "email@test.com",
                                  phone= "+2011111111",
                                  addressLine= "address line",
                                  city= "Dubai",
                                  state= "Dubai",
                                  countryCode= "ae", // ISO alpha 2
                                  zip= "1234")

let shippingDetails = new PaymentSDKShippingDetails(name= "John Smith",
                                  email= "email@test.com",
                                  phone= "+2011111111",
                                  addressLine= "address line",
                                  city= "Dubai",
                                  state= "Dubai",
                                  countryCode= "ae", // ISO alpha 2
zip= "1234")- Create object of
PaymentSDKConfigurationand fill it with your credentials and payment details.
let configuration = new PaymentSDKConfiguration();
configuration.profileID = "*your profile id*"
configuration.serverKey= "*server key*"
configuration.clientKey = "*client key*"
configuration.cartID = "545454"
configuration.currency = "AED"
configuration.cartDescription = "Flowers"
configuration.merchantCountryCode = "ae"
configuration.merchantName = "Flowers Store"
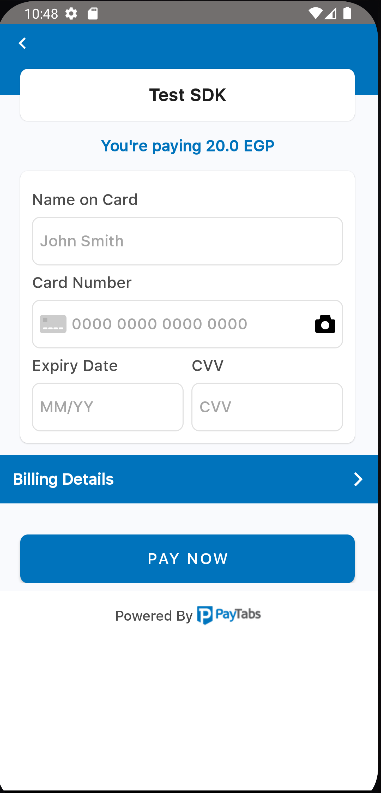
configuration.amount = 20
configuration.screenTitle = "Pay with Card"
configuration.billingDetails = billingDetails
configuration.forceShippingInfo = falseOptions to show billing and shipping info
	configuration.showBillingInfo = true
	configuration.showShippingInfo = true
Options to set expiry timeout for the card payment screen
/** To establish a timeout of 2 minutes.
 * Set to zero to deactivate the timeout feature.
 * Note that the expiryTime cannot be set to less than 60 seconds.
 * */
configuration.expiryTime = 120;
You can dismiss the payment screen if there is no transaction in progress.
RNPaymentSDKLibrary.cancelPayment()Start payment by calling startCardPayment method and handle the transaction details
RNPaymentSDKLibrary.startCardPayment(JSON.stringify(configuration)).then( result => {
      if(result["PaymentDetails"] != null) { // Handle transaction details
        let paymentDetails = result["PaymentDetails"]
        console.log(paymentDetails)
      } else if(result["Event"] == "CancelPayment") { // Handle events
        console.log("Cancel Payment Event")
      }
     }, function(error) { // Handle error
      console.log(error)
     });
Start payment by calling startTokenizedCardPayment method and handle the transaction details
RNPaymentSDKLibrary.startTokenizedCardPayment(JSON.stringify(configuration),
"Token",
"TransactionReference"
).then( result => {
      if(result["PaymentDetails"] != null) { // Handle transaction details
        let paymentDetails = result["PaymentDetails"]
        console.log(paymentDetails)
      } else if(result["Event"] == "CancelPayment") { // Handle events
        console.log("Cancel Payment Event")
      }
     }, function(error) { // Handle error
      console.log(error)
});Start payment by calling start3DSecureTokenizedCardPayment method and handle the transaction details
let cardInfo = new PaymentSDKSavedCardInfo("Card mask", "cardType")
RNPaymentSDKLibrary.start3DSecureTokenizedCardPayment(
  JSON.stringify(configuration),
  JSON.stringify(cardInfo),
  "Token"
  ).then( result => {
      if(result["PaymentDetails"] != null) { // Handle transaction details
        let paymentDetails = result["PaymentDetails"]
        console.log(paymentDetails)
      } else if(result["Event"] == "CancelPayment") { // Handle events
        console.log("Cancel Payment Event")
      }
     }, function(error) { // Handle error
      console.log(error)
     });
Start payment by calling startPaymentWithSavedCards method and handle the transaction details
RNPaymentSDKLibrary.startPaymentWithSavedCards(JSON.stringify(configuration),
support3DsBool).then( result => {
      if(result["PaymentDetails"] != null) { // Handle transaction details
        let paymentDetails = result["PaymentDetails"]
        console.log(paymentDetails)
      } else if(result["Event"] == "CancelPayment") { // Handle events
        console.log("Cancel Payment Event")
      }
     }, function(error) { // Handle error
      console.log(error)
     });
-
Follow the guide Steps to configure Apple Pay to learn how to configure ApplePay with PayTabs.
-
Do the steps 1 and 2 from Pay with Card although you can ignore Billing & Shipping details and Apple Pay will handle it, also you must pass the merchant name and merchant identifier.
let configuration = new PaymentSDKConfiguration();
    configuration.profileID = "*your profile id*"
    configuration.serverKey= "*server key*"
    configuration.clientKey = "*client key*"
    configuration.cartID = "545454"
    configuration.currency = "AED"
    configuration.cartDescription = "Flowers"
    configuration.merchantCountryCode = "ae"
    configuration.merchantName = "Flowers Store"
    configuration.amount = 20
    configuration.screenTitle = "Pay with Card"
configuration.merchantIdentifier = "merchant.com.bundleID"- To simplify ApplePay validation on all user's billing info, pass simplifyApplePayValidation parameter in the configuration with true.
configuration.simplifyApplePayValidation = true- Call
startApplePayPaymentto start payment
RNPaymentSDKLibrary.startApplePayPayment(JSON.stringify(configuration)).then( result => {
        if(result["PaymentDetails"] != null) { // Handle transaction details
          let paymentDetails = result["PaymentDetails"]
          console.log(paymentDetails)
        } else if(result["Event"] == "CancelPayment") { // Handle events
          console.log("Cancel Payment Event")
        }
     }, function(error) { // handle errors
      console.log(error)
});Pass Samsung Pay token to the configuration and call startCardPayment
configuration.samsungToken = "token"It becomes easy to integrate with other payment methods in your region like STCPay, OmanNet, KNet, Valu, Fawry, UnionPay, and Meeza, to serve a large sector of customers.
-
Do the steps 1 and 2 from Pay with Card.
-
Choose one or more of the payment methods you want to support.
configuration.alternativePaymentMethods = [PaymentSDKConstants.AlternativePaymentMethod.stcPay]- Start payment by calling
startAlternativePaymentMethodmethod and handle the transaction details
RNPaymentSDKLibrary.startAlternativePaymentMethod(JSON.stringify(configuration)).then( result => {
      if(result["PaymentDetails"] != null) { // Handle transaction details
        let paymentDetails = result["PaymentDetails"]
        console.log(paymentDetails)
      } else if(result["Event"] == "CancelPayment") { // Handle events
        console.log("Cancel Payment Event")
      }
     }, function(error) { // Handle error
      console.log(error)
});Follow the below instructions to enable tokenisation feature.
- Request token
configuration.tokeniseType = PaymentSDKConstants.TokeniseType.userOptional // read more about the tokeniseType in the enums section
configuration.tokenFormat = PaymentSDKConstants.TokeniseFormat.hex32 // read more about the tokenFormat in the enums section
After passing those parameters, you will receive a token and transaction reference in the result callback, save them for future usage.
- Pass the token & transaction reference
configuration.token = token
configuration.transactionReference = transactionreferenceThose enums will help you in customizing your configuration.
- Tokenise types
The default type is none
TokeniseType = {
"none":"none", // tokenise is off
"merchantMandatory":"merchantMandatory", // tokenise is forced
"userMandatory":"userMandatory", // tokenise is forced as per user approval
"userOptinoal":"userOptional" // tokenise if optional as per user approval
};configuration.tokeniseType = PaymentSDKConstants.TokeniseType.userOptional- Token formats
The default format is hex32
TokeniseFormat = {"none":"1",
"hex32": "2",
"alphaNum20": "3",
"digit22": "3",
"digit16": "5",
"alphaNum32": "6"
};configuration.tokenFormat = PaymentSDKConstants.TokeniseFormat.hex32- Transaction types
The default type is sale
TransactionType = {"sale":"sale",
"authorize": "auth"};configuration.transactionType = PaymentSDKConstants.TransactionType.sale- Alternative payment methods
AlternativePaymentMethod = {"unionPay":"unionpay", "stcPay":"stcpay", "valu": "valu", "meezaQR": "meezaqr", "omannet": "omannet", "knetCredit": "knetcredit", "knetDebit": "knetdebit", "fawry": "fawry", "aman": "aman", "urpay": "urpay"};configuration.alternativePaymentMethods = [PaymentSDKConstants.AlternativePaymentMethod.stcPay,]- To apply discounts on the transaction, you can pass the discount amount and the discount type.
let cardDiscount1 = new PaymentSDKCardDiscount();
cardDiscount1.discountCards = ['4111', '40001'];
cardDiscount1.discountValue = 10;
cardDiscount1.discountTitle = 'Discount 10% on 4111,40001 cards';
cardDiscount1.isPercentage = true;

let cardDiscount2 = new PaymentSDKCardDiscount();
cardDiscount2.discountCards = ['42222', '40002'];
cardDiscount2.discountValue = 5;
cardDiscount2.discountTitle = 'Discount 5 EGP on 42222,40002 cards';
cardDiscount2.isPercentage = false;

configuration.cardDiscounts = Array.of(cardDiscount1, cardDiscount2);configuration.hideCardScanner = true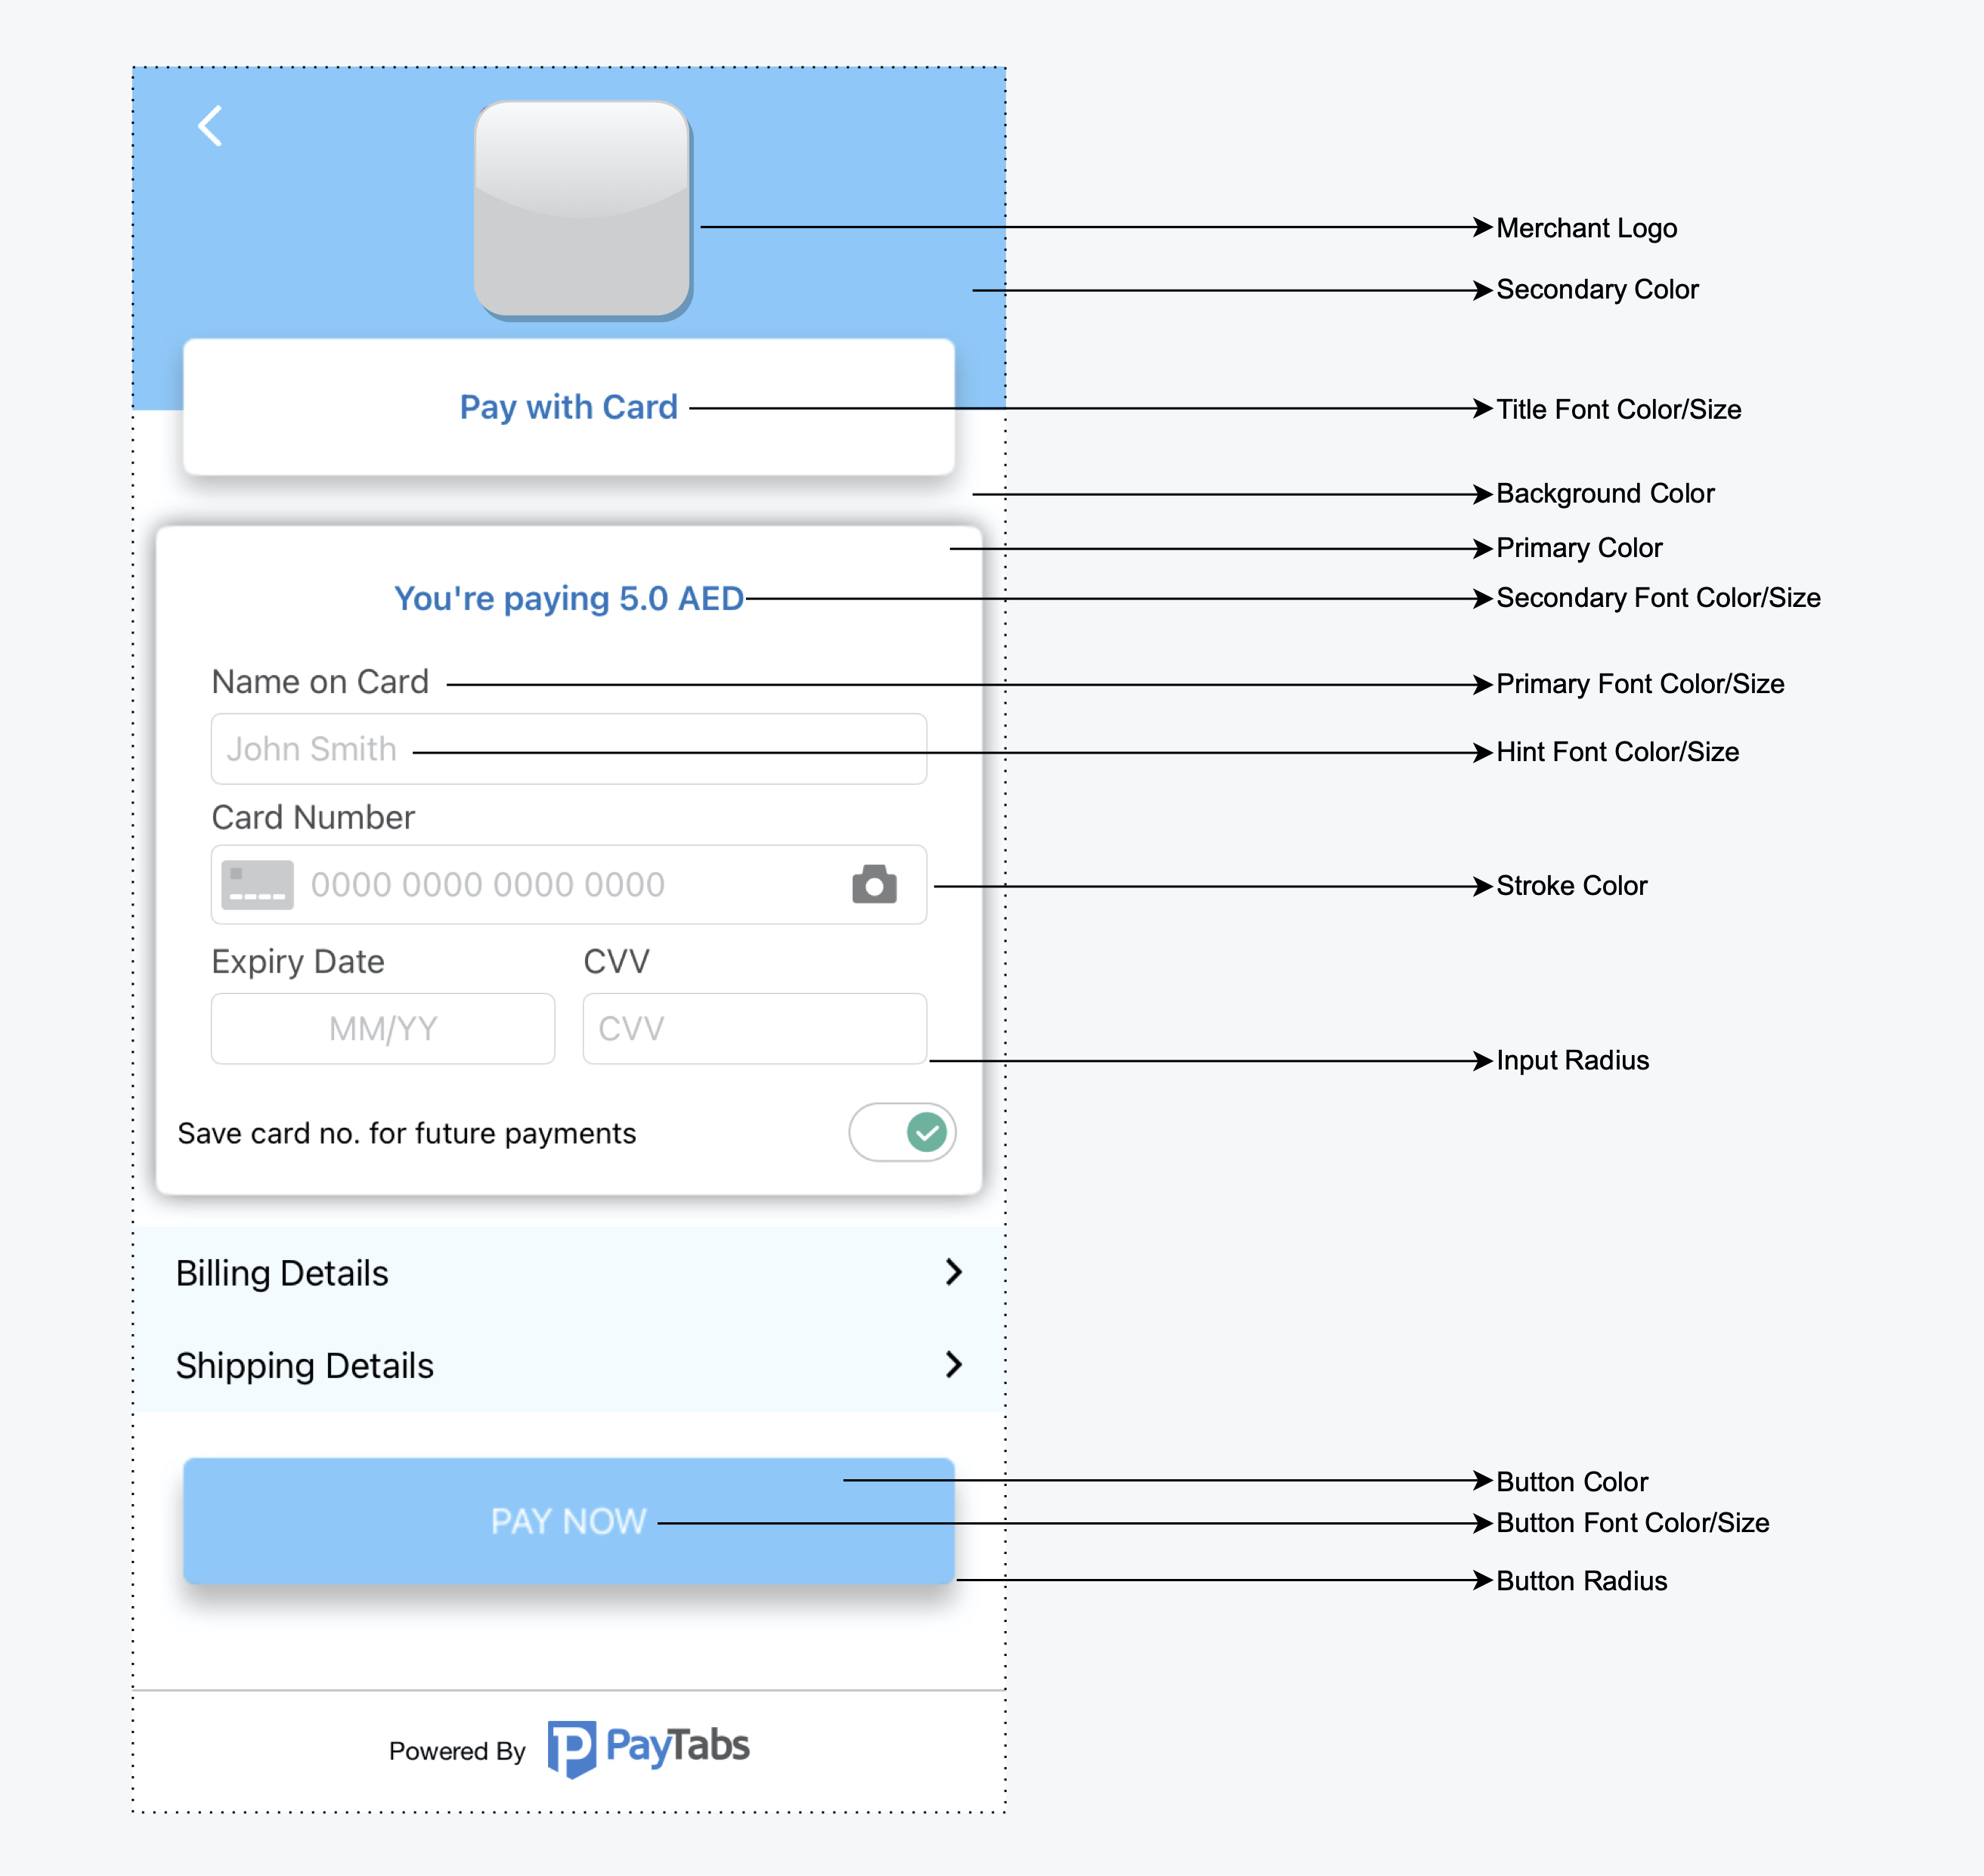
-
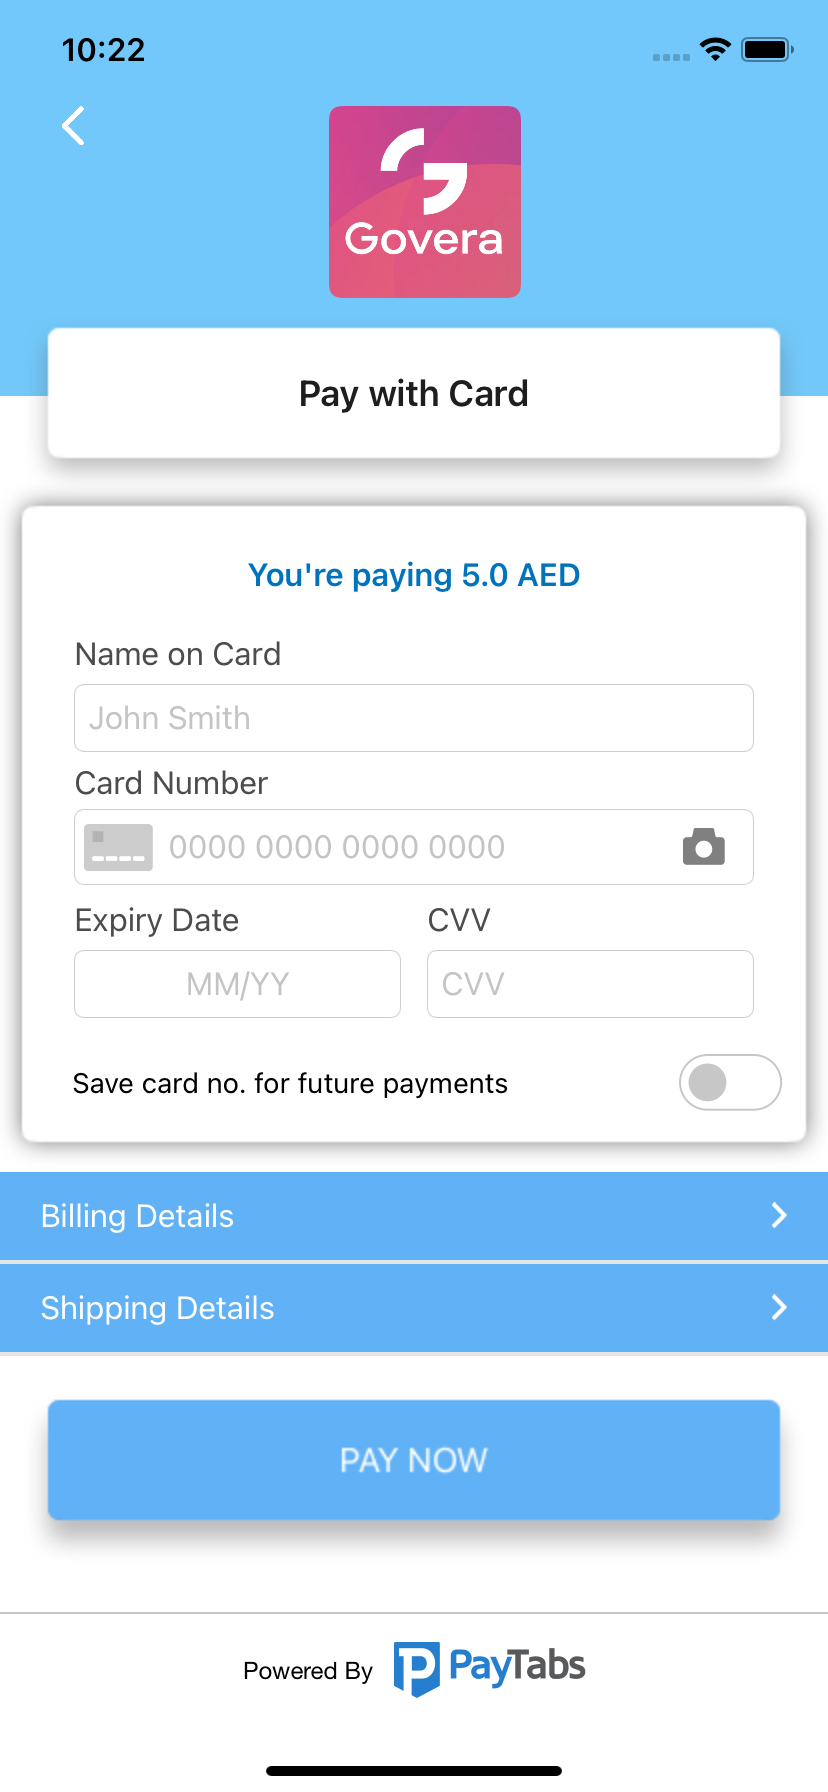
Theme:
Create an instance from the classPaymentThemeand customize the theme.
let theme = new PaymentSDKTheme()
theme.backgroundColor = "a83297"
theme.primaryColor = "956596"
// Set the merchant logo
const merchantLogo = require('./Logo.png');
const resolveAssetSource = require('react-native/Libraries/Image/resolveAssetSource');
const resolvedMerchantLogo = resolveAssetSource(merchantLogo);
theme.merchantLogo = resolvedMerchantLogo

configuration.theme = theme-
Localization:
Use the keys from our localization string files (English, Arabic), then add the same key to your app localizable string file and add your custom string.
-
Theme:
Edit yourstyles.xmlto customize the theme.
<resources>
  // to override colors
     <color name="payment_sdk_primary_color">#5C13DF</color>
     <color name="payment_sdk_secondary_color">#FFC107</color>
     <color name="payment_sdk_primary_font_color">#111112</color>
     <color name="payment_sdk_secondary_font_color">#6D6C70</color>
     <color name="payment_sdk_separators_color">#FFC107</color>
     <color name="payment_sdk_stroke_color">#673AB7</color>
     <color name="payment_sdk_button_text_color">#FFF</color>
     <color name="payment_sdk_title_text_color">#FFF</color>
     <color name="payment_sdk_button_background_color">#3F51B5</color>
     <color name="payment_sdk_background_color">#F9FAFD</color>
     <color name="payment_sdk_card_background_color">#F9FAFD</color>

  // to override dimens
     <dimen name="payment_sdk_primary_font_size">17sp</dimen>
     <dimen name="payment_sdk_secondary_font_size">15sp</dimen>
     <dimen name="payment_sdk_separator_thickness">1dp</dimen>
     <dimen name="payment_sdk_stroke_thickness">.5dp</dimen>
     <dimen name="payment_sdk_input_corner_radius">8dp</dimen>
     <dimen name="payment_sdk_button_corner_radius">8dp</dimen>

</resources>- Merchant Logo:
let theme = new PaymentSDKTheme()

// Set the merchant logo
const merchantLogo = require('./Logo.png');
const resolveAssetSource = require('react-native/Libraries/Image/resolveAssetSource');
const resolvedMerchantLogo = resolveAssetSource(merchantLogo);
theme.merchantLogo = resolvedMerchantLogo

configuration.theme = theme- Localization: To override your strings you can find the keys with the default values here English, Arabic.
Check our complete examples (React-Native, Expo).
See LICENSE.