Dreem GL
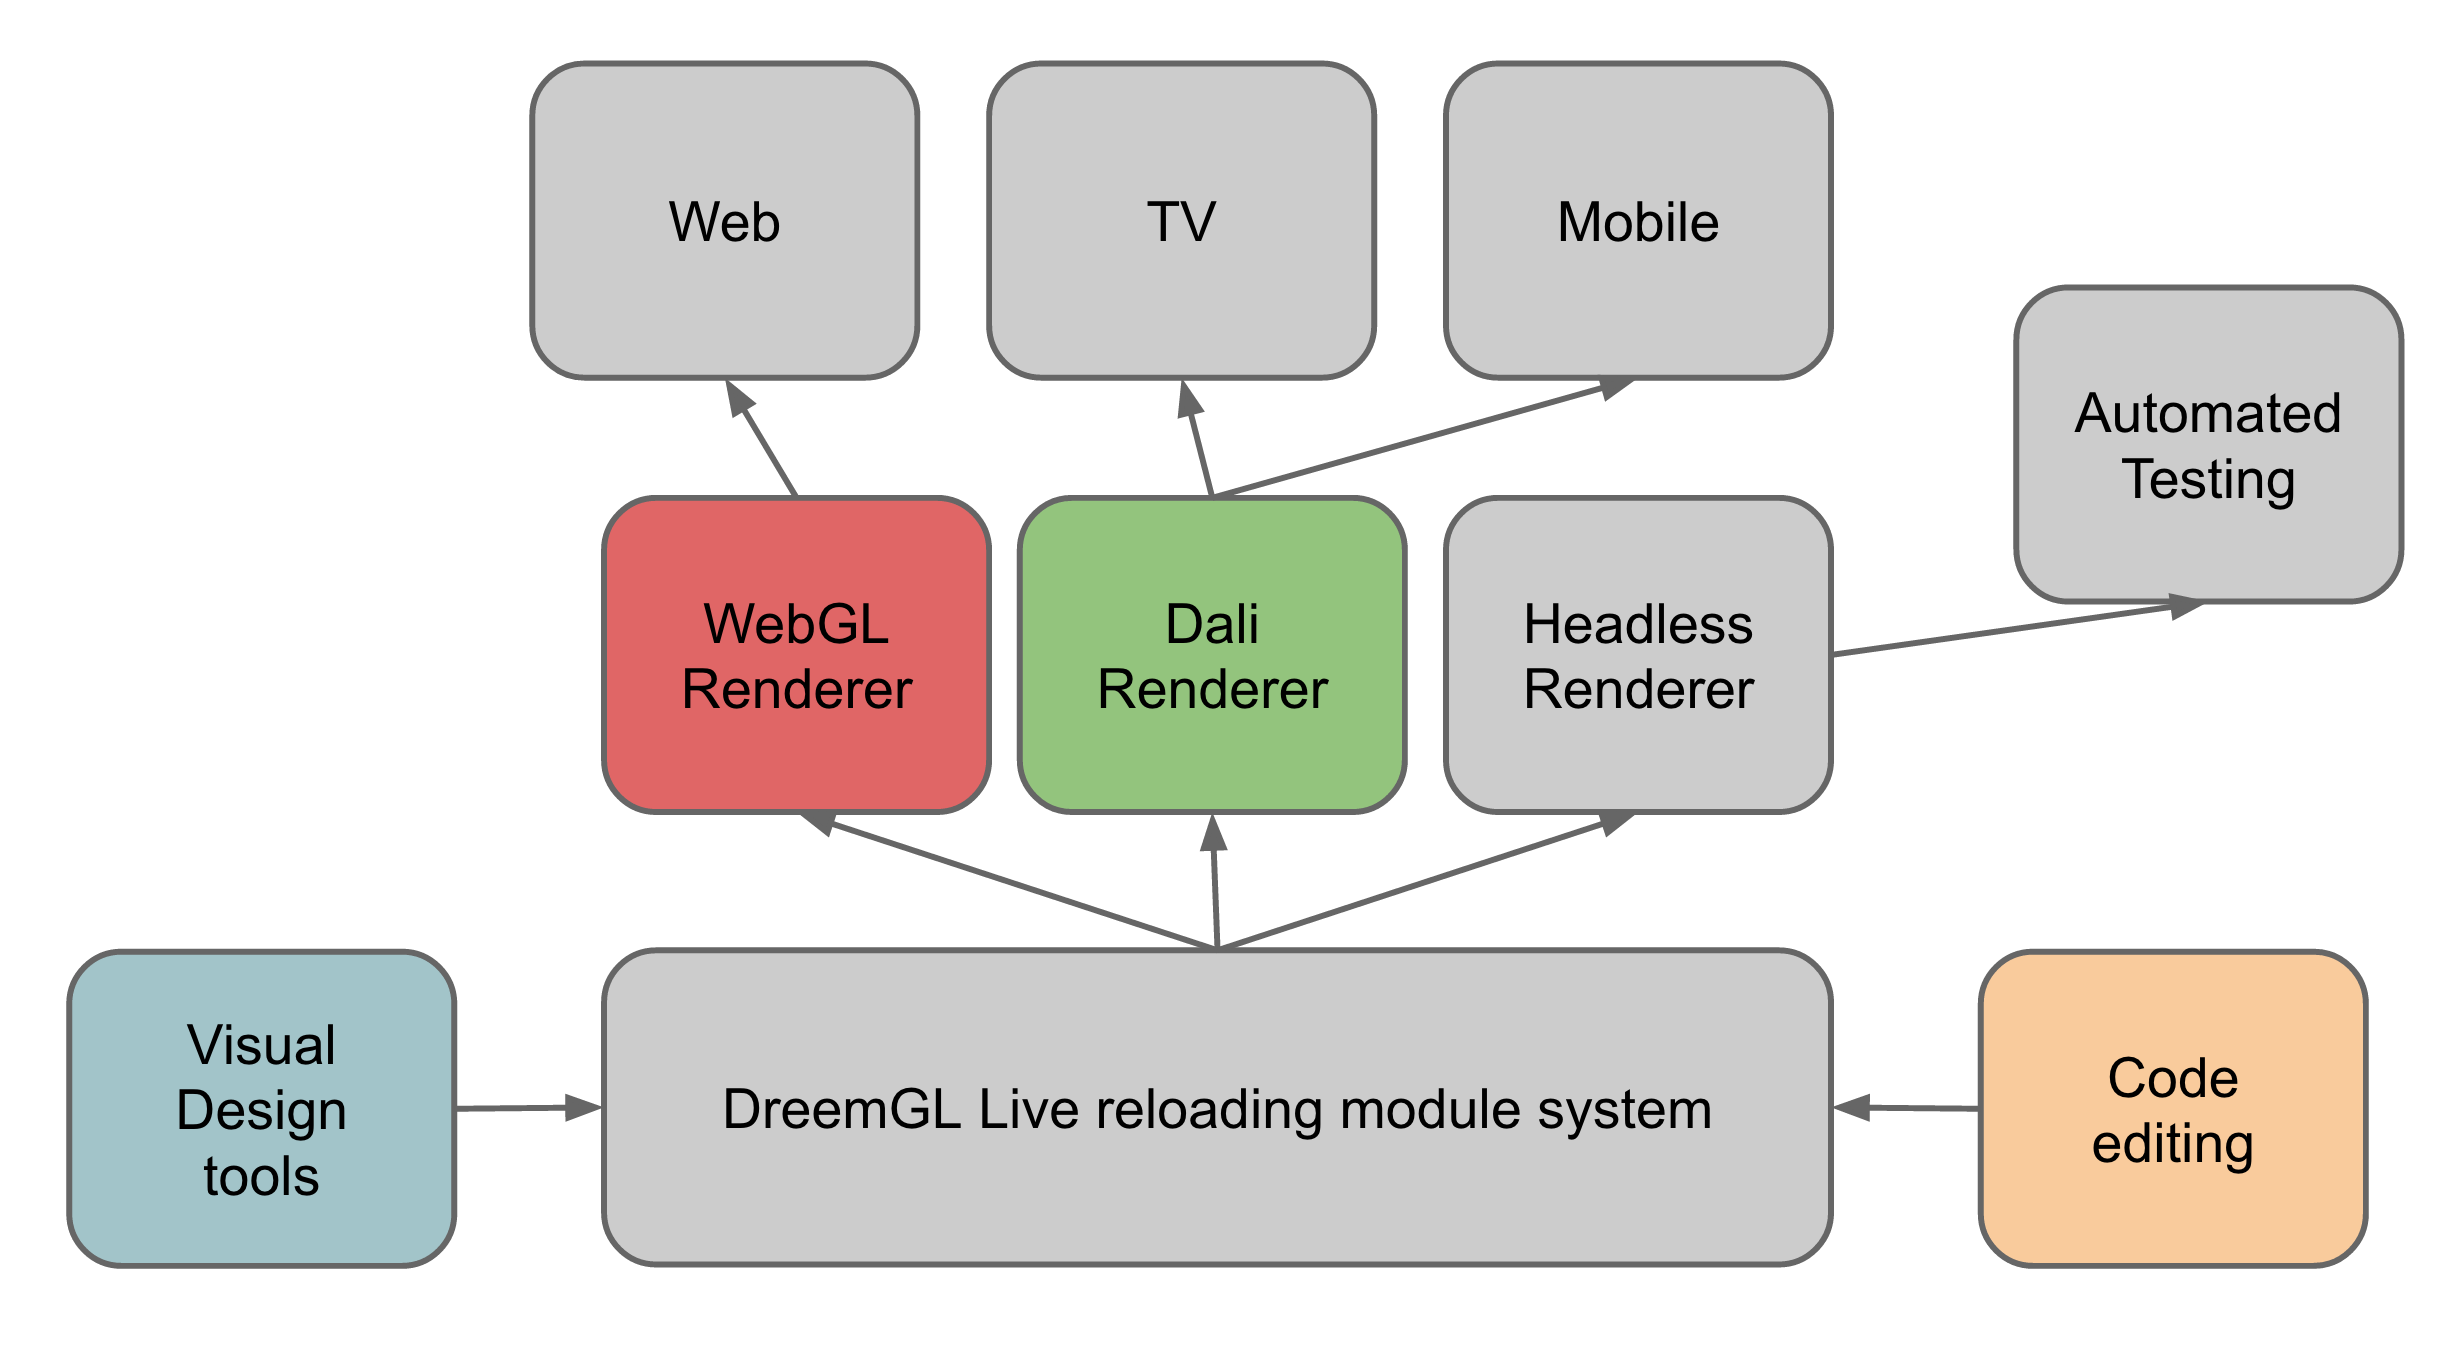
DreemGL is an open source JS webGL and DALi (Dynamic Animation Library; a cross-platform 3D UI Toolkit) prototyping framework with
shader styling and render functions.
Start DreemGL
To start DreemGL type:
node server.js
To view the Intro presentation, click here:
http://127.0.0.1:2000/docs/slides/introduction
To try livecoding a shader open this:
http://127.0.0.1:2000/test/rendertest and open ./test/rendertest.js in your editor and start typing away and saving, reload should be live.
As the server starts, it also shows other local IP's its listening on (for trying it on your phone)
Path symbols
The server.js has a set of 'default path symbols' which are referencable using the $symbol syntax in require strings: '$widgets/myfile', The default path symbols are:
    'system':'$root/system',
    'resources':'$root/resources',
    'examples':'$root/examples',
    '3d':'$root/classes/3d',
    'behaviors':'$root/classes/behaviors',
    'server':'$root/classes/server',
    'ui':'$root/classes/ui',
    'testing':'$root/classes/testing',
    'widgets':'$root/classes/widgets',
Adding a path is done using the commandline node server.js -path mylib:../mydir mylib2:../mydir2
Classes
classes are defined in a single file, using the following syntax:
define.class('$ui/view', function(require, exports, $ui$, label){
    var mylib = require('./mylib')

    this.method = function(){
    }

    exports.staticmethod = function(){
    }
})
Please note the 'require' syntax to specify the baseclass, and the $ui$ to switch directory in the dependency-class list. Other syntax: $$ - current directory, relative$dir$
The prototype of the class is the 'this' of the function. Note the 2 specially named arguments 'require' and 'exports' where they appear doesnt matter, the name does. exports is the class constructor function, which can hold the static methods. require is simply the local instance of require if needed for normal requires.
After the baseclass and dependencies, you can define attributes on a dreemclass.
Attributes
Attributes are properties that can be wired to other properties, and have a type.
The way to create them in a class is to assign an object to this.attributes. The setter of 'attributes' will handle creating all the attributes on the class for you. Types of attributes are automatically inferred if assigned with a plain value, but can also be configured using a Config({meta:'hello'}) object. Assigning a Config object to any existing attribute also refines its settings. Options for the config attribute are:
    type:vec2,float,String
    value:0.4,vec2(3),"hello"
    meta:'metadataforeditor'
    persist:true // make sure the attribute survives a livereload / rerender
this.attributes = {
    propfloat: 1.0,
    propstring: "HELLO",
    propcustom: Config({type:vec2})
}
Attributes are also automatically created if you pass them to the constructor function. view({myprop:10}) automatically creates the myprop attribute
Events and attributes
Attributes allow listeners, and this forms the core eventhandling system. When a value of an attribute changes, using a simple assignment:
this.attr = 10
This will fire all the listeners to this attribute. Adding listeners to attributes is advised to use the onattr (on prefix) syntax
this.onattr = function(event){
    // event object contains value, old, type, etc
}
Attribute listeners are called parent-on-up in the prototype hierarchy, and each prototypelevel only has one 'onattr' slot, since this is a normal property. Emitting an event on an attribute can be done by assigning to it, but also using the emit syntax. This object goes to all the listeners as an argument
this.emit('attr',{type:'myown'})
It is also possible to mark values going into a setter using the Mark wrapper.
this.attr = Mark(15, true) // or plainly Mark(15)
This 'mark' is passed into the event object to all the listener as the mark property. Using this it is possible to break infinite feedback loops like so
this.onattr = function(event){
    if(event.mark) return // someone did an attribute assign using the Mark
}
It is also possible to use addListener, this adds a list of listeners which are not the same as the onattr (on prefix) slots on the prototype chain. However this is exceedingly rare
this.addListener('attr', function(event){

})
Styles
Styles are supported using the 'style' property that can live on 4 levels:
- composition
- screen
- class
- nestedclass
These levels are also inherited in that order. Styles allow subclassing of classes used in the render function of the class on which the properties are set. The subclassing is done using a matching syntax There are no limitations what you can put in a style since its an actual subclass.
The following style match patterns are supported
this.style = {
    $:{ // match all
    }
    $_myclass:{ // match all with class:'myclass'
    },
    label:{ // match all labels
    }
    label_name:{ // match all labels with name:'name'
    },
    label_class:{ // match all labels with class:'class'
    }
}
Have fun!
License
This software is licensed under the Apache License, Version 2.0. You will find the terms in the file named "LICENSE.md" in this directory.


