
Rita
Breaking the language barrier for free.
RITA is now used on over 6500 Servers, by more than 700k Users.
Join the Language Revolution, Invite RITA today.


An open-source, free Discord Translator Bot built using google-translate-api and Discord.js.
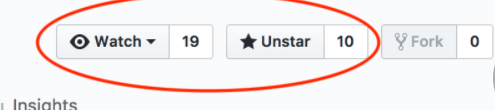
If you like what we are doing, please star our repo using the top-right star icon
📖 Table of Contents
Please note some of these links direct you towards our website
Click to expand contents
💻 Setting up Rita Translator on Heroku

1. Fork this repository.
-
If you don't yet have a Github account, create one! It's free and easy.
-
Click here or use the button in the upper righthand side of this page to fork the repository so that it will be associated with your Github account.
-
Please star our project if you like it using the top-right Star icon. Every star helps us!
2. Create a new Discord Application in the Discord Developer Portal
- Give app a friendly name and click the Create App button
- I like the name C-3PO, but feel free to pick something different if you fear George Lucas's wrath. Maybe C-4PO
- Take note of the app CLIENT ID, you will need it later
- Scroll down to the Bot section
- Click the Create a Bot User button
- Click the Yes, do it! button
- Copy the bot's TOKEN, you will need it later
3. Create a Heroku account (It's free!)
-
Create a new app. It's name must be unique and composed of all lowercase letters and dashes. Something like
yourname-discordbotis fine -
Under Deployment Method select Github. Connect to your Github account and search for this repository by name.
-
Scroll down to the manual deploy section, and select the Master branch. Click deploy branch, and wait for the successfully deployed message.
-
Go to the Resources tab and look for the addons section. Search 'Postgres', and add a 'Hobby Dev - Free' version of Heroku Postgres. This will be automatically attached as your bot's database.
-
Go to the Settings tab. Click to reveal Config Variables, then add then add the following:
-
KEY: = DISCORD_TOKEN
- Value: = Your discord bot's token that you copied earlier.
-
KEY: = NODE_MODULES_CACHE
- Value: = false
- This is to ensure that when the bot updates it does not use any old Dependencies that Heroku has stored and gets fresh ones from the package.json file
-
KEY: = DISCORD_TOKEN
-
Go to the Overview tab and click configure dynos. Turn off the default
web npm startdyno and turn on theworker node src/bot.jsdyno. Your bot will now be up and running!
Make sure that you have added the Heroku Postgres Addon in the Resources Tab of Heroku or else your bot shall not run!
- If you have any issues running your bot join our Discord Server
4. Invite your bot to your server and configure it!
-
Replace the CLIENTID string in the following URL with your own apps client id from Step 2:
-
Visit the resulting URL and add your bot to any server where you have admin privileges.
- Once added, your bot should show in your server, now go back to Heroku and go to the "Deploy" section, scroll down to "Manual Deploy" and deploy the master branch. That's it your are good to go!
- Your bot is now setup and ready for any translation you have for it to do. Use the commands
!tr helpand!tr help modulesto learn more about the commands Rita has!
- Your bot is now setup and ready for any translation you have for it to do. Use the commands
- Once added, your bot should show in your server, now go back to Heroku and go to the "Deploy" section, scroll down to "Manual Deploy" and deploy the master branch. That's it your are good to go!
-
Important Note
-
The
!tr embedcommand is changeable whenever you like. It simply decides wether you would like translations to be sent as Webhooks (more user-like, profile picture) or embed (bot sends message with anembed message contintaining user profile picture.)
💾 How to Update to Stable Branch on Heroku
1. Checklist
- You must have a bot already running on your server, if not then refer to Setting up a New Bot
2. Make a Pull Request to your Fork from this Repo
- Complete a Pull Request from the master Branch of RitaBot-Project/Rita to your master branch.
- Detailed instructions with example can be found here
3. Deploy Updated Fork in Heroku
- Log in to your Heroku account.
- Select the bot you made in Step 3 of Setting up a New Bot
- Under Deployment Method make sure you have Github selected, ensure Connect to GitHub has the correct repository selected, Scroll down to the "Manual deploY" section, and select the master branch. Click deploy branch, and wait for the successfully deployed message.
4. Updating Database
- Once the bot has been deployed with the successfully updated fork you are all done.
🖥️ Running Rita Locally
The bot can also be run locally on a device. Please note that for the bot to continue running 24/7, the process of node src/bot.js should always remain online and thus your PC/hosting device must remain online too
- Install node.js. It comes with npm which you will need.
- Simply download this repository as a .zip, or clone it if you have git:
git clone https://github.com/RitaBot-Project/RitaBot - In the RitaBot folder, rename the existing .env.example file and name it .env. Edit the Value of DISCORD_TOKEN. (If you don't have a bot account, see Step 2 of "Setting Up a New Bot")
- Open a terminal/console in the RitaBot folder and download dependencies using
npm install - Start the bot with
npm start - Invite your bot to your server and configure it!
-
If you don't already have a invite for your bot, you can replace the CLIENTID string in the following URL with your own apps client id: https://discordapp.com/oauth2/authorize?&client_id=**CLIENTID**&scope=bot&permissions=8 . Visit the resulting URL and add your bot to any server where you have admin privileges. Once added, your bot should show up as online.
-
Your bot is now setup and ready for any translation you have for it to do. Use the commands
!tr helpand!tr help modulesto learn more about the commands Rita has!
Alternative Database Settings
Any Database that runs with SQL Sequelize can be used. If you want to use an alternative DB Location other than in the default directory then you can manually set this. Example: The connection to a sqlite database with the name database.db stored at the same level of this README file would be ./database.db.
Within the .env file from the above step, set the DATABASE_URL to be the path to the database file, if there is no DB file in the selected path then RITA will create the DB file upon startup.
- Example -
DATABASE_URL=C:\Admin\Rita_Development\test.db
Heroku Database Support
Sometimes you need to edit the Database manually, This is not something you should be playing around with unless you really know what you are doing.
1. Checklist
- Know that you are doing, if you don't then don't touch the DB. Simple.
- Download and Install Postgres Admin 4, Located Here or Here. This guide will be for Windows, but it shouldn't be much different for any other OS.
- Locate your credentials for you Heroku Database, Log in to Heroku > Select your App > Click Resources > Click Heroku Postgres > Click Settings > Click View Credentials (Note: Heroku rotates credentials periodically and updates applications where this database is attached.)
2. Connect
For a fresh install of pgAdmin, the dashboard likely contains only one server. This is your local server, Ignore this.
- Right click server(s) > create > server …
- Fill out the following:
- Name: This is solely for you. Name it whatever you want, I chose ‘Heroku-Run — On’
Under the connection tab:
- Hostname/Address: This is the host credential you located in Step 3. It should look like **-**-**...amazonaws.com
- Port: Keep the port at 5432, unless your credentials list otherwise
- Maintenance database This is the database name in the credentials
- Username: This is the user field in the credentials
- Password: The password field located in Step 3. I highly advise checking save password so that you don’t have to copypasta this every time you want to connect.
- In the SSL Tab, mark SSL mode as require
At this point, if we were to hit ‘save’ (please don’t), something very strange would happen. You’d see hundreds if not thousands of databases appear in pgAdmin. This has to do with how Heroku configures their servers. You’ll still only have access to your specific database, not those of others. In order to avoid parsing so many databases, we have to white list only those databases we care about.
- Go to the Advanced tab and under db restriction copy the database name (it’s the same value as the Maintenance Database field filled earlier).
- Click Save/Connect and you are done. Edit away.
💡 Coming Soon!
- Error Message Support Section.
-
!tr tasks #TargetChannelImplementation. - Allow Bot Translation (V1.3.0)
- Discord slash commands introduction
👏 Supporters
🤩 Credits & License
This project was originally released by Aziz under the MIT license. He chose to take the project private/commercial at version 0.4.2 Beta. Bobby Johnson forked the project and renamed it Louie after his dog. AlooAkbar forked Louie and added the necessary modifications for simple and free deployment of the bot using Heroku. RitaBot-Project Picked up the fork and as part of a team fixed over 200 errors and brought it in to the modern age, All would like to thank Aziz for his hard work and making these early versions OSS so that others may learn and build on his hard work to share with the community.
😎 Design Team
- Zycore / ZyC0R3
- Artanis / ArtanisTheOne
- Jshep89 - AKA Lord Lazarus / Jshep89
- Z3US / cyberlooper
- Maddious / MadIndex
- defqon.1 / wdaniel1985
😋 What is Rita and who are we?
Rita is the culmination of many things, it started with a mobile game, a community of gamers, a discord server of different languages and a desire to all be understood. She is a Real-Time Translator Bot for use on Discord, Hosted using Heroku and Local Devices and Completly 100% Free. She is maintained by a small group of users, each with different backgrounds and some learning as we go.
🗺️ Why did you make Rita?
The mobile game itself would get old, fast. The community around it, however, is what kept us going. The one downside was we didn't all speak the same language. The game we played translated our conversations for us but Discord didn't, so the server admins used a translation bot called C-3P0. This introduction is the start of the story.
🚀 The history of Rita?
There are loads of different translation bots out there, some are amazing, some are expensive, some are free but have limits, and others are just rubbish. C-3P0 checked all these boxes.
Originally called discord-translator and made by Aziz, then forked By NotMyself and renamed Louie, forked again By AlooAkbar and renamed C-3P0, its code was neglected, not maintained, left outdated and iterations made private for commercial gains.
🌟 Why Rita and what does it stand for?
I and a group of fellow C-3P0 users decided that collectively we could do better, plagued with crashes, API changes, relentless bugs and issues, the drive to make something better was born. Vast changes were made, many hours were spent and now the Rita you know was brought to life.
Rita's history and various iterations each added something extra, it just needed to be brought together and molded, molded into something amazing, moulded into Rita. The Real-Time Interchangeable Translating Assistant.
There you have it, the story, dramatised and electrified for effect, but all true, of how Rita was born.
Released under MIT license.


