txm 


Command-line tool that checks correctness of your Markdown
documentation's code examples. Parses <!-- !test command --> annotations
preceding code blocks, runs them, and checks that the outputs match.
-
Only uses HTML comments
The annotations aren't rendered. You retain formatting control. -
Works with any programming language
You choose the shell command(s). Many languages in the same doc are OK. -
Helpful failure diagnostics
Colours (optional), diffs, line numbers, exit code, stderr, invisible characters, etc. -
Parallel tests on multi-core machines
Configurable. Result output ordering remains constant. -
TAP format output
The standard supported by many testing tools.
Example
-
Write a
README.md, with comment annotations:# console.log The [console.log][1] function in [Node.js][2] stringifies the given arguments and writes them to `stdout`, followed by a newline. For example: <!-- !test program node --> <!-- !test in simple example --> console.log('a') console.log(42) console.log([1, 2, 3]) The output is: <!-- !test out simple example --> a 42 [ 1, 2, 3 ] [1]: https://nodejs.org/api/console.html#console_console_log_data_args [2]: https://nodejs.org/
See § Use for more detail on how annotations work. Fenced code blocks delimited by
```work too. Language tags also. -
Run:
$ txm README.md
-
See output:

TAP version 13
1..1
ok 1 simple example

# 1/1 passed
# OK
Examples of other use-cases:
Testing Node.js code with ESM imports
Running code from node's stdin as an ES module requires
--input-type=module.
Demonstrating that the root directory is a directory:

<!-- !test program node --input-type=module -->

<!-- !test in example -->

    import { stat } from 'fs/promises'
    console.log((await stat('/')).isDirectory())

<!-- !test out example -->

    true
TAP version 13
1..1
ok 1 example

# 1/1 passed
# OK
Testing C code with gcc
Any sequence of shell commands is a valid !test program, so you can e.g. cat
the test input into a file, then compile and run it:
<!-- !test program
cat > /tmp/program.c
gcc /tmp/program.c -o /tmp/test-program && /tmp/test-program -->

Here is a simple example C program that computes the answer to life, the
universe, and everything:

<!-- !test in printf -->

    #include <stdio.h>
    int main () {
        printf("%d\n", 6 * 7);
    }

<!-- !test out printf -->

    42
TAP version 13 1..1 ok 1 printf # 1/1 passed # OK
In practice you might want to invoke mktemp in the !test program to avoid
multiple parallel tests overwrting each other's files. Or pass --jobs 1 to
run tests serially.
Redirecting stderr→stdout, to test both in the same
block
Prepending 2>&1 to a shell command redirects stderr
to stdout. This can be handy if you don't want to write separate !test out
and !test err blocks.
<!-- !test program 2>&1 node -->

<!-- !test in print to both stdout and stderr -->

    console.error("This goes to stderr!")
    console.log("This goes to stdout!")

<!-- !test out print to both stdout and stderr -->

    This goes to stderr!
    This goes to stdout!
TAP version 13 1..1 ok 1 print to both stdout and stderr # 1/1 passed # OK
Ignoring the tested program's exit code
Normally, you'd use !test exit nonzero (or a specific exit code) to tell txm
that a test is expected to fail. But since you need to write that before every
failing run, it can get pointlessly repetitive if e.g. it's obvious only from
the output of your program when it failed.
In such cases, just put || true after the program command to make the shell
swallow the exit code and pretend to txm that it was 0. Remember that the
program tests are run with can be a whole script.
<!-- !test program node || true -->

<!-- !test in don't fail -->

    console.log("Hi before throw!")
    throw new Error("AAAAAA!")

<!-- !test out don't fail -->

    Hi before throw!
TAP version 13 1..1 ok 1 don't fail # 1/1 passed # OK
Testing examples that call assert
If your example code calls assert or such (which throw an error and exit
nonzero when the assert fails), then you don't really need an output block,
because the example already documents its assumptions.
In such cases you can use use a !test check annotation. This simply runs the
code, ignoring its output.
<!-- !test program node -->

<!-- !test check laws of mathematics -->

    const assert = require('assert')
    assert(1 + 1 == 2)
TAP version 13
1..1
ok 1 laws of mathematics

# 1/1 passed
# OK
If you are using an assert library that can output ANSI colour codes, it should
detect that it is running without a TTY (as tests do), and not output colour.
But if txm itself is run in coloured mode, the TXM_HAS_COLOUR environment
variable will be set to 1, and it's safe to force colour output on; they will
be included in txm's error output.
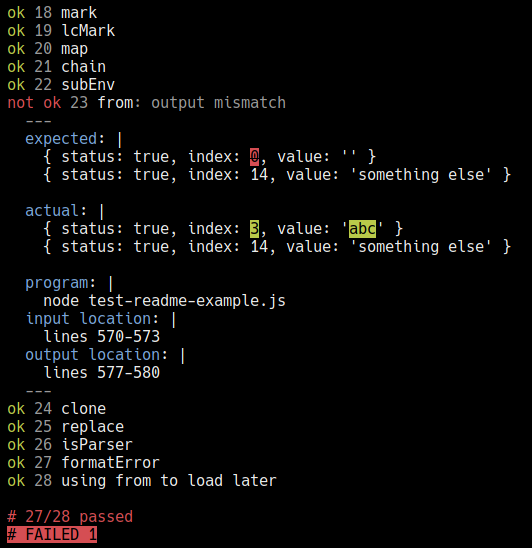
As you may be suspecting, this readme is itself tested with txm. All of the above examples run as part of the automatic tests, locally and on the CI server. If you want to see the comment annotations, see the readme source. (It's a little trippy, because txm is recursively running itself.)
Install
To install for current directory's project: npm install txm
To install globally: npm install -g txm
Requires Node.js (minimum version tested is current LTS).
Use
Command line
txm [--jobs <n>] [filename]
-
filename: Input file (default: read fromstdin) -
--jobs: How many tests may run in parallel. (default:os.cpus().length)When a test finishes, txm will only print its output after all earlier-defined tests have printed their outputs, so that results appear in the same order tests were defined. Further tests continue to run in the background, regardless of how many results are pending print.
-
--version -
--help
Annotations
HTML comments that start with !test are read specially. Use a separate
comment for each annotation.
-
!test program <program>The
<program>is run as a shell command for each following matching input/output pair. It gets the input onstdin, and is expected to produce the output onstdout. The program may be as many lines as you like; a full shell script if you wish.The declared program is used for all tests after here, until a new program is declared.
-
!test in <name>/!test out <name>/!test err <name>The next code block is read as the input to give to a program for the test
<name>, or expected stdout or stderr of the test<name>. These are matched by<name>, and may be anywhere in relation to each other.Errors are raised if a test has no input (
in) or no output (outnorerr), or if it has duplicates of any. -
!test check <name>The next code block is read as a check test. The program gets this as input, but its output is ignored. The test will pass if the program exits successfully. (With exit code
0, or that specified in a!test exitcommand prior.)Use this for code examples that check their own correctness, for example by calling an
assertfunction. -
!test exit <code>The next test which is fully read is expected to fail, and to exit with the given
code, instead of the default0.You can use
!test exit nonzeroto accept any non-0 exit code. -
!test onlyIf any test has this command in front of it, all tests without it are skipped. (They don't run, and their output is suppressed.)
This is intended for developer convenience: When you have lots of tests of which only a few are failing, you can use this command to focus on them, so other tests don't waste time running or clutter your screen.
Behaviour details
Exit code
txm exits 0 if and only if all tests pass.
Invisible characters
In diff additions and deletions, C0 Control Characters (such as Null, Line Feed, or Space), which are ordinarily invisible, are shown as the corresponding Unicode Control Picture. These take the form of small diagonally arranged letters, so Null becomes ␀, Line Feed becomes ␊, and Space becomes ␠. This is the standard way to show this set of invisible characters.
Whenever such characters are used, an index will be present in the accompanying test data, listing what original character each picture corresponds to, with its name, C escape, and Unicode code point. This is intended to give as much information as possible, because bugs relating to invisible characters are awkward to debug.
If an invisible character is not part of the diff, it is shown normally (without a Control Picture replacement.)
To maintain line breaks, the Line Feed character is kept as-is, with its Control Picture (␊) added at the end of the line for clarity.
Invisible characters that aren't part of the C0 set are shown as-is. Examples include the zero-width space, or right-to-left text flow marker.
Colour (color, for Americans grepping)
Coloured output is automatically enabled when outputting directly to a
colour-capable console interface, and disabled otherwise. It can be forced on
or off with the environment variables NO_COLOR=1 or FORCE_COLOR=1, or with
the options --no-color or --color.
Stripping colour codes from coloured output does not change its logical meaning, and indeed the same text is emitted regardless of whether colour is enabled. The colours do not themselves carry meaning; they're just hints to guide the eye.
HTML comment character restrictions
The HTML spec regarding comments has a few restrictions on what comments may contain:
the text must not start with the string
>, nor start with the string->, nor contain the strings<!--,-->, or--!>, nor end with the string<!-.
Some of those are valid constructs in some programming languages, which can be
restrictive if you're writing a !test program command in one of those
languages.
Luckily all of them involve hyphens (-), so to work around "forbidden"
character sequences, txm lets you optionally escape hyphens inside HTML
comments: #- is automatically replaced by -. So for example, <!-- !test in -#-> --> is legal HTML, and will be parsed by txm as the command !test in -->.
To write literally #-, write ##- instead, and so on. # acts normally
everywhere else, and doesn't need to be escaped.
Environment variables
For advanced use, your test program sees the same environment variables that txm sees, plus these introduced by txm:
-
TXM_INDEX(1-based number of test) -
TXM_NAME(name of test) -
TXM_INDEX_FIRST,TXM_INDEX_LAST(indexes of first and last tests that will be run) -
TXM_INPUT_LANG(the language identifier of the input/check markdown code block, if any) -
TXM_HAS_COLOUR,TXM_HAS_COLOR(both set to1if outputting with colours enabled, or to0if disabled; they are logically equivalent, just alternate spellings)
You can use these for example to descriptively name log files, or to easily detect languages and test them differently.
You can also tell with the colour variables whether txm is doing coloured
output or not, and have your program emit debug output with ANSI colour codes
by your method of choice. This is probably only reasonable to do for the
output of check tests, which output is shown unmodified. Don't do this for
in/out tests unless you really know what you're doing; the colour codes
used by txm's automatic diffing will interfere, and you'll get garbage.
Trivia
The name txm stands for "tests ex markdown" as in "deus ex machina", or temptamentum ex Markdown I guess if you're feeling extra Latin.
