HOS-Discovery
This repo describes the using of the TYPO3-Extensions discovery. The extension extends the typo3find extension of subugoe and is for the HamburgOpenScience project
"hos-discovery"


Architecture
LAMP
Linux / Package managers
The project is tested on two Linux distributions:
Ubuntu 16.04 LTS xenial, preinstalled by RRZ Hamburg

First we can test if apache is already installed by:
sudo netstat -tnl
Depending on linux distribution (ubuntu/centos) we use different package manager.
UBUNTU
It is easy done:
sudo apt-get update
sudo apt-get install apache2 libapache2-mod-php7.1 php7.1 php7.1-mysql mysql-server php-gd php-json php-imagick php-mbstring php-curl php-apcu php-soap php-xml php-zip composer
With this command above apache, mysql and pho is installed. After this we have to configure mysql by creating users:
mysql -u root -p
During this act you have to create an user.
Next:
CREATE DATABASE typo3 DEFAULT CHARACTER SET utf8;
CREATE USER typo3_db_user@localhost IDENTIFIED BY 'secretpassword';
GRANT ALL PRIVILEGES ON typo3.* TO typo3_db_user@localhost;
FLUSH PRIVILEGES;
quit;
'secretpassword' is only an example, you have to substitute!
CENTOS
First we install MariaDB. MariaDB is a MySQL fork of the original MySQL developer Monty Widenius. MariaDB is compatible with MySQL and I've chosen to use MariaDB here instead of MySQL. Run this command to install MariaDB with yum:
sudo yum -y install mariadb-server mariadb
Then we create the system startup links for MySQL (so that MySQL starts automatically whenever the system boots) and start the MySQL server:
sudo systemctl start mariadb.service
sudo ystemctl enable mariadb.service
Set passwords for the MySQL root account:
sudo mysql_secure_installation
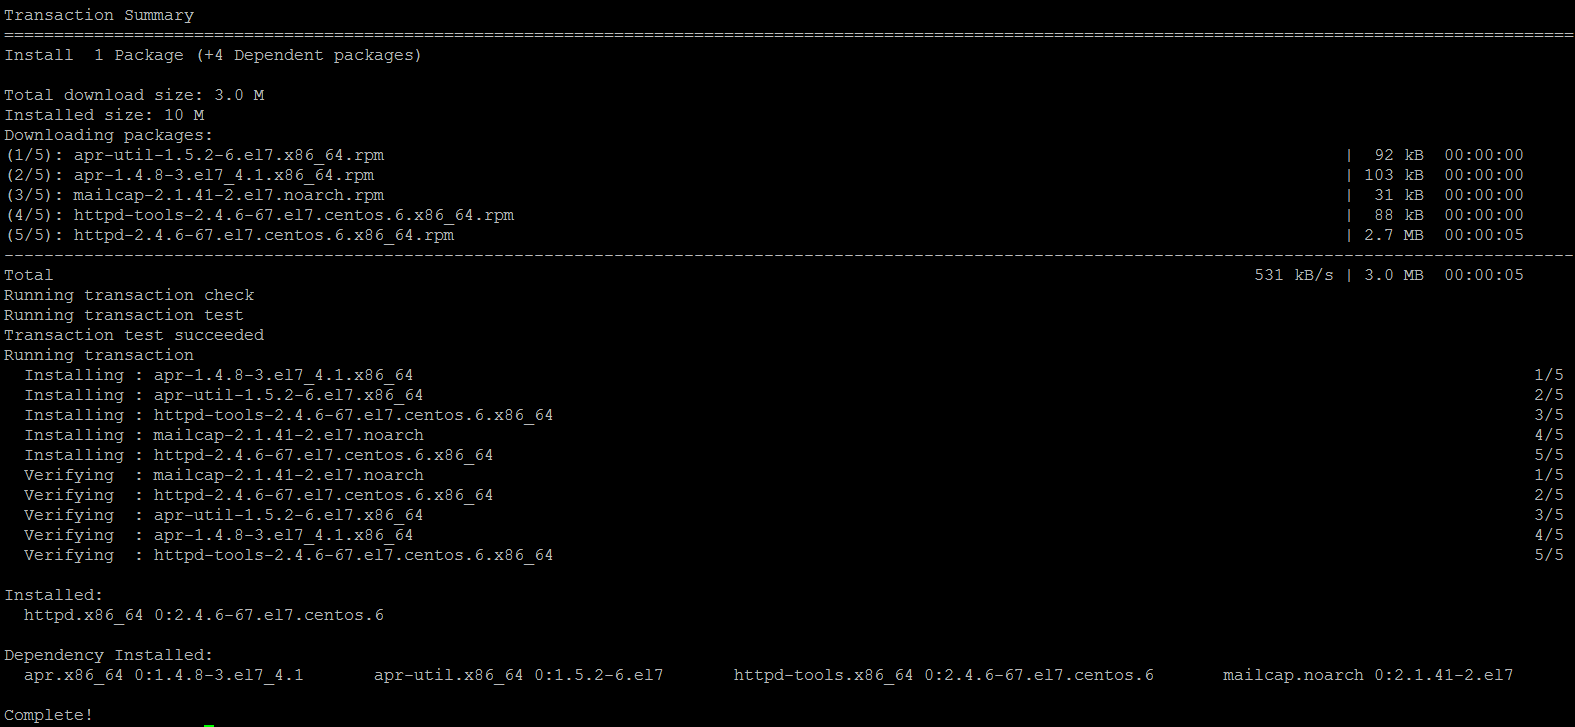
Next we install apache. CentOS 7 ships with Apache 2.4. Apache is directly available as a CentOS 7 package, therefore we can install it like this:
sudo yum -y install httpd
Now configure your system to start Apache at boot time …
sudo systemctl start httpd.service
sudo systemctl enable httpd.service
Next we install php7. The PHP version that ships with CentOS as default is quite old (PHP 5.4). Therefore I will show you in this chapter some options to install newer PHP versions like PHP 7.0 or 7.1 from Remi repository.
sudo rpm -Uvh http://rpms.remirepo.net/enterprise/remi-release-7.rpm
Install yum-utils as we need the yum-config-manager utility.
sudo yum -y install yum-utils
and run yum update
sudo yum update
We can install PHP 7.1 and the Apache PHP 7.1 module as follows:
sudo yum-config-manager --enable remi-php71
sudo yum -y install php php-opcache
We must restart Apache to apply the changes:
sudo systemctl restart httpd.service
Alternativly we can use the same command as UBUNTU:
sudo service httpd restart
Now we can test on both platforms the functionality with:
sudo netstat -tnl
You must see: 22, 80, 3306
If the server is in internet you can test the (web-) server with your browser.
Getting MySQL Support In PHP
To get MySQL support in PHP, we can install the php-mysqlnd package. It's a good idea to install some other PHP modules as well as you might need them for your applications. You can search for available PHP5 modules like this:
sudo yum search php
Pick the ones you need and install them like this:
sudo yum -y install php-mysqlnd php-pdo
In the next step I will install some common PHP modules that are required by TYPO3:
sudo yum -y install php-gd php-ldap php-odbc php-pear php-xml php-xmlrpc php-mbstring php-soap curl curl-devel
In the end you can improve the performance of PHP with:
sudo sed -i 's/max_execution_time = 30/max_execution_time = 240/' /etc/php/7.0/apache2/php.ini
sudo sed -i 's/; max_input_vars = 1000/max_input_vars = 1500/' /etc/php/7.0/apache2/php.ini
sudo sed -i 's/upload_max_filesize = 2M/upload_max_filesize = 8M/' /etc/php/7.0/apache2/php.ini
This make sense for both distributions.
With this step the LAMP install is finished on both platforms.
Solr installation
UBUNTU
First, we should install the Java JDK.
sudo apt-get -y install openjdk-8-jdk
sudo mkdir /usr/java
sudo ln -s /usr/lib/jvm/java-8-openjdk-amd64 /usr/java/default
CENTOS
To install Java, run the following command:
sudo yum install java-1.8.0-openjdk.x86_64
Once Java is installed, you can verify it by running the following command:
sudo java -version
Output:
openjdk version "1.8.0_111"
OpenJDK Runtime Environment (build 1.8.0_111-b15)
OpenJDK 64-Bit Server VM (build 25.111-b15, mixed mode)
Downloading and Installing Apache Solr
First you will need to download the latest version of Apache Solr from the Apache website. You can easily download it using the wget command:
wget http://apache.org/dist/lucene/solr/7.3.1/solr-7.3.1.tgz
You can see the available version under http://apache.org/dist/lucene/solr/
Once the download is completed, extract the service installation file with the following command:
tar xzf solr-`7.3.1.tgz solr-7.3.1/bin/install_solr_service.sh --strip-components=2
Install Solr as a service by running the following command:
sudo bash ./install_solr_service.sh solr-7.3.1.tgz
We recommend installing the 'lsof' command for more stable start/stop of Solr

Extracting solr-7.3.1.tgz to /opt

Installing symlink /opt/solr -> /opt/solr-7.3.1 ...

Installing /etc/init.d/solr script ...

Installing /etc/default/solr.in.sh ...

Service solr installed.
Customize Solr startup configuration in /etc/default/solr.in.sh
NOTE: Please install lsof as this script needs it to determine if Solr is listening on port 8983.

Started Solr server on port 8983 (pid=6426). Happy searching!

Found 1 Solr nodes:

Solr process 6426 running on port 8983
{
 "solr_home":"/var/solr/data",
 "version":"7.3.1 a66a44513ee8191e25b477372094bfa846450316 - shalin - 2018-11-02 19:52:42",
 "startTime":"2016-11-30T06:49:18.927Z",
 "uptime":"0 days, 0 hours, 0 minutes, 18 seconds",
 "memory":"85.4 MB (%17.4) of 490.7 MB"}
You can start|stop|restart the Solr service with the following commands:
sudo service solr start
sudo service solr stop
sudo service solr restart
More about solr installation here: https://lucene.apache.org/solr/guide/7_1/installing-solr.html
Increasing of performance
In /etc/security/limits.conf you can add these lines:

solr             soft    nofile          500000
solr             hard    nofile          500000
solr             soft    nproc           65000
solr             hard    nproc           65000
These lines above suppresses the warning at solr start.
Exposing and restricting access to Solr interface
Because of firewall/load balancer restrictions we have hidden the solr admin interface (port 8983) behind a reverse proxy relized in apache and additionally we could realize an access restriction.
Inside the folder /etc/httpd/sites-available we have created a file
solrproxy.conf with the content below:
<VirtualHost *:80>
    ServerAdmin netadmin@sub.uni-hamburg.de
    ServerName hosindex.openscience.hamburg.de
    <Directory />
        Options +FollowSymLinks
       AllowOverride None
    </Directory>
     <Proxy /solrAdmin >
        Require all granted
     </Proxy>
     <Proxy /solrQuery >
        Require all granted
     </Proxy>
     <Location /solrAdmin/>
	AuthType Basic
	AuthName "Restricted Area"
	AuthBasicProvider file
	AuthUserFile "/etc/httpd/.htpassword"
	Require user solr
     </Location>
     ProxyPreserveHost On
     ProxyRequests Off
     ProxyPass /solrAdmin  http://localhost:8983/solr
     ProxyPassReverse /solrAdmin http://localhost:8983/solr
</VirtualHost>
A symbol link to sites-enabled activates the configuration:
ln -s /etc/httpd/sites-available/solrproxy.conf /etc/httpd/sites-enabled/solrproxy.conf
Creating solr-admin user
This command:
sudo htpasswd -c /etc/httpd/.htpassword solradmin
creates a new file .htpassword inside apache root config (we have
announced this in our host section) and adds a user solradmin.
Now we can access the admin UI by URL like http://myserver.com/solrAdmin.

TYPO3
For installing TYPO3 and the extensions we use composer.
First we install curl by:
sudo apt-get install curl
resp.
sudo yum install curl
Next, download the installer:
sudo curl -s https://getcomposer.org/installer | php
and move the composer.phar file:
sudo mv composer.phar /usr/local/bin/composer
Use the composer command to test the installation. If Composer is installed correctly, the server will respond with a long list of help information and commands:
user@localhost:~# composer
   ______
  / ____/___  ____ ___  ____  ____  ________  _____
 / /   / __ \/ __ `__ \/ __ \/ __ \/ ___/ _ \/ ___/
/ /___/ /_/ / / / / / / /_/ / /_/ (__  )  __/ /
\____/\____/_/ /_/ /_/ .___/\____/____/\___/_/
                /_/
Composer version 1.3.2 2017-01-27 18:23:41

Usage:
  command [options] [arguments]

Options:
  -h, --help                     Display this help message
  -q, --quiet                    Do not output any message
Extension find (subgoe)
Extension discovery (subhh)
Architecture
The Discovery app uses an extended version of subugoe/find. The most facet functionalities are realized with Javascript inside schaufenster extension.
