Django JET2

Next Generation django-jet2 (Modern template for Django admin interface with improved functionality)
![]()
- Home page: https://github.com/tikservices/django-jet2
- Documentation: http://django-jet2.rtfd.io/
- PyPI: https://pypi.python.org/pypi/django-jet2
- Support: support@tik.tn
Why Django JET?
- New fresh look
- Responsive mobile interface
- Useful admin home page
- Minimal template overriding
- Easy integration
- Themes support
- Autocompletion
- Handy controls
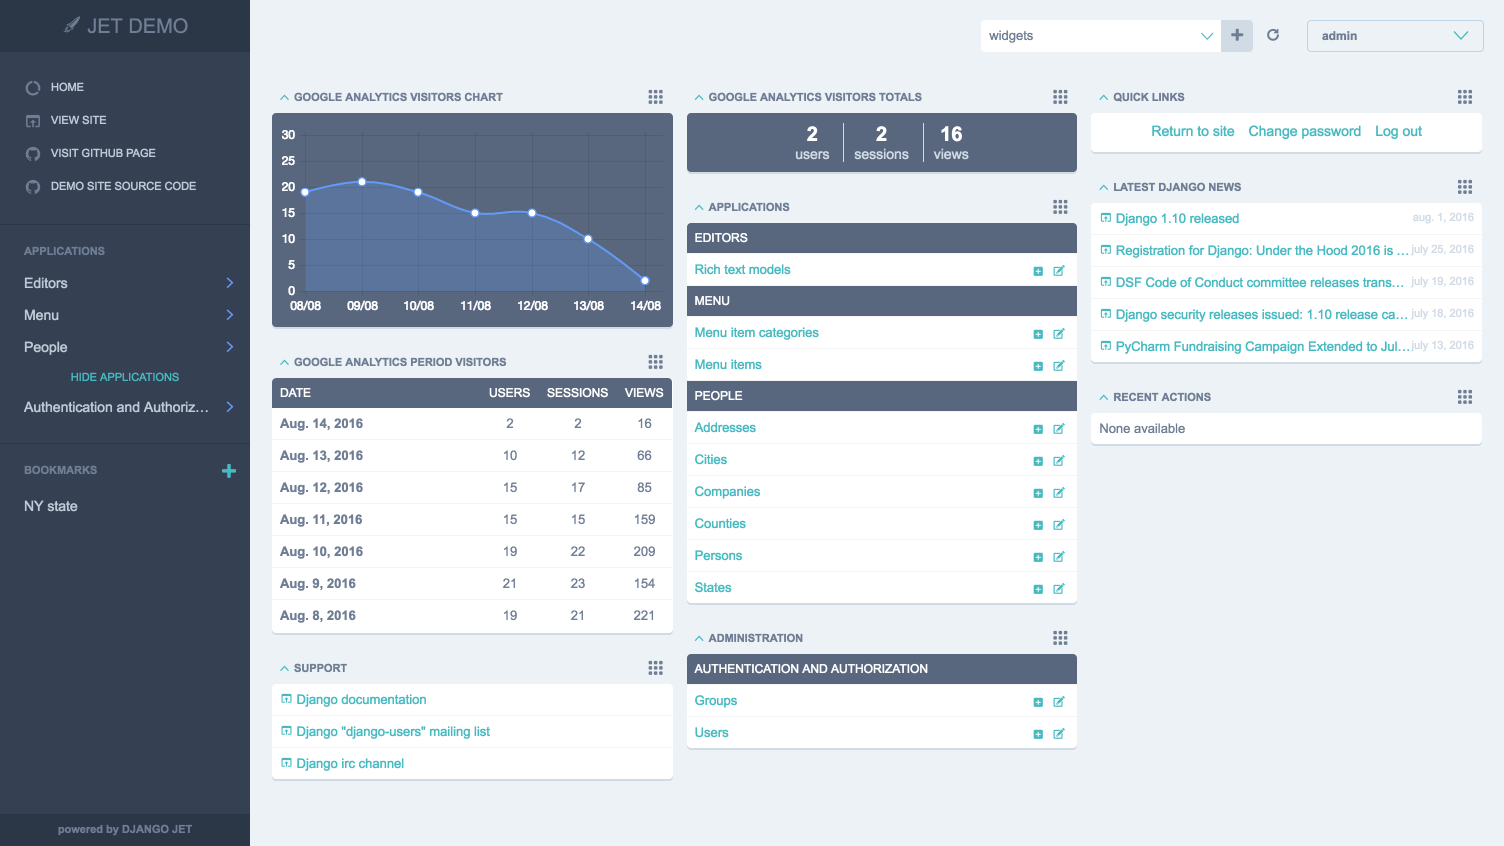
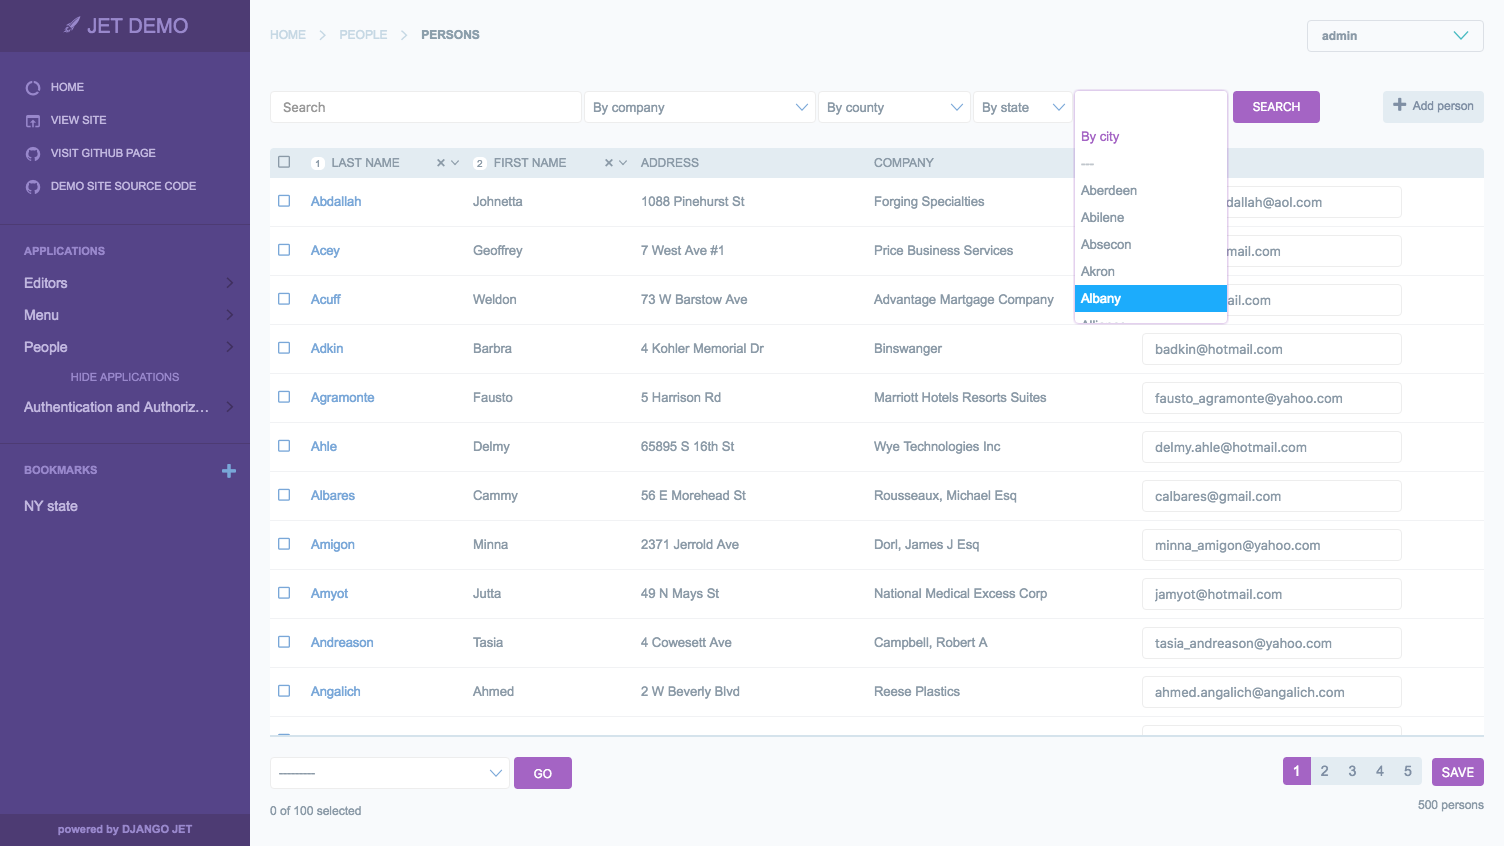
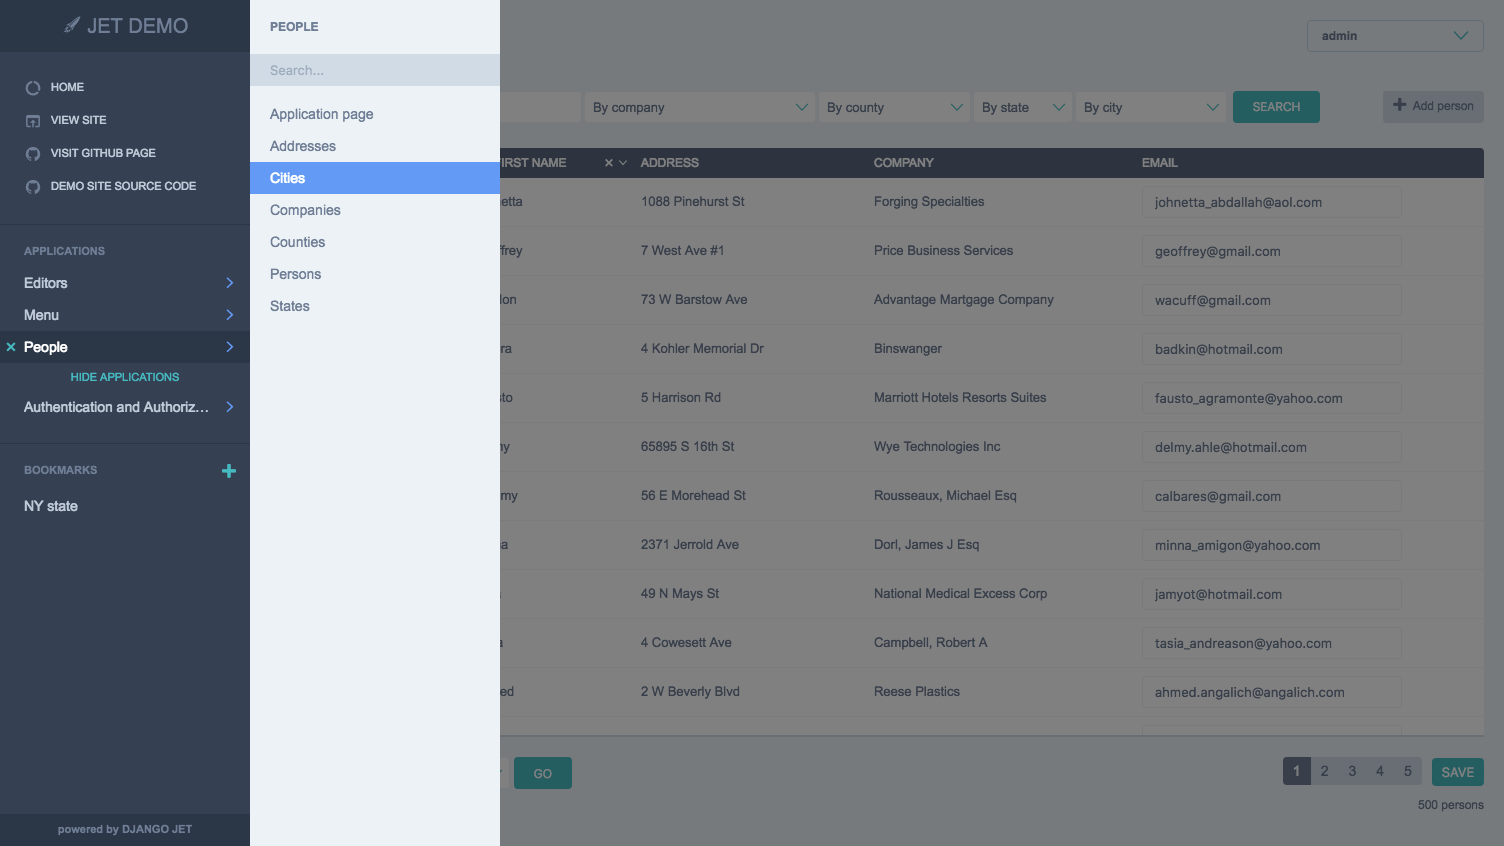
Screenshots
Index dashboard
Changelist
Sidemenu
Installation
- Download and install latest version of Django JET:
pip install django-jet2
# or
easy_install django-jet2- Add 'jet' application to the INSTALLED_APPS setting of your Django project settings.py file (note it should be before 'django.contrib.admin'):
INSTALLED_APPS = (
    ...
    'jet',
    'django.contrib.admin',
)- Make sure
django.template.context_processors.requestcontext processor is enabled in settings.py (Django 1.8+ way):
TEMPLATES = [
    {
        'BACKEND': 'django.template.backends.django.DjangoTemplates',
        'DIRS': [],
        'APP_DIRS': True,
        'OPTIONS': {
            'context_processors': [
                ...
                'django.template.context_processors.request',
                ...
            ],
        },
    },
]- Add URL-pattern to the urlpatterns of your Django project urls.py file (they are needed for related–lookups and autocompletes):
urlpatterns = patterns(
    '',
    path('jet/', include('jet.urls', 'jet')),  # Django JET URLS
    path('admin/', include(admin.site.urls)),
    ...
)- Create database tables:
python manage.py migrate jet- Collect static if you are in production environment:
python manage.py collectstatic- Clear your browser cache
Dashboard installation
Note
Dashboard is located into a separate application. So after a typical JET installation it won't be active. To enable dashboard application follow these steps:
- Add 'jet.dashboard' application to the INSTALLED_APPS setting of your Django project settings.py file (note it should be before 'jet'):
INSTALLED_APPS = (
    ...
    'jet.dashboard',
    'jet',
    'django.contrib.admin',
    ...
)- Add URL-pattern to the urlpatterns of your Django project urls.py file (they are needed for related–lookups and autocompletes):
urlpatterns = patterns(
    '',
    path('jet/', include('jet.urls', 'jet')),  # Django JET URLS
    path('jet/dashboard/', include('jet.dashboard.urls', 'jet-dashboard')),  # Django JET dashboard URLS
    path('admin/', include(admin.site.urls)),
    ...
)- For Google Analytics widgets only install python package:
pip install google-api-python-client==1.4.1
- Create database tables:
python manage.py migrate dashboard- Collect static if you are in production environment:
python manage.py collectstaticLicense
Django JET (which Django JET2 is based on) has two kinds of licenses: open-source (AGPLv3) and commercial. Please note that using AGPLv3 code in your programs make them AGPL compatible too. So if you don't want to comply with that we can provide you a commercial license (visit Home page). The commercial license is designed for using Django JET in commercial products and applications without the provisions of the AGPLv3.