minion-ci

minion-ci is a minimalist, decentralized, flexible Continuous Integration Server for hackers.
Quickstart
Making your repository minion compatible is as easy as running this command in the root of your repository:
minion init
After that you should modify the minion.yml file in your repository to fit your needs. Make a nice commit and run the following command to start your first job:
git minion
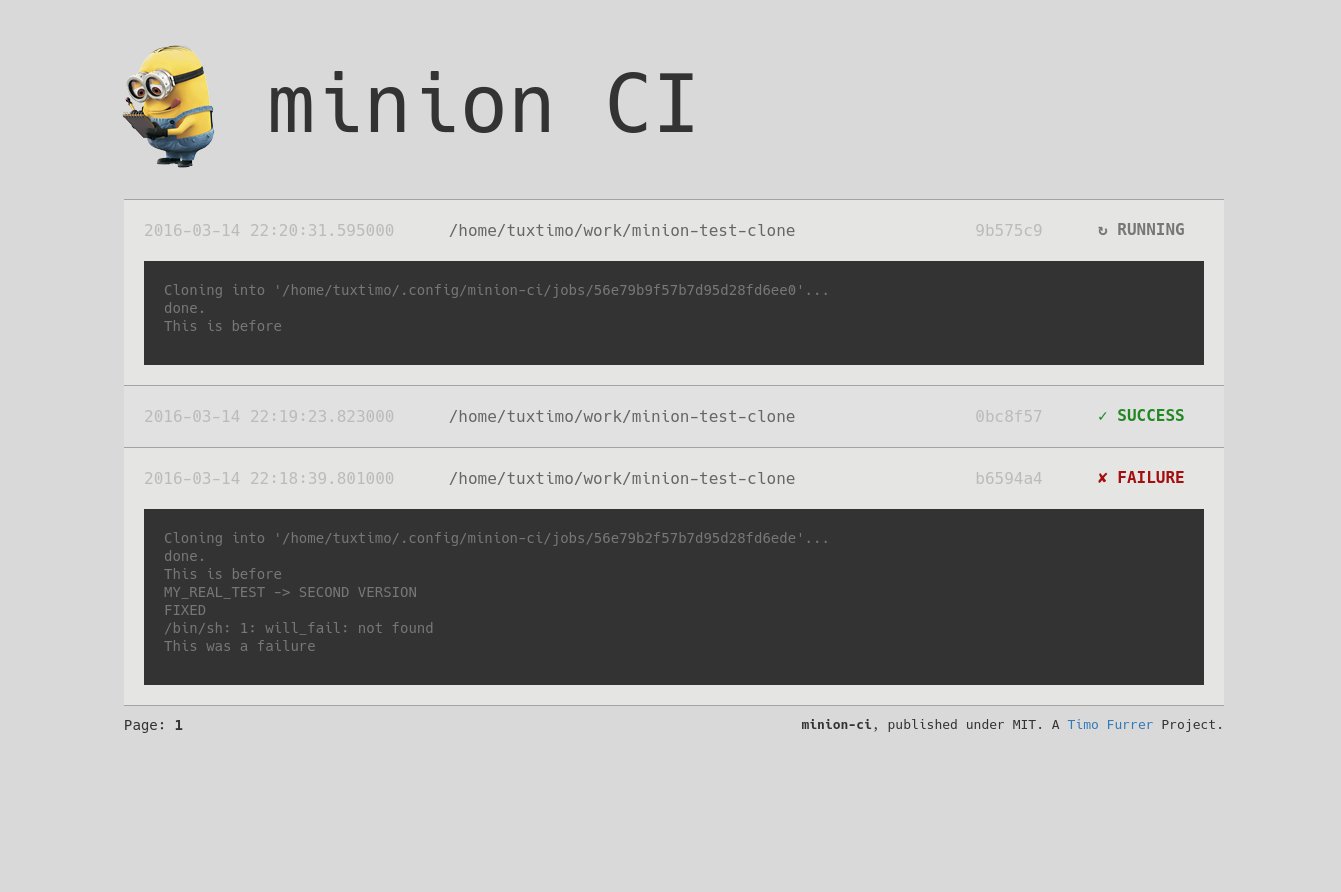
If the minion server successfully started you can browse the web interface at http://localhost:5000
Installation
It's recommended to use pip to install minion-ci:
pip3 install minion-ci
MongoDB: To persist the job data minion-ci uses MongoDB. Make sure you have MongoDB installed ...
apt-get install mongodb
yum install mongodb
... and an instance is running:
ps -ef | grep mongod
... eventually start one with:
mongod
minion.yml File Format
The minion-ci server will clone your repository and parse a file called minion.yml located in the root of the cloned repository. The format is really simple:
# command which is run before the real command
precondition: "echo 'I was run before the test ...'"
# the test command
command: "echo 'This is my test...'"
on:
  # command which is run if the command was successful
  success: "echo 'I was run because the test was successful ...'"
  # command which is run if the command failed
  failure: "echo 'I was run because the test failed ...'"
minion.yml Receipts
The following few sections explain how to setup a minion.yml file for different
kind of environments and technologies, like python virtualenvs, docker containers, etc.
Why so complicated? ... Well it's not really complicated, isn't it? There are just to many different styles of test environments and approaches ... I don't want to give full attention to all of them and support them. And anyway ... In the end your Use-Case wouldn't be supported. Thus, we provide each developer the full control over their own test setup and environment. Setup it up how you like and run your test how you like it. But: Here are some receipts which might help you to come up with a nice minion.yml configuration:
Python virtualenv
To test your code in a python virtualenv base your minion.yml on the following example:
precondition: >
  /bin/bash -c 'virtualenv env -p python3.4 &&
  source env/bin/activate && python -m pip install . -r requirements-dev.txt'
command: /bin/bash -c 'source env/bin/activate && make test'
Make sure you change the actual test command which in the example's case is make test.
You can also easily integrate it with tox. Just make sure tox is installed and run as your
test command.
Docker
To test your code in a docker container follow the following example to setup your minion.yml:
precondition: /bin/bash -c 'docker pull ubuntu'
command: /bin/bash -c 'docker run -t ubuntu /bin/bash -c "make test"'
This will pull a new ubuntu docker image from docker hub and run make test in the container.
You might want to setup your own docker image in the precondition and the run this container
in the actual command:
precondition: /bin/bash -c 'docker build -t testing .'
command: /bin/bash -c 'docker run -t testing /bin/bash -c "make test"'
Make sure you mount your repository, source code, test code or whatever in the container before running any tests.
Server API
| Route | HTTP Method | Parameter | Description |
|---|---|---|---|
| /status | GET | Get status of the server | |
| /jobs | GET | page, page_size | Get a list of all jobs |
| /jobs | POST | repo_url, commit_hash, branch, keep_data, arbitrary data | Create a new job |
| /jobs | DELETE | Remove all jobs | |
| /jobs/<job_id> | GET | Get a single job | |
| /jobs/<job_id> | DELETE | Remove a single job | |
| /stop | POST | Stop the minion-server |


