uRaymarching
uRaymarching is a raymarching shader templates using uShaderTemplate. The following functions are implemented:
- Create a ray-marching object by simply writing a distance function
- Legacy pipelines (Forward / Deferred) and URP (Forward / Deferred) are supported
- HDRP is not yet supported
- Intersects polygonal objects because it writes depth
- VR support
- Lit / Unlit (+ Transparent)
- Shadows for Directional / Spot / Point lights
- Object-space and full-screen (Full screen only for legacy pipelines)
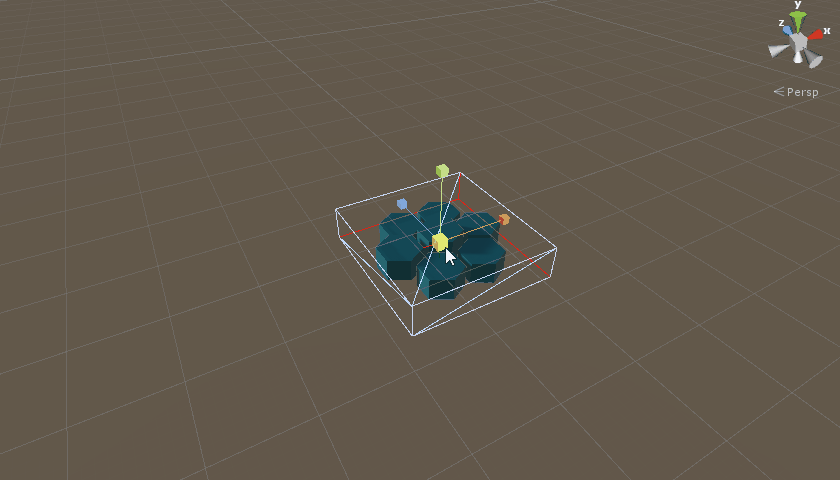
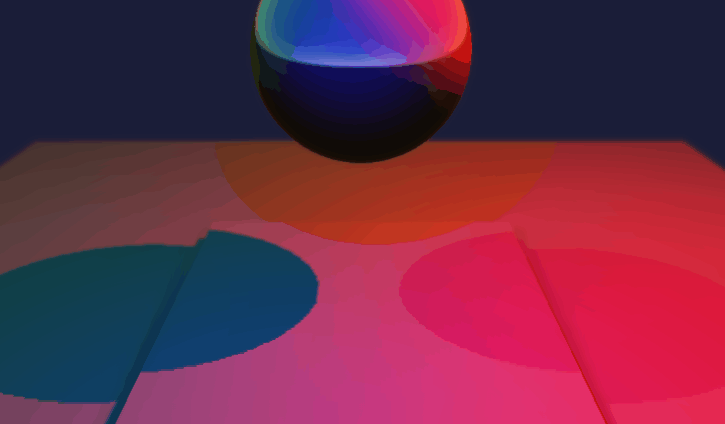
Screenshots
The following shapes are rendered inside a 12-polygon cube.
Check more examples here:
Install
- Unity Package
- Download the following .unitypackage-s.
- Git URL (UPM)
- Add the following git URLs to Package Manager.
https://github.com/hecomi/uShaderTemplate.git#upmhttps://github.com/hecomi/uRaymarching.git#upm
- Add the following git URLs to Package Manager.
- Scoped Registry (UPM)
- Add a scoped registry to your project.
- URL:
https://registry.npmjs.com - Scope:
com.hecomi
- URL:
- Install uRaymarching in Package Manager.
- Add a scoped registry to your project.
How to use
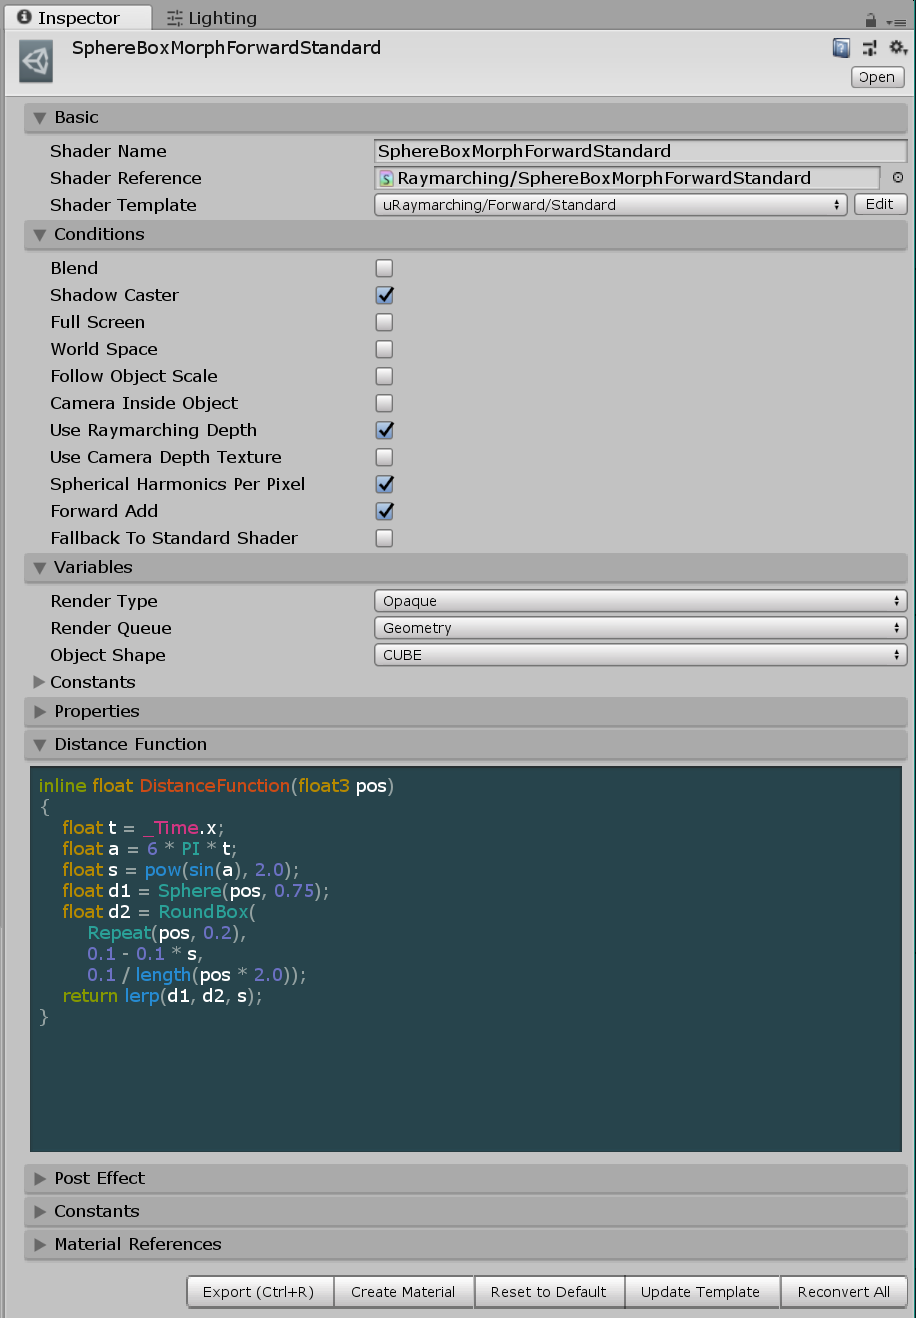
- Select Create > Shader > uShaderTemplate > Generator in the Project view.
- Input Shader Name and select Shader Template from Inspector.
- Edit items in Conditions, Variables, Properties, Distance Function, and Post Effect.
- Press Export button or Ctrl + R to create shader from the
Generator. - Create material in the Project view (or press Create Material button).
- Create Cube in the Hierarchy view.
- Apply the generated material to the cube.
Please also see uShaderTemplate to learn the detail of shader generation function.
Inspector
The UI is generated by uShaderTemplate automatically from template files located in the Assets/uRaymarching/Editor/Resources/ShaderTemplates.
Shader Templates
-
Forward > Standard
- The lighting is done by the same method as a standard surface shader in ForwardBase/Add pass.
-
Forward > Unlit
- No lighting by default so you have to write output colors manually.
-
Deferred > Standard
- The lighting is done by the same method as a standard surface shader.
-
Deferred > Direct GBuffer
- Write values directly into GBuffers without effects like GI and LightProbe.
-
UniversalRP > Lit
- Same lighting as the built-in
Universal Render Pipelin/Litshader.
- Same lighting as the built-in
-
UniversalRP > Unlit
- No lighting, and same as the built-in
Universal Render Pipelin/Unlitshader.
- No lighting, and same as the built-in
The items in Conditions and Variables are different depending on the selected template. Please see each page for further details:
Properties
This block is inserted into a Property section in a shader.
[Header(Additional Parameters)]
_Grid("Grid", 2D) = "" {}
Distance Function
Write a distance function here. The following code is the one generating the example of morphing sphere in Screenshots section in this document.
inline float DistanceFunction(float3 pos)
{
    float r = abs(sin(2 * PI * _Time.y / 2.0));
    float d1 = RoundBox(Repeat(pos, float3(6, 6, 6)), 1 - r, r);
    float d2 = Sphere(pos, 3.0);
    float d3 = Plane(pos - float3(0, -3, 0), float3(0, 1, 0));
    return SmoothMin(SmoothMin(d1, d2, 1.0), d3, 1.0);
}
Math.cginc and Primitives.cginc are included in the generated shader, so in this example some functions like RoundBox() and Repeat() come from these include files (of cource you can write them by yourself).
Post Effect
Post Effect is similar to a surface function in a surface shader. The following code is used in the hexagon-tile example in Screenshots section.
float4 _TopColor;

inline void PostEffect(RaymarchInfo ray, inout PostEffectOutput o)
{
    float3 localPos = ToLocal(ray.endPos);
    o.Emission += smoothstep(0.48, 0.50, localPos.y) * _TopColor;
    o.Occlusion *= 1.0 - 1.0 * ray.loop / ray.maxLoop;
}
RaymarchInfo is the input and the output of a raymarching calculation and this is defined in Struct.cginc.
struct RaymarchInfo
{
    // Input
    float3 startPos;    // start position of ray
    float3 rayDir;      // ray direction
    float3 projPos;     // ComputeScreenPos-applied position
    float3 polyNormal;  // normal on polygon surface
    float minDistance;  // minimum ray distance (comes from material setting)
    float maxDistance;  // maximum ray distance (changes by the raymarching setting)
    int maxLoop;        // maximum number of loop (comes from material setting)

    // Output
    int loop;           // total number of loop of the calculation (<= maxLoop)
    float3 endPos;      // last position (= surface of the distance function)
    float lastDistance; // the final distance of the raymarching
    float totalLength;  // total ray length
    float depth;        // depth (encoded)
    float3 normal;      // normal (encoded)
};
So ray.loop / ray.maxLoop is a normalized value and becomes close to 0.0 on the position where a ray reaches easily and becomes close to 1.0 when hard. So you can use it as a factor of a rechability or 1.0 - ray.loop / ray.maxLoop as an simple and a light-weight occlusion factor.
PostEffectOutput is defferent depending on the selected shader template. For example, it is an alias of SurfaceOutputStandard in Standard template. Please see the following pages for more details.
Please see each template file by clicking Edit button on the right side of the Shader Template drop-down list for more details.
Export

Press Export button or Ctrl + R to export shader. Then, press Create Material button to generate a material which uses the shader (or create a material manually from the Project pane).
Material
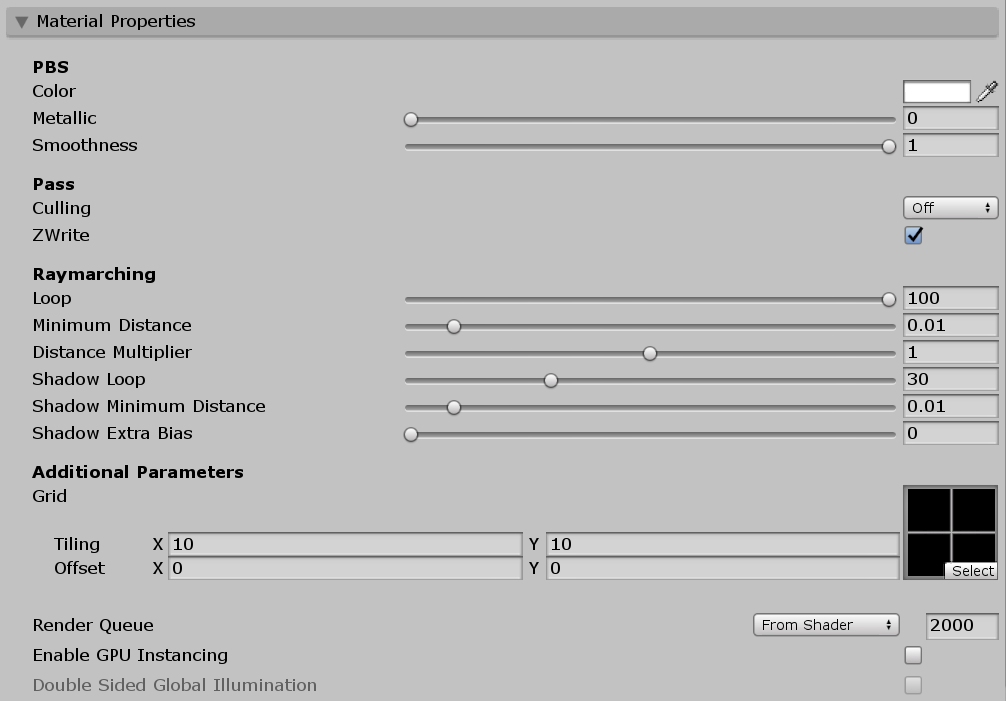
- Loop
- The maximum number of loops of raymarching in basic passes.
- Minimum Distance
- If the distance returned by a distance function becomes lower than this value, the loop finishes.
- Distance Multiplier
- This value is multiplied by the output of a distance function.
- Shadow Loop
- The maximum number of loops of raymarching in shadow pass.
- Shadow Minimum Distance
- Minimum Distance in shadow pass.
- Shadow Extra Bias
- Additional shadow bias to avoid shadow acne.
