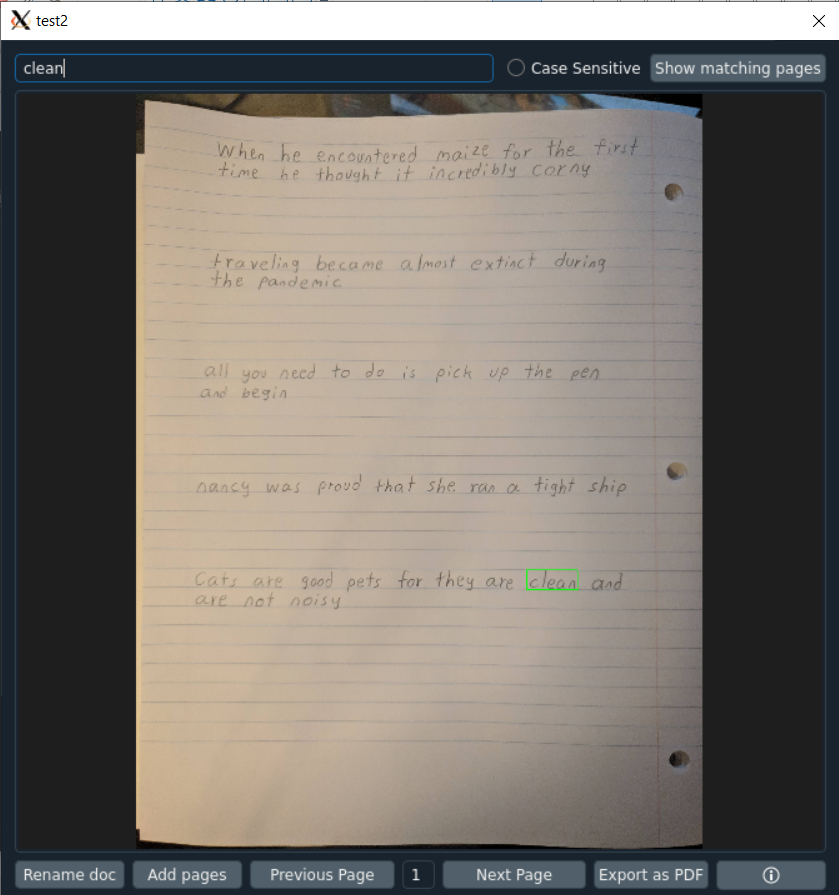
StudiOCR is an application to index notes and make them searchable by using OCR.
Select JPEG or PNG files to create a document
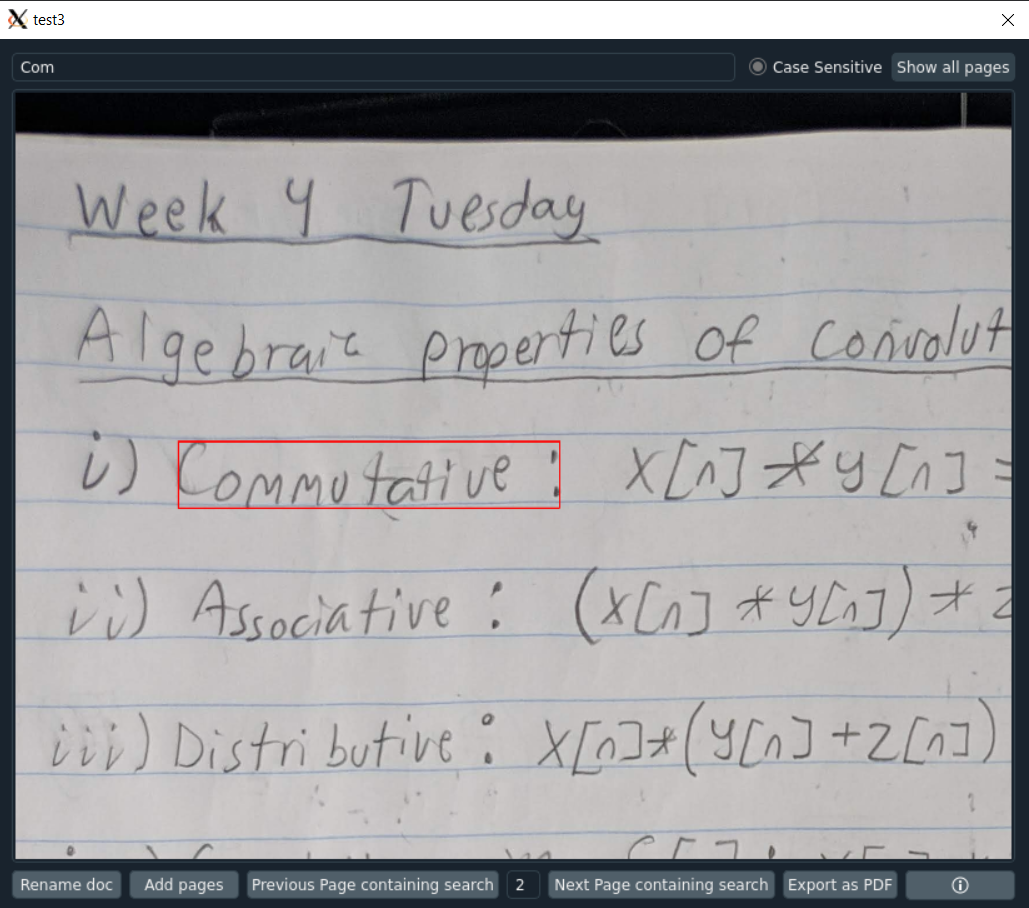
Search through a document to see if it has any matching text
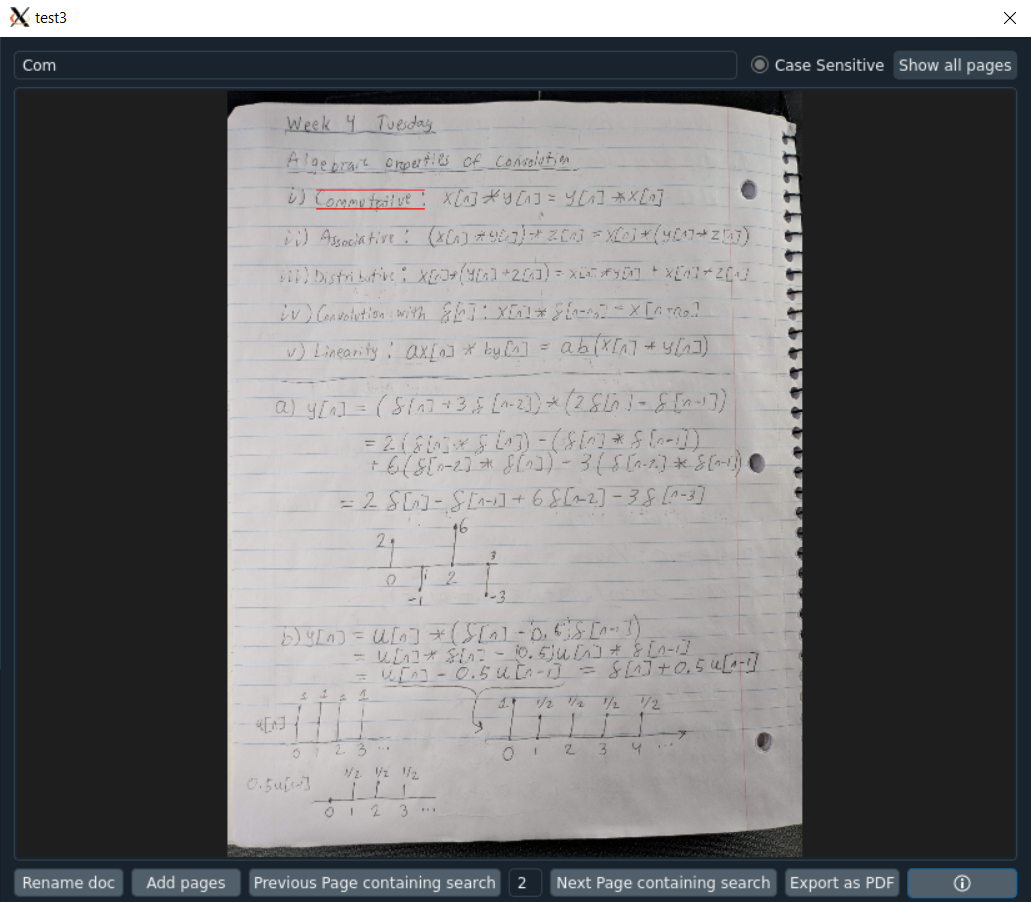
Any matching text will be highlighted with a colored box based on confidence level
You must have Qt, Tesseract OCR, and Poppler installed.
Ubuntu or Debian
sudo apt install qt5-default tesseract-ocr poppler-utils
Arch or Manjaro
sudo pacman -S qt5-base tesseract poppler
Optionally, create a fresh venv for installing the package in
python3 -m venv venv_StudiOCR
source venv_StudiOCR/bin/activate
To deactivate the venv run deactivate
pip install StudiOCROnce installed, run StudiOCR to launch the application
Optionally, create a fresh venv for installing the package dependencies in
python3 -m venv venv_StudiOCR
source venv_StudiOCR/bin/activate
To deactivate the venv, rundeactivate
git clone https://github.com/BSpwr/StudiOCRcd StudiOCRpip install -r requirements.txtOnce installed, cd into the source directory cd StudiOCR and run python3 main.py to launch the application
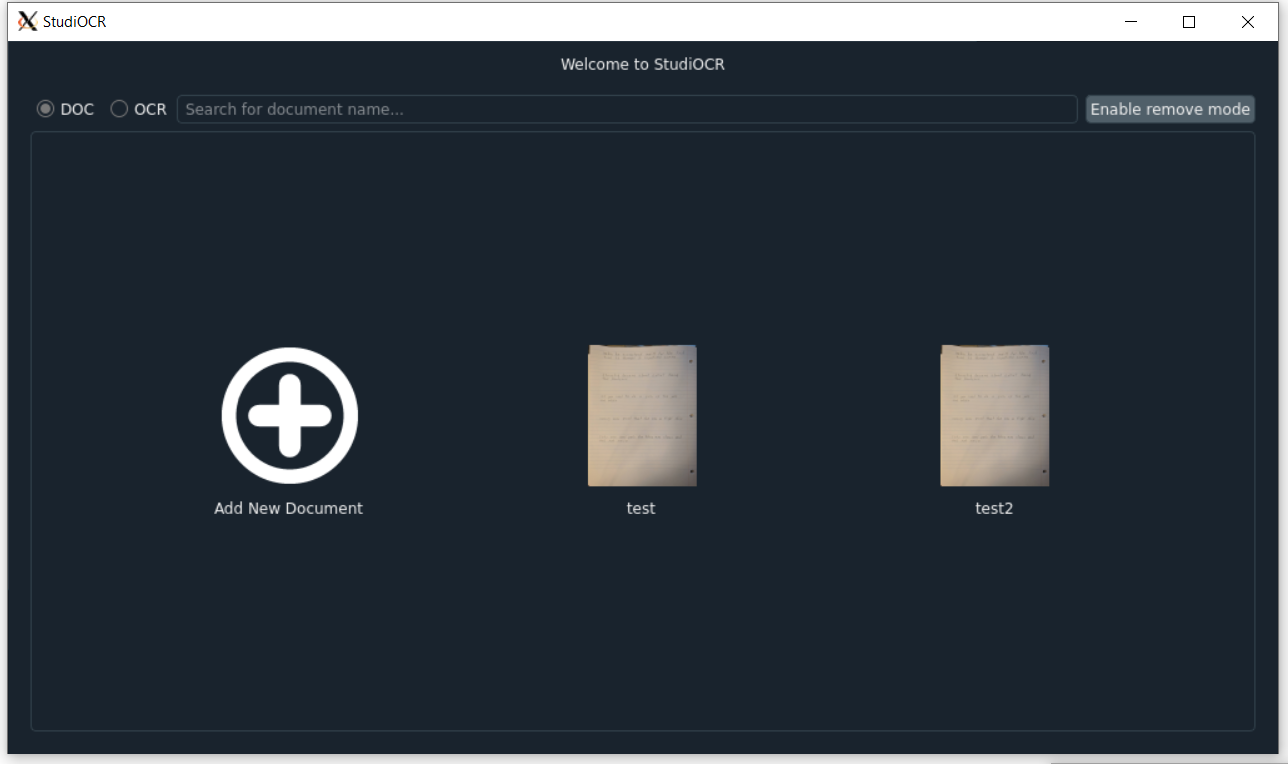
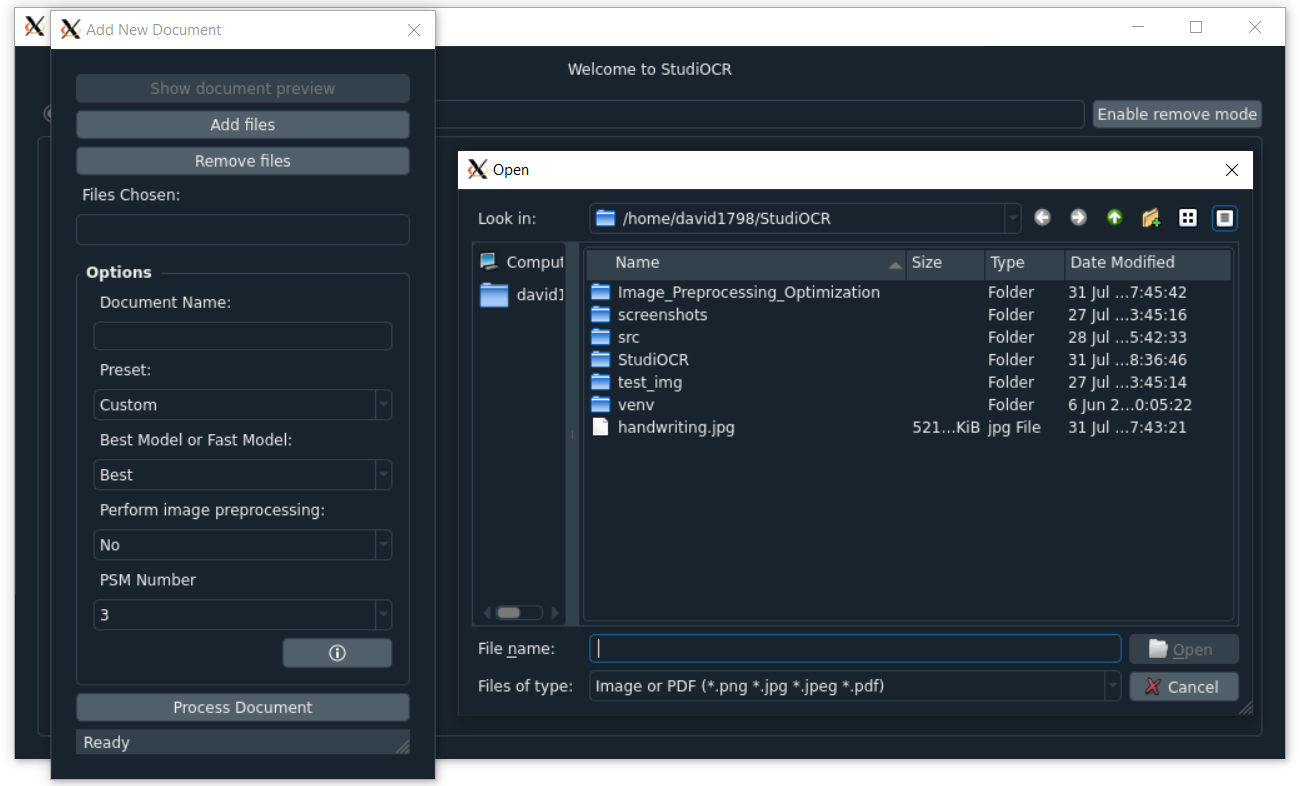
Click the Add New Document button to open the add new document window interface
Click on a document thumbnail (which is generated from the first page) to open the document window interface
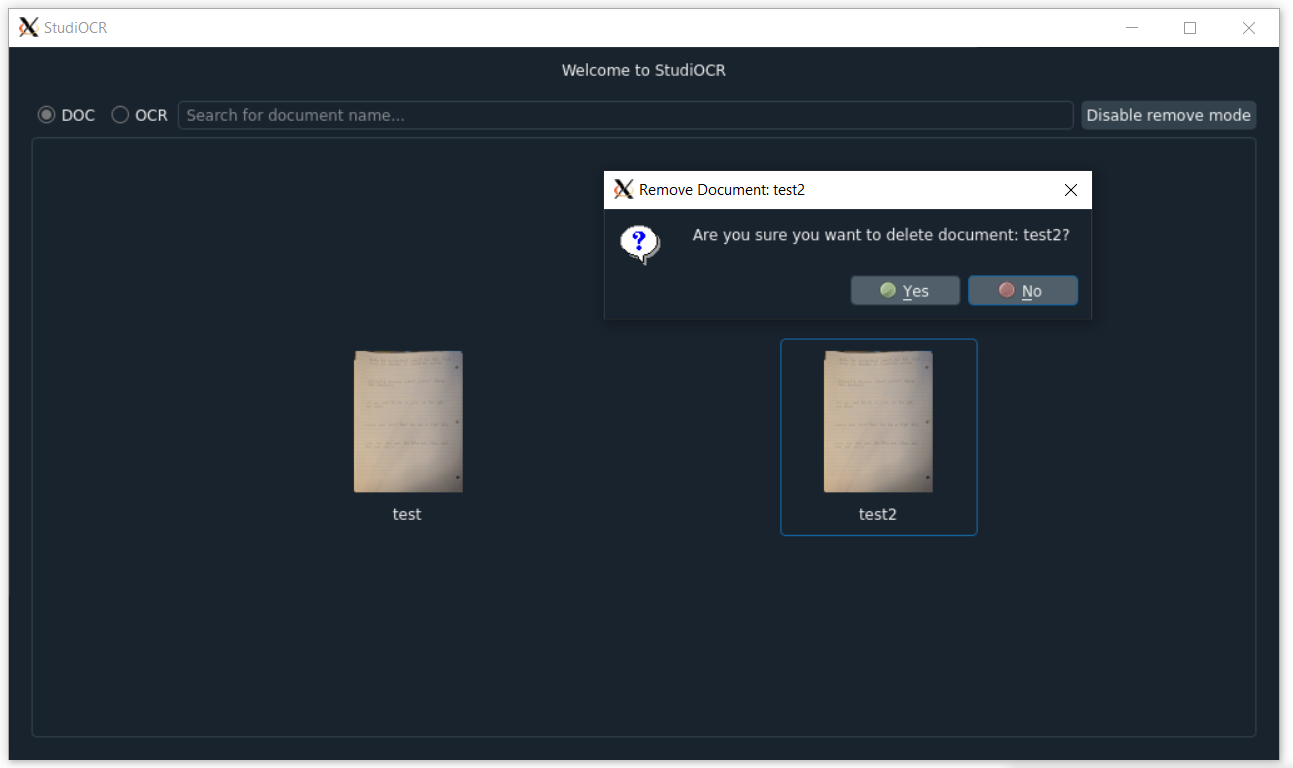
Toggle remove mode to remove existing documents
Search for a document based on document name by typing in the search bar with the DOC bullet selected
Search for a document based on matching OCR text by typing in the search bar with the OCR bullet selected
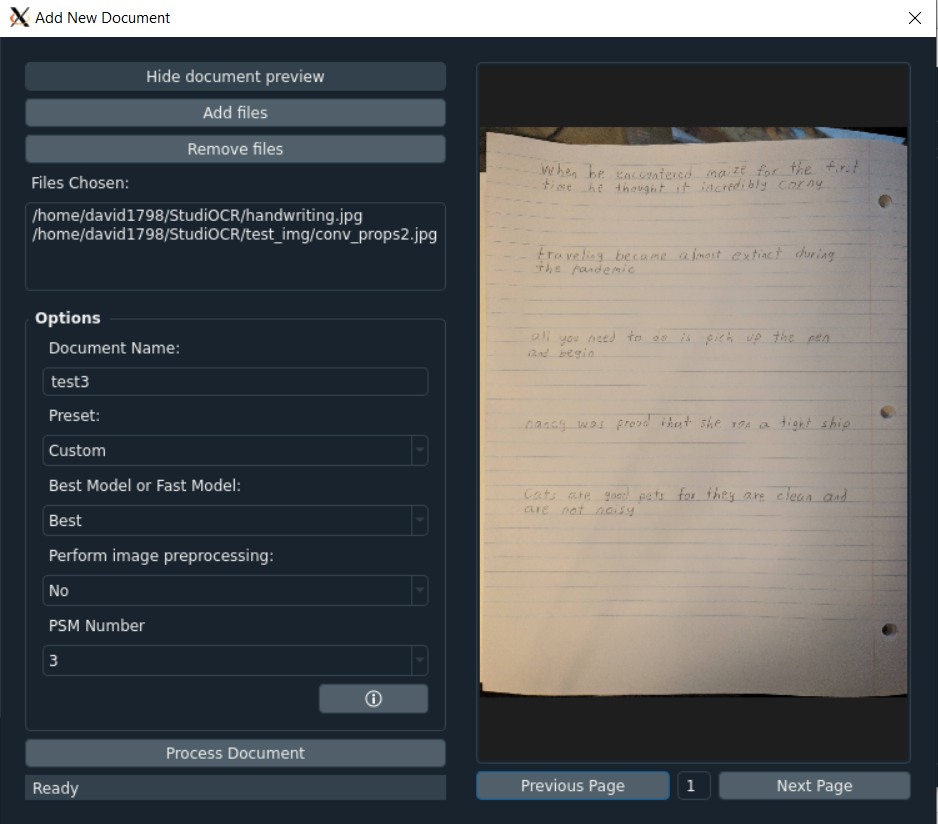
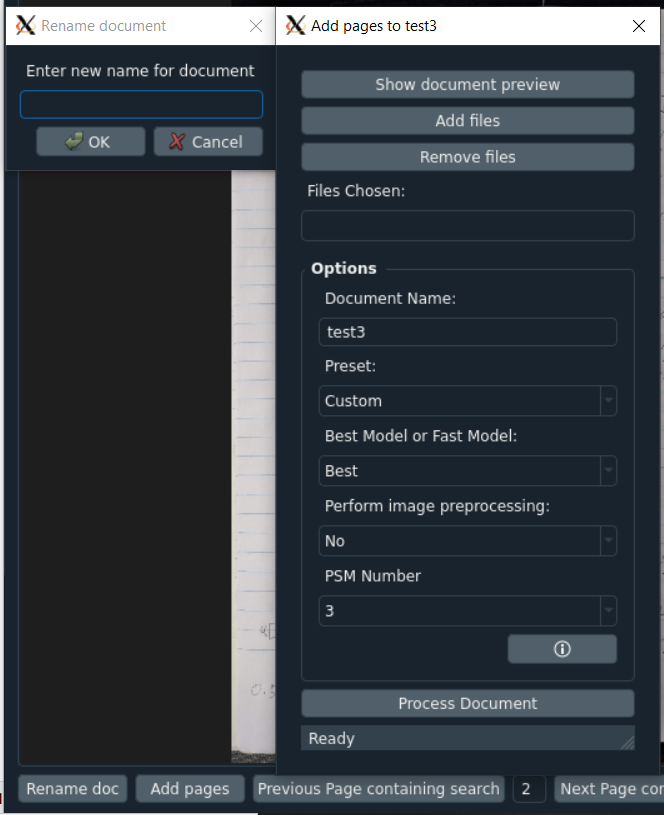
Add/Remove *.png, *.jpg, *.jpeg, or *.pdf files to be processed by OCR into a document in the database
Input the document name
Click show document preview to preview the document with all images as pages on the side
Change the preset for image analysis optimization between: Custom, Screenshot, Printed Text (PDF), Written Paragraph, or Written Page
Underneath the Process Document button is a status bar for processing any PDFs selected into images
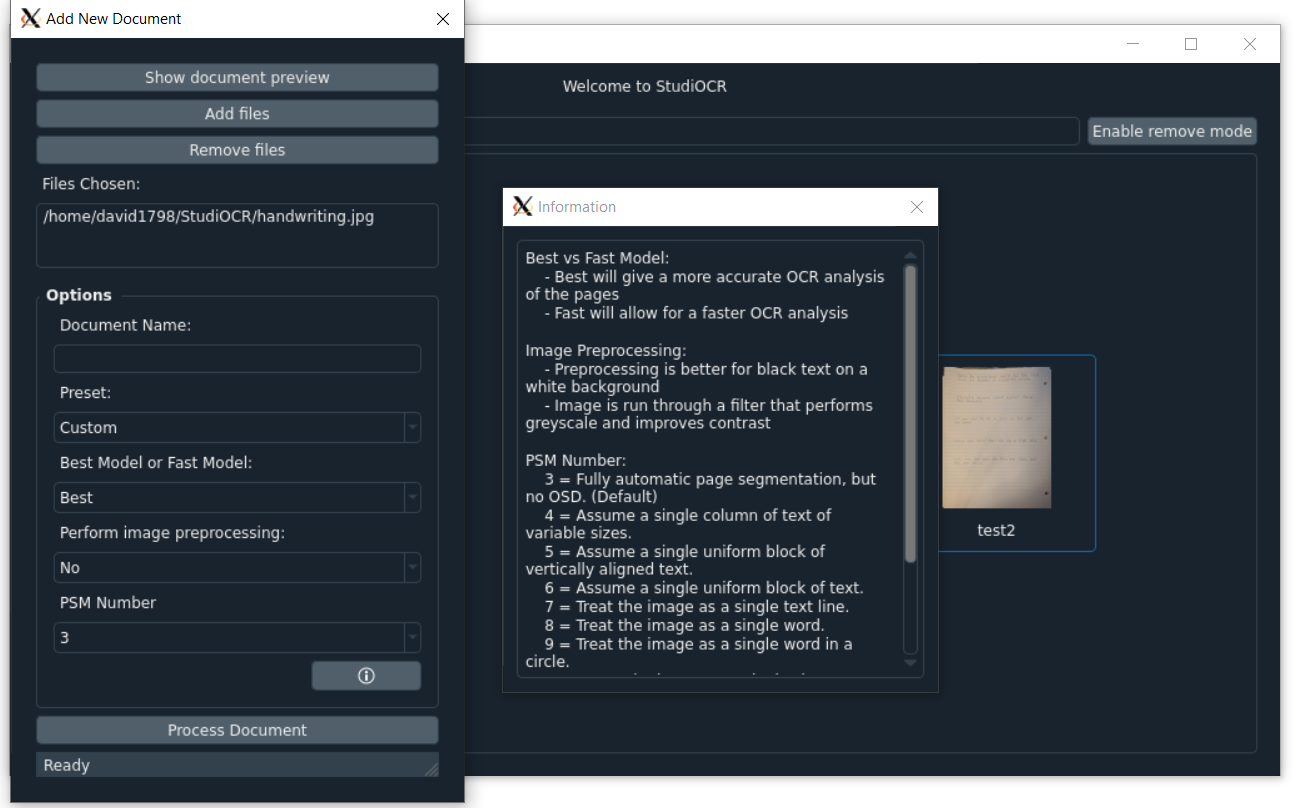
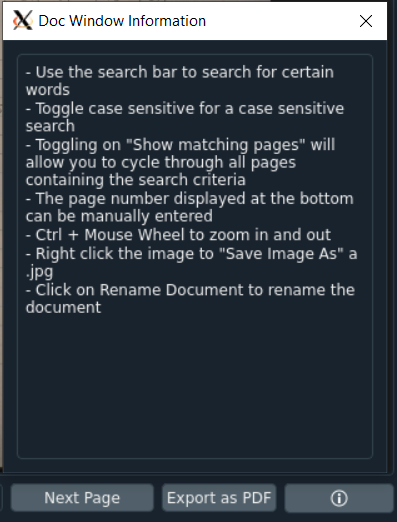
Click on the info icon to display a window explaining document options
Select the processing model you wish to use: Best (for accuracy) or Fast (for speed)
Select whether you wish to do image preprocessing (convert to grayscale and increase text contrast)
PSM Number:
PSM Number
Value
3
Fully automatic page segmentation, but no OSD. (Default)
4
Assume a single column of text of variable sizes.
5
Assume a single uniform block of vertically aligned text.
6
Assume a single uniform block of text.
7
Treat the image as a single text line.
8
Treat the image as a single word.
9
Treat the image as a single word in a circle.
10
Treat the image as a single character.
11
Sparse text. Find as much text as possible in no particular order.
12
Sparse text with OSD.
13
Raw line. Treat the image as a single text line, bypassing hacks that are Tesseract-specific.
Enter text in the search bar to search for matching text in the document
Click the Next/Previous Page buttons to cycle through the pages in the document
The current page number is shown at the bottom of the window and can be manually entered
Toggle show matching pages to only display pages with matching text and to cycle through them
Hold Ctrl and scroll up/down to zoom in and out. Users can also pan around the image. This applies to any images being displayed.
Toggle Case Sensitive to do a case sensitive search
Right click the image and click Save Image As to save the image as a JPEG
Click the Export as PDF button to export the document as a pdf
Click the Rename doc button to rename the document
Click the Add pages button to add more pages to the current document
Box Color:
Box Color
Confidence Value
Green
Greater than or equal to 80
Blue
Less than 80 and greater than or equal to 40
Red
Less than 40
Click on the info icon to display a window explaining document features
