Celery Connectors
Celery is a great framework for processing messages from a message queue broker like Redis or RabbitMQ. If you have a queue with json or pickled messages that you need to consume and process, then hopefully this repository will help you out.
It has multiple examples on setting up working publisher-subscriber messaging workflows using Celery, Celery Bootsteps, Kombu, and Kombu mixins. These examples are focused on finding a starting ground to tune for high availability + performance + reduce the risk of message loss (the dockerized celery bootstep rabbitmq subscriber can process around 100,000 messages in 90 seconds with 3 workers). By using the included docker containers combined with the included load tests, you can start to vet your solution won't wake you up in the middle of the night during an outage.
Each example below can run as a docker container with the included docker-compose files in the compose directory. Please note these docker-compose steps are optional and the consumer counts in the documentation below will only refer to the non-dockerized, repository versions.
Here's the JSON-to-Celery ecomm relay example in action. By using docker-compose you can use container monitoring tools to benchmark resources and throughput to figure out your deployment footprint and address bottlenecks.
Why do I care?
- Do you want to read json or pickled messages out of a queue and have a framework handle the scaling and deployment aspects all out of the box?
- Do you want a simple way to read out of queues without setting up a task result backend (mongo)?
- Do you want to connect a windows python client to a backend linux system or cluster?
- Do you want to communicate with all your AWS VPC backends over SQS?
- Do you want to glue python and non-python technologies together through a message queue backend?
- Do you want something that works with python 2 and 3?
How do I get started?
-
Setup the virtualenv
If you want to use python 2:
virtualenv venv && source venv/bin/activate && pip install celery-connectors
If you want to use python 3:
virtualenv -p python3 venv && source venv/bin/activate && pip install celery-connectors
-
Confirm the pip is installed
pip list | grep celery-connectors
-
Start the containers
# if you do not have docker compose installed, you can try installing it with:
# pip install docker-compose
start-redis-and-rabbitmq.sh
Or if your docker version and OS support container volume-mounting, then you can persist Redis and RabbitMQ messages and data to disk with:
./start-persistence-containers.sh
-
Check the Redis and RabbitMQ containers are running
docker ps
CONTAINER ID        IMAGE                       COMMAND                  CREATED             STATUS              PORTS                                                                                                       NAMES
913e8092dbde        mher/flower:latest          "/usr/local/bin/py..."   35 seconds ago      Up 35 seconds                                                                                                                   celflowerredis
b6983a1316ba        rabbitmq:3.6.6-management   "docker-entrypoint..."   35 seconds ago      Up 34 seconds       4369/tcp, 5671/tcp, 0.0.0.0:5672->5672/tcp, 0.0.0.0:15672->15672/tcp, 15671/tcp, 0.0.0.0:25672->25672/tcp   celrabbit1
52cb4c511d61        redis:4.0.5-alpine          "docker-entrypoint..."   35 seconds ago      Up 34 seconds       0.0.0.0:6379->6379/tcp, 0.0.0.0:16379->16379/tcp                                                            celredis1
202bdaf70784        mher/flower:latest          "/usr/local/bin/py..."   35 seconds ago      Up 35 seconds                                                                                                                   celflowerrabbit
Running a Payments JSON-to-JSON Relay Service
This will simulate a json->json relay using kombu mixins:
http://docs.celeryproject.org/projects/kombu/en/latest/reference/kombu.mixins.html
Kombu mixins are a great way to process messages without Celery, and they are resilient to multiple HA scenarios including a complete broker failures. While building this I would load up messages to process, simulate lag before an ack and then start/stop the RabbitMQ docker container to see how things reacted. As long as the subscribers can declare their consuming queues on a fresh broker start-up case, these mixins seem capable of surviving these types of DR events. By default these builds are going to only read one message out of the queue at a time.
Start JSON Relay
This process will consume JSON dictionary messages on the ecomm.api.west RabbitMQ queue and pass the message to the reporting.payments queue.
Please start this in a new terminal that has sourced the virtual env: source venv/bin/activate
start-mixin-json-relay.py
INFO:mixin_relay:Consuming queues=1
INFO:relay:consuming queues=[<unbound Queue ecomm.api.west -> <unbound Exchange ecomm.api(topic)> -> ecomm.api.west>]
INFO:kombu.mixins:Connected to amqp://rabbitmq:**@127.0.0.1:5672//
INFO:relay-wrk:creating consumer for queues=1 callback=handle_message relay_ex=Exchange ''(direct) relay_rk=reporting.payments prefetch=1
Or with docker compose
docker-compose -f compose-start-mixin-json-relay.yml up
Starting jtojrelay ...
Starting jtojrelay ... done
Attaching to jtojrelay
jtojrelay    | 2017-12-15 06:37:39,458 - jtoj_relay - INFO - Consuming queues=1
jtojrelay    | 2017-12-15 06:37:39,462 - jtoj_relay - INFO - consuming queues=[<unbound Queue ecomm.api.west -> <unbound Exchange ""(topic)> -> ecomm.api.west>]
jtojrelay    | 2017-12-15 06:37:39,478 - kombu.mixins - INFO - Connected to amqp://rabbitmq:**@127.0.0.1:5672//
List the Queues
In a new terminal that has the virtual env loaded, checkout the RabbitMQ queues:
list-queues.sh

Listing Queues broker=localhost:15672
| name | consumers | messages | messages_ready | messages_unacknowledged |
| celeryev.ea44162e-7224-4167-be30-4be614c33fc9 | 1 | 0 | 0 | 0 |
| ecomm.api.west | 1 | 0 | 0 | 0 |
Start the Kombu Mixin Subscriber
In a new terminal that has the virtual env loaded, start the subscriber for relayed messags in the reporting.payments queue:
kombu_mixin_subscriber.py
INFO:kombu-mixin-subscriber:Start - kombu-mixin-subscriber
INFO:kombu-subscriber:setup routing
INFO:kombu-subscriber:kombu-mixin-subscriber - kombu.subscriber queues=reporting.payments consuming with callback=handle_message
Or with docker compose:
docker-compose -f compose-kombu-mixin-subscriber.yml  up
WARNING: Found orphan containers (jtojrelay) for this project. If you removed or renamed this service in your compose file, you can run this command with the --remove-orphans flag to clean it up.
Creating kombumixinsubrmq ... done
Attaching to kombumixinsubrmq
kombumixinsubrmq    | 2017-12-15 06:41:15,135 - kombu-mixin-subscriber - INFO - Start - kombu-mixin-subscriber
kombumixinsubrmq    | 2017-12-15 06:41:15,135 - kombu-subscriber - INFO - setup routing
List the Bindings
With the relay and the subscrbier online the bindings should show two separate queues for these two processes.
list-bindings.sh

Listing Bindings broker=localhost:15672
| source | destination | routing_key |
| celeryev.ea44162e-7224-4167-be30-4be614c33fc9 | celeryev.ea44162e-7224-4167-be30-4be614c33fc9 | |
| ecomm.api.west | ecomm.api.west | |
| reporting.payments | reporting.payments | |
| celeryev | celeryev.ea44162e-7224-4167-be30-4be614c33fc9 | # |
| ecomm.api | ecomm.api.west | ecomm.api.west |
| reporting.payments | reporting.payments | reporting.payments |
Publish Ecomm messages to the Relay
In a new terminal that has the virtual env loaded, start the mixin publisher that will send JSON messages to the ecomm.api.west queue:
start-mixin-publisher.py
INFO:robopub:Generating messages=10
INFO:robopub:Publishing messages=10
INFO:pub_send:pub_send publish - ex=Exchange ecomm.api(topic) rk=ecomm.api.west sz=json
INFO:pub_send:pub_send publish - ex=Exchange ecomm.api(topic) rk=ecomm.api.west sz=json
INFO:pub_send:pub_send publish - ex=Exchange ecomm.api(topic) rk=ecomm.api.west sz=json
INFO:pub_send:pub_send publish - ex=Exchange ecomm.api(topic) rk=ecomm.api.west sz=json
INFO:pub_send:pub_send publish - ex=Exchange ecomm.api(topic) rk=ecomm.api.west sz=json
INFO:pub_send:pub_send publish - ex=Exchange ecomm.api(topic) rk=ecomm.api.west sz=json
INFO:pub_send:pub_send publish - ex=Exchange ecomm.api(topic) rk=ecomm.api.west sz=json
INFO:pub_send:pub_send publish - ex=Exchange ecomm.api(topic) rk=ecomm.api.west sz=json
INFO:pub_send:pub_send publish - ex=Exchange ecomm.api(topic) rk=ecomm.api.west sz=json
INFO:pub_send:pub_send publish - ex=Exchange ecomm.api(topic) rk=ecomm.api.west sz=json
INFO:robopub:Done Publishing
Or with docker compose:
docker-compose -f compose-start-mixin-publisher.yml up
WARNING: Found orphan containers (kombumixinsubrmq, jtojrelay) for this project. If you removed or renamed this service in your compose file, you can run this command with the --remove-orphans flag to clean it up.
Starting mixinpubrmq ... done
Attaching to mixinpubrmq
Verify the Relay Handled the Messages
Verify the terminal logs in the relay look similar to:
INFO:relay-wrk:default handle_message - acking - msg={'data': {'simulated_lag': 1.0}, 'msg_id': '35e8546f-f757-4764-9a25-12b867f61957_1', 'created': '2017-12-13T01:30:35.401399'}
INFO:relay-wrk:send start - relay_ex=Exchange ''(direct) relay_rk=reporting.payments id=95c93115-2041-424b-b37e-0e8dff1b6336_1
INFO:pub_send:pub_send publish - ex=Exchange ''(direct) rk=reporting.payments sz=json
INFO:relay-wrk:send done - id=95c93115-2041-424b-b37e-0e8dff1b6336_1
INFO:relay-wrk:default handle_message - acking - msg={'data': {'simulated_lag': 1.0}, 'msg_id': '989641cc-cd2b-4041-81aa-bdd27393646a_1', 'created': '2017-12-13T01:30:35.401529'}
INFO:relay-wrk:send start - relay_ex=Exchange ''(direct) relay_rk=reporting.payments id=7d8b473a-1f7e-4d04-8e8a-234536b0a8fb_1
INFO:pub_send:pub_send publish - ex=Exchange ''(direct) rk=reporting.payments sz=json
INFO:relay-wrk:send done - id=7d8b473a-1f7e-4d04-8e8a-234536b0a8fb_1
INFO:relay-wrk:default handle_message - acking - msg={'data': {'simulated_lag': 1.0}, 'msg_id': '68eb6ab0-2e41-4838-a088-927709c4d595_1', 'created': '2017-12-13T01:30:35.401554'}
INFO:relay-wrk:send start - relay_ex=Exchange ''(direct) relay_rk=reporting.payments id=4ca34760-db69-4c06-97c9-0355c38bd158_1
INFO:pub_send:pub_send publish - ex=Exchange ''(direct) rk=reporting.payments sz=json
INFO:relay-wrk:send done - id=4ca34760-db69-4c06-97c9-0355c38bd158_1
INFO:relay-wrk:default handle_message - acking - msg={'data': {'simulated_lag': 1.0}, 'msg_id': 'f906ab52-27f1-4ea7-bd68-2956da232258_1', 'created': '2017-12-13T01:30:35.401618'}
INFO:relay-wrk:send start - relay_ex=Exchange ''(direct) relay_rk=reporting.payments id=8a584a99-b35d-4e18-acd8-45d32871ba0a_1
Verify the Subscriber Handled the Relayed Messages
INFO:kombu-mixin-subscriber:callback received msg body={'msg_id': '95c93115-2041-424b-b37e-0e8dff1b6336_1', 'data': {'org_msg': {'msg_id': '35e8546f-f757-4764-9a25-12b867f61957_1', 'data': {'simulated_lag': 1.0}, 'created': '2017-12-13T01:30:35.401399'}, 'relay_name': 'json-to-json-relay'}, 'created': '2017-12-13T01:30:35.423314'}
INFO:kombu-subscriber:kombu-mixin-subscriber - kombu.subscriber queues=reporting.payments consuming with callback=handle_message
INFO:kombu-mixin-subscriber:callback received msg body={'msg_id': '7d8b473a-1f7e-4d04-8e8a-234536b0a8fb_1', 'data': {'org_msg': {'msg_id': '989641cc-cd2b-4041-81aa-bdd27393646a_1', 'data': {'simulated_lag': 1.0}, 'created': '2017-12-13T01:30:35.401529'}, 'relay_name': 'json-to-json-relay'}, 'created': '2017-12-13T01:30:35.445645'}
INFO:kombu-subscriber:kombu-mixin-subscriber - kombu.subscriber queues=reporting.payments consuming with callback=handle_message
INFO:kombu-mixin-subscriber:callback received msg body={'msg_id': '4ca34760-db69-4c06-97c9-0355c38bd158_1', 'data': {'org_msg': {'msg_id': '68eb6ab0-2e41-4838-a088-927709c4d595_1', 'data': {'simulated_lag': 1.0}, 'created': '2017-12-13T01:30:35.401554'}, 'relay_name': 'json-to-json-relay'}, 'created': '2017-12-13T01:30:35.453077'}
INFO:kombu-subscriber:kombu-mixin-subscriber - kombu.subscriber queues=reporting.payments consuming with callback=handle_message
INFO:kombu-mixin-subscriber:callback received msg body={'msg_id': '8a584a99-b35d-4e18-acd8-45d32871ba0a_1', 'data': {'org_msg': {'msg_id': 'f906ab52-27f1-4ea7-bd68-2956da232258_1', 'data': {'simulated_lag': 1.0}, 'created': '2017-12-13T01:30:35.401618'}, 'relay_name': 'json-to-json-relay'}, 'created': '2017-12-13T01:30:35.458601'}
Confirm the Queues are empty
list-queues.sh

Listing Queues broker=localhost:15672
| name | consumers | messages | messages_ready | messages_unacknowledged |
| celeryev.ea44162e-7224-4167-be30-4be614c33fc9 | 1 | 0 | 0 | 0 |
| ecomm.api.west | 1 | 0 | 0 | 0 |
| reporting.payments | 1 | 0 | 0 | 0 |
Stop the the JSON Relay Demo
In the mixin relay and mixin subscriber terminal sessions use: ctrl + c to stop the processes.
Restart the docker containers to a good, clean state.
Stop:
stop-redis-and-rabbitmq.sh
Stopping redis and rabbitmq
Stopping celrabbit1      ... done
Stopping celredis1       ... done
Stopping celflowerredis  ... done
Stopping celflowerrabbit ... done
Start:
start-redis-and-rabbitmq.sh
Starting redis and rabbitmq
Creating celrabbit1 ... done
Creating celrabbit1 ... done
Creating celredis1 ... done
Creating celflowerredis ... done
Running an Ecommerce JSON-to-Celery Relay Service
This will simulate hooking up an existing Celery application to start processing Celery tasks from JSON messages in a RabbitMQ queue. This is useful because it allows reusing existing Celery application tasks over a JSON messaging layer for mapping payloads to specific, existing Celery tasks. With this approach you can glue python and non-python services together provided that they can publish JSON messages to Redis, RabbitMQ or AWS SQS (please refer to the fix SQS section). Each of the components below can scale horizontally for redundancy. Each one also utilizes native RabbitMQ acks (https://www.rabbitmq.com/confirms.html) to ensure messages are never deleted or lost until propagation to the next queue or component has been confirmed.
Note: Please run this demo with three separate terminal sessions and a browser to view the Celery application's task progress in Flower.
Start Ecommerce Celery Worker
Start a Celery worker for an existing ecommerce application from a hypothetical Django or Flask server.
Note: Please run this from the base directory for the repository and source the virtual env: source venv/bin/activate
./start-ecomm-worker.sh

-------------- celery@ecommerce_subscriber v4.1.0 (latentcall)
---- **** -----
--- * ***  * -- Linux-4.7.4-200.fc24.x86_64-x86_64-with-fedora-24-Twenty_Four 2017-12-14 00:33:02
-- * - **** ---
- ** ---------- [config]
- ** ---------- .> app:         ecommerce-worker:0x7f0c23f1c550
- ** ---------- .> transport:   amqp://rabbitmq:**@localhost:5672//
- ** ---------- .> results:     redis://localhost:6379/10
- *** --- * --- .> concurrency: 3 (prefork)
-- ******* ---- .> task events: OFF (enable -E to monitor tasks in this worker)
--- ***** -----
-------------- [queues]
                .> celery           exchange=celery(direct) key=celery


[tasks]
. ecomm_app.ecommerce.tasks.handle_user_conversion_events

[2017-12-14 00:33:02,243: INFO/MainProcess] Connected to amqp://rabbitmq:**@127.0.0.1:5672//
[2017-12-14 00:33:02,260: INFO/MainProcess] mingle: searching for neighbors
[2017-12-14 00:33:03,293: INFO/MainProcess] mingle: all alone
[2017-12-14 00:33:03,337: INFO/MainProcess] celery@ecommerce_subscriber ready.
[2017-12-14 00:33:05,275: INFO/MainProcess] Events of group {task} enabled by remote.
Or with docker compose:
docker-compose -f compose-start-ecomm-worker.yml up
Recreating ecommworker ... done
Attaching to ecommworker
Notice the worker is named celery@ecommerce_subscriber this is the identifier for viewing the Celery application in Flower:
http://localhost:5555/worker/celery@ecommerce_subscriber (login: admin/admin)
Start Ecomm Relay
This process will consume JSON dictionary messages on the ecomm.api.west RabbitMQ queue and pass the message to the ecomm Celery app as a ecomm_app.ecommerce.tasks.handle_user_conversion_events Celery task.
Please start this in a new terminal that has sourced the virtual env: source venv/bin/activate
./start-mixin-celery-relay.py
2017-12-14 00:36:47,339 - jtoc_relay - INFO - Consuming queues=1
2017-12-14 00:36:47,342 - jtoc - INFO - consuming queues=[<unbound Queue ecomm.api.west -> <unbound Exchange ecomm.api(topic)> -> ecomm.api.west>]
2017-12-14 00:36:47,353 - kombu.mixins - INFO - Connected to amqp://rabbitmq:**@127.0.0.1:5672//
2017-12-14 00:36:47,355 - jtoc - INFO - creating consumer for queues=1 callback=handle_message relay_ex=Exchange ''(direct) relay_rk=reporting.payments prefetch=1
Or with docker compose:
docker-compose -f compose-start-mixin-celery-relay.yml up
Creating jtocrelay ... done
Attaching to jtocrelay
jtocrelay    | 2017-12-15 06:56:07,689 - jtoc_relay - INFO - Consuming queues=1
jtocrelay    | 2017-12-15 06:56:07,703 - jtoc_relay - INFO - consuming queues=[<unbound Queue ecomm.api.west -> <unbound Exchange ecomm.api(topic)> -> ecomm.api.west>]
jtocrelay    | 2017-12-15 06:56:07,720 - kombu.mixins - INFO - Connected to amqp://rabbitmq:**@127.0.0.1:5672//
Publish a User Conversion Event to the Ecomm Relay
This will use Kombu to publish a JSON dictionary message to the ecomm.api.west RabbitMQ queue which is monitored by the mixin JSON to Celery relay. This test tool is configured to simulate hypothetical worst-cast lag during the relay + message processing. This is a functional test to ensure everything stays connected and ready for more messages to process.
Please start this in a new terminal that has sourced the virtual env: source venv/bin/activate
./start-mixin-publisher.py
2017-12-14 00:42:16,849 - robopub - INFO - Generating messages=10
2017-12-14 00:42:16,850 - robopub - INFO - Publishing messages=10
2017-12-14 00:42:16,866 - pub - INFO - ex=ecomm.api rk=ecomm.api.west msg=46cb24f0d0_1
2017-12-14 00:42:16,867 - pub - INFO - ex=ecomm.api rk=ecomm.api.west msg=d2724b75fa_1
2017-12-14 00:42:16,867 - pub - INFO - ex=ecomm.api rk=ecomm.api.west msg=e72e09da34_1
2017-12-14 00:42:16,869 - pub - INFO - ex=ecomm.api rk=ecomm.api.west msg=f5ec3f0c9d_1
2017-12-14 00:42:16,870 - pub - INFO - ex=ecomm.api rk=ecomm.api.west msg=222094db10_1
2017-12-14 00:42:16,871 - pub - INFO - ex=ecomm.api rk=ecomm.api.west msg=9bed4cc0e5_1
2017-12-14 00:42:16,871 - pub - INFO - ex=ecomm.api rk=ecomm.api.west msg=f66139a9cf_1
2017-12-14 00:42:16,872 - pub - INFO - ex=ecomm.api rk=ecomm.api.west msg=94d3a2c7ed_1
2017-12-14 00:42:16,873 - pub - INFO - ex=ecomm.api rk=ecomm.api.west msg=b517f87ff4_1
2017-12-14 00:42:16,873 - pub - INFO - ex=ecomm.api rk=ecomm.api.west msg=822ef4142c_1
2017-12-14 00:42:16,874 - robopub - INFO - Done Publishing
Or with docker compose:
docker-compose -f compose-start-mixin-publisher.yml up
WARNING: Found orphan containers (jtocrelay) for this project. If you removed or renamed this service in your compose file, you can run this command with the --remove-orphans flag to clean it up.
Recreating mixinpubrmq ... done
Attaching to mixinpubrmq
mixinpubrmq    | 2017-12-15 06:56:43,517 - robopub - INFO - Generating messages=10
Verify the Ecomm Relay Processed the Conversion Message
After the simulated lag finishes, the logs for the ecomm relay should show something similar to:
2017-12-14 00:42:16,869 - jtoc - INFO - hd msg=46cb24f0d0_1 from_ex=ecomm.api from_rk=ecomm.api.west
2017-12-14 00:42:16,870 - jtoc - INFO - relay msg_id=46cb24f0d0_1 body={'msg_id': '46cb24f0d0_1', 've
2017-12-14 00:42:16,937 - jtoc - INFO - relay done with msg_id=46cb24f0d0_1
2017-12-14 00:42:16,937 - jtoc - INFO - task - ecomm_app.ecommerce.tasks.handle_user_conversion_events - simulating processing lag sleep=8.0 seconds
2017-12-14 00:42:24,947 - jtoc - INFO - hd msg=d2724b75fa_1 from_ex=ecomm.api from_rk=ecomm.api.west
2017-12-14 00:42:24,947 - jtoc - INFO - relay msg_id=d2724b75fa_1 body={'msg_id': 'd2724b75fa_1', 've
2017-12-14 00:42:24,953 - jtoc - INFO - relay done with msg_id=d2724b75fa_1
2017-12-14 00:42:24,953 - jtoc - INFO - task - ecomm_app.ecommerce.tasks.handle_user_conversion_events - simulating processing lag sleep=8.0 seconds
2017-12-14 00:42:32,962 - jtoc - INFO - hd msg=e72e09da34_1 from_ex=ecomm.api from_rk=ecomm.api.west
2017-12-14 00:42:32,963 - jtoc - INFO - relay msg_id=e72e09da34_1 body={'msg_id': 'e72e09da34_1', 've
2017-12-14 00:42:32,968 - jtoc - INFO - relay done with msg_id=e72e09da34_1
2017-12-14 00:42:32,968 - jtoc - INFO - task - ecomm_app.ecommerce.tasks.handle_user_conversion_events - simulating processing lag sleep=8.0 seconds
2017-12-14 00:42:40,982 - jtoc - INFO - hd msg=f5ec3f0c9d_1 from_ex=ecomm.api from_rk=ecomm.api.west
2017-12-14 00:42:40,983 - jtoc - INFO - relay msg_id=f5ec3f0c9d_1 body={'msg_id': 'f5ec3f0c9d_1', 've
2017-12-14 00:42:41,005 - jtoc - INFO - relay done with msg_id=f5ec3f0c9d_1
2017-12-14 00:42:41,006 - jtoc - INFO - task - ecomm_app.ecommerce.tasks.handle_user_conversion_events - simulating processing lag sleep=8.0 seconds
2017-12-14 00:42:49,014 - jtoc - INFO - hd msg=222094db10_1 from_ex=ecomm.api from_rk=ecomm.api.west
2017-12-14 00:42:49,015 - jtoc - INFO - relay msg_id=222094db10_1 body={'msg_id': '222094db10_1', 've
2017-12-14 00:42:49,024 - jtoc - INFO - relay done with msg_id=222094db10_1
2017-12-14 00:42:49,024 - jtoc - INFO - task - ecomm_app.ecommerce.tasks.handle_user_conversion_events - simulating processing lag sleep=8.0 seconds
2017-12-14 00:42:57,034 - jtoc - INFO - hd msg=9bed4cc0e5_1 from_ex=ecomm.api from_rk=ecomm.api.west
2017-12-14 00:42:57,035 - jtoc - INFO - relay msg_id=9bed4cc0e5_1 body={'msg_id': '9bed4cc0e5_1', 've
2017-12-14 00:42:57,045 - jtoc - INFO - relay done with msg_id=9bed4cc0e5_1
2017-12-14 00:42:57,045 - jtoc - INFO - task - ecomm_app.ecommerce.tasks.handle_user_conversion_events - simulating processing lag sleep=8.0 seconds
2017-12-14 00:43:05,052 - jtoc - INFO - hd msg=f66139a9cf_1 from_ex=ecomm.api from_rk=ecomm.api.west
2017-12-14 00:43:05,053 - jtoc - INFO - relay msg_id=f66139a9cf_1 body={'msg_id': 'f66139a9cf_1', 've
2017-12-14 00:43:05,061 - jtoc - INFO - relay done with msg_id=f66139a9cf_1
2017-12-14 00:43:05,061 - jtoc - INFO - task - ecomm_app.ecommerce.tasks.handle_user_conversion_events - simulating processing lag sleep=8.0 seconds
2017-12-14 00:43:13,073 - jtoc - INFO - hd msg=94d3a2c7ed_1 from_ex=ecomm.api from_rk=ecomm.api.west
2017-12-14 00:43:13,074 - jtoc - INFO - relay msg_id=94d3a2c7ed_1 body={'msg_id': '94d3a2c7ed_1', 've
2017-12-14 00:43:13,095 - jtoc - INFO - relay done with msg_id=94d3a2c7ed_1
2017-12-14 00:43:13,098 - jtoc - INFO - task - ecomm_app.ecommerce.tasks.handle_user_conversion_events - simulating processing lag sleep=8.0 seconds
2017-12-14 00:43:21,105 - jtoc - INFO - hd msg=b517f87ff4_1 from_ex=ecomm.api from_rk=ecomm.api.west
2017-12-14 00:43:21,106 - jtoc - INFO - relay msg_id=b517f87ff4_1 body={'msg_id': 'b517f87ff4_1', 've
2017-12-14 00:43:21,123 - jtoc - INFO - relay done with msg_id=b517f87ff4_1
2017-12-14 00:43:21,124 - jtoc - INFO - task - ecomm_app.ecommerce.tasks.handle_user_conversion_events - simulating processing lag sleep=8.0 seconds
2017-12-14 00:43:29,140 - jtoc - INFO - hd msg=822ef4142c_1 from_ex=ecomm.api from_rk=ecomm.api.west
2017-12-14 00:43:29,140 - jtoc - INFO - relay msg_id=822ef4142c_1 body={'msg_id': '822ef4142c_1', 've
2017-12-14 00:43:29,147 - jtoc - INFO - relay done with msg_id=822ef4142c_1
2017-12-14 00:43:29,147 - jtoc - INFO - task - ecomm_app.ecommerce.tasks.handle_user_conversion_events - simulating processing lag sleep=8.0 seconds
Verify the Ecomm Celery Application Processed the Task
The logs for the ecomm Celery worker should show something similar to:
[2017-12-14 00:42:16,938: INFO/MainProcess] Received task: ecomm_app.ecommerce.tasks.handle_user_conversion_events[7848f13c-00e1-47d1-b5a5-a8e0dea1dc04]   expires:[2017-12-14 08:47:16.881373+00:00]
[2017-12-14 00:42:16,940: INFO/ForkPoolWorker-1] task - user_conversion_events - start body={'subscription_id': 321, 'r_id': '2483467dad_1', 'stripe_id': 876, 'version': 1, 'created': '2017-12-14T00:42:16.870156', 'product_id': 'JJJ', 'account_id': 999, 'msg_id': '46cb24f0d0_1'}
[2017-12-14 00:42:16,940: INFO/ForkPoolWorker-1] task - user_conversion_events - done
[2017-12-14 00:42:16,942: INFO/ForkPoolWorker-1] Task ecomm_app.ecommerce.tasks.handle_user_conversion_events[7848f13c-00e1-47d1-b5a5-a8e0dea1dc04] succeeded in 0.002363318002608139s: True
[2017-12-14 00:42:24,954: INFO/MainProcess] Received task: ecomm_app.ecommerce.tasks.handle_user_conversion_events[4ea2b08f-efa1-46f8-a522-7e2ccde37f4e]   expires:[2017-12-14 08:47:24.950295+00:00]
[2017-12-14 00:42:24,955: INFO/ForkPoolWorker-2] task - user_conversion_events - start body={'subscription_id': 321, 'r_id': '88daa66cac_1', 'stripe_id': 876, 'version': 1, 'created': '2017-12-14T00:42:24.947811', 'product_id': 'JJJ', 'account_id': 999, 'msg_id': 'd2724b75fa_1'}
[2017-12-14 00:42:24,955: INFO/ForkPoolWorker-2] task - user_conversion_events - done
[2017-12-14 00:42:24,960: INFO/ForkPoolWorker-2] Task ecomm_app.ecommerce.tasks.handle_user_conversion_events[4ea2b08f-efa1-46f8-a522-7e2ccde37f4e] succeeded in 0.005053305001638364s: True
[2017-12-14 00:42:32,979: INFO/MainProcess] Received task: ecomm_app.ecommerce.tasks.handle_user_conversion_events[496e6c89-e725-433d-8bfa-a0d0decc8e0d]   expires:[2017-12-14 08:47:32.965396+00:00]
[2017-12-14 00:42:32,981: INFO/ForkPoolWorker-3] task - user_conversion_events - start body={'subscription_id': 321, 'r_id': '2bb5cdd264_1', 'stripe_id': 876, 'version': 1, 'created': '2017-12-14T00:42:32.963186', 'product_id': 'JJJ', 'account_id': 999, 'msg_id': 'e72e09da34_1'}
[2017-12-14 00:42:32,981: INFO/ForkPoolWorker-3] task - user_conversion_events - done
[2017-12-14 00:42:32,987: INFO/ForkPoolWorker-3] Task ecomm_app.ecommerce.tasks.handle_user_conversion_events[496e6c89-e725-433d-8bfa-a0d0decc8e0d] succeeded in 0.00654161800048314s: True
[2017-12-14 00:42:41,008: INFO/MainProcess] Received task: ecomm_app.ecommerce.tasks.handle_user_conversion_events[f4f7681e-1bca-4798-a73a-89f62317651d]   expires:[2017-12-14 08:47:40.991378+00:00]
[2017-12-14 00:42:41,012: INFO/ForkPoolWorker-1] task - user_conversion_events - start body={'subscription_id': 321, 'r_id': '5365dc6b70_1', 'stripe_id': 876, 'version': 1, 'created': '2017-12-14T00:42:40.983174', 'product_id': 'JJJ', 'account_id': 999, 'msg_id': 'f5ec3f0c9d_1'}
[2017-12-14 00:42:41,012: INFO/ForkPoolWorker-1] task - user_conversion_events - done
[2017-12-14 00:42:41,014: INFO/ForkPoolWorker-1] Task ecomm_app.ecommerce.tasks.handle_user_conversion_events[f4f7681e-1bca-4798-a73a-89f62317651d] succeeded in 0.002192696003476158s: True
[2017-12-14 00:42:49,026: INFO/MainProcess] Received task: ecomm_app.ecommerce.tasks.handle_user_conversion_events[35d5ed9e-aacf-4b05-bae0-f74b8df83ad2]   expires:[2017-12-14 08:47:49.017937+00:00]
[2017-12-14 00:42:49,028: INFO/ForkPoolWorker-2] task - user_conversion_events - start body={'subscription_id': 321, 'r_id': 'f369b4c0e0_1', 'stripe_id': 876, 'version': 1, 'created': '2017-12-14T00:42:49.015218', 'product_id': 'JJJ', 'account_id': 999, 'msg_id': '222094db10_1'}
[2017-12-14 00:42:49,028: INFO/ForkPoolWorker-2] task - user_conversion_events - done
[2017-12-14 00:42:49,031: INFO/ForkPoolWorker-2] Task ecomm_app.ecommerce.tasks.handle_user_conversion_events[35d5ed9e-aacf-4b05-bae0-f74b8df83ad2] succeeded in 0.00297039799625054s: True
[2017-12-14 00:42:57,047: INFO/MainProcess] Received task: ecomm_app.ecommerce.tasks.handle_user_conversion_events[4c9137a1-e4c0-44f2-852d-b96e8004cf52]   expires:[2017-12-14 08:47:57.040272+00:00]
[2017-12-14 00:42:57,050: INFO/ForkPoolWorker-3] task - user_conversion_events - start body={'subscription_id': 321, 'r_id': '81646a1d3e_1', 'stripe_id': 876, 'version': 1, 'created': '2017-12-14T00:42:57.035385', 'product_id': 'JJJ', 'account_id': 999, 'msg_id': '9bed4cc0e5_1'}
[2017-12-14 00:42:57,051: INFO/ForkPoolWorker-3] task - user_conversion_events - done
[2017-12-14 00:42:57,053: INFO/ForkPoolWorker-3] Task ecomm_app.ecommerce.tasks.handle_user_conversion_events[4c9137a1-e4c0-44f2-852d-b96e8004cf52] succeeded in 0.0024162650006473996s: True
[2017-12-14 00:43:05,061: INFO/MainProcess] Received task: ecomm_app.ecommerce.tasks.handle_user_conversion_events[c0eafd5b-803a-4550-9bba-961d7ab7f4cc]   expires:[2017-12-14 08:48:05.056204+00:00]
[2017-12-14 00:43:05,064: INFO/ForkPoolWorker-1] task - user_conversion_events - start body={'subscription_id': 321, 'r_id': '360be5bb5d_1', 'stripe_id': 876, 'version': 1, 'created': '2017-12-14T00:43:05.052968', 'product_id': 'JJJ', 'account_id': 999, 'msg_id': 'f66139a9cf_1'}
[2017-12-14 00:43:05,065: INFO/ForkPoolWorker-1] task - user_conversion_events - done
[2017-12-14 00:43:05,067: INFO/ForkPoolWorker-1] Task ecomm_app.ecommerce.tasks.handle_user_conversion_events[c0eafd5b-803a-4550-9bba-961d7ab7f4cc] succeeded in 0.003034861001651734s: True
[2017-12-14 00:43:13,100: INFO/MainProcess] Received task: ecomm_app.ecommerce.tasks.handle_user_conversion_events[b402c99b-b998-48b8-9cb8-bb49b1289032]   expires:[2017-12-14 08:48:13.081228+00:00]
[2017-12-14 00:43:13,106: INFO/ForkPoolWorker-2] task - user_conversion_events - start body={'subscription_id': 321, 'r_id': '5d4d3f1277_1', 'stripe_id': 876, 'version': 1, 'created': '2017-12-14T00:43:13.074799', 'product_id': 'JJJ', 'account_id': 999, 'msg_id': '94d3a2c7ed_1'}
[2017-12-14 00:43:13,107: INFO/ForkPoolWorker-2] task - user_conversion_events - done
[2017-12-14 00:43:13,110: INFO/ForkPoolWorker-2] Task ecomm_app.ecommerce.tasks.handle_user_conversion_events[b402c99b-b998-48b8-9cb8-bb49b1289032] succeeded in 0.004359455000667367s: True
[2017-12-14 00:43:21,127: INFO/MainProcess] Received task: ecomm_app.ecommerce.tasks.handle_user_conversion_events[a57b8b49-349a-44d3-99fc-12f96d69d489]   expires:[2017-12-14 08:48:21.114216+00:00]
[2017-12-14 00:43:21,129: INFO/ForkPoolWorker-3] task - user_conversion_events - start body={'subscription_id': 321, 'r_id': '97ec19ac8d_1', 'stripe_id': 876, 'version': 1, 'created': '2017-12-14T00:43:21.106783', 'product_id': 'JJJ', 'account_id': 999, 'msg_id': 'b517f87ff4_1'}
[2017-12-14 00:43:21,130: INFO/ForkPoolWorker-3] task - user_conversion_events - done
[2017-12-14 00:43:21,133: INFO/ForkPoolWorker-3] Task ecomm_app.ecommerce.tasks.handle_user_conversion_events[a57b8b49-349a-44d3-99fc-12f96d69d489] succeeded in 0.003475217003142461s: True
[2017-12-14 00:43:29,150: INFO/MainProcess] Received task: ecomm_app.ecommerce.tasks.handle_user_conversion_events[da0c3a78-cac7-4b78-8a32-568d8a5c7362]   expires:[2017-12-14 08:48:29.143188+00:00]
[2017-12-14 00:43:29,152: INFO/ForkPoolWorker-1] task - user_conversion_events - start body={'subscription_id': 321, 'r_id': '6f3fe96baf_1', 'stripe_id': 876, 'version': 1, 'created': '2017-12-14T00:43:29.140647', 'product_id': 'JJJ', 'account_id': 999, 'msg_id': '822ef4142c_1'}
[2017-12-14 00:43:29,152: INFO/ForkPoolWorker-1] task - user_conversion_events - done
[2017-12-14 00:43:29,155: INFO/ForkPoolWorker-1] Task ecomm_app.ecommerce.tasks.handle_user_conversion_events[da0c3a78-cac7-4b78-8a32-568d8a5c7362] succeeded in 0.0034106169987353496s: True
Benchmark the JSON to Celery Relay Service
The start-mixin-load-test.py load test will send in 20,000 messages with no simulated lag. This may take a few moments to finish so you might want to open a new terminal and source the virtual env to run watch -n5 list-queues.sh for tracking the test's progress.
./start-mixin-load-test.py
2017-12-14 00:48:06,217 - robopub - INFO - Generating messages=20000
2017-12-14 00:48:06,694 - robopub - INFO - Publishing messages=20000
2017-12-14 00:48:06,821 - pub - INFO - 1.00 send done msg=200/20000 ex=ecomm.api rk=ecomm.api.west
2017-12-14 00:48:06,821 - pub - INFO - ex=ecomm.api rk=ecomm.api.west msg=69ae9e80bf_1
2017-12-14 00:48:06,916 - pub - INFO - 2.00 send done msg=400/20000 ex=ecomm.api rk=ecomm.api.west
2017-12-14 00:48:06,917 - pub - INFO - ex=ecomm.api rk=ecomm.api.west msg=43c153a155_1
2017-12-14 00:48:07,015 - pub - INFO - 3.00 send done msg=600/20000 ex=ecomm.api rk=ecomm.api.west
2017-12-14 00:48:07,016 - pub - INFO - ex=ecomm.api rk=ecomm.api.west msg=1978ebf438_1
2017-12-14 00:48:07,075 - pub - INFO - 4.00 send done msg=800/20000 ex=ecomm.api rk=ecomm.api.west
2017-12-14 00:48:07,075 - pub - INFO - ex=ecomm.api rk=ecomm.api.west msg=3dbae69bb2_1
2017-12-14 00:48:07,157 - pub - INFO - 5.00 send done msg=1000/20000 ex=ecomm.api rk=ecomm.api.west
2017-12-14 00:48:07,158 - pub - INFO - ex=ecomm.api rk=ecomm.api.west msg=a5dda8b23a_1
2017-12-14 00:48:07,240 - pub - INFO - 6.00 send done msg=1200/20000 ex=ecomm.api rk=ecomm.api.west
2017-12-14 00:48:07,241 - pub - INFO - ex=ecomm.api rk=ecomm.api.west msg=138a5c7939_1
2017-12-14 00:48:07,310 - pub - INFO - 7.00 send done msg=1400/20000 ex=ecomm.api rk=ecomm.api.west
2017-12-14 00:48:07,311 - pub - INFO - ex=ecomm.api rk=ecomm.api.west msg=a1c6315380_1
2017-12-14 00:48:07,374 - pub - INFO - 8.00 send done msg=1600/20000 ex=ecomm.api rk=ecomm.api.west
2017-12-14 00:48:07,374 - pub - INFO - ex=ecomm.api rk=ecomm.api.west msg=f1cf343847_1
Or with docker compose:
docker-compose -f compose-start-mixin-load-test.yml up
WARNING: Found orphan containers (ecommworker, jtocrelay) for this project. If you removed or renamed this service in your compose file, you can run this command with the --remove-orphans flag to clean it up.
Starting mixinloadtest ... done
Attaching to mixinloadtest
Sample output during that load test:
list-queues.sh

Listing Queues broker=localhost:15672
| name | durable | auto_delete | consumers | messages | messages_ready | messages_unacknowledged |
| celery | True | False | 1 | 0 | 0 | 0 |
| celery@ecommerce_subscriber.celery.pidbox | False | True | 1 | 0 | 0 | 0 |
| celeryev.28b0b3a0-2e82-4e16-b829-a2835763b3cb | False | True | 1 | 0 | 0 | 0 |
| celeryev.b019122d-0dd3-48c0-8c0a-b82f4fb8d4d7 | False | True | 1 | 0 | 0 | 0 |
| ecomm.api.west | True | False | 1 | 17810 | 17809 | 1 |
View the Ecomm Celery Worker Tasks in Flower
You can also watch progress using the Flower Celery monitoring application that's included in the docker compose file.
Here's a snapshot of my 20,000 + 10 messages using the celery@ecommerce_subscriber Celery worker.
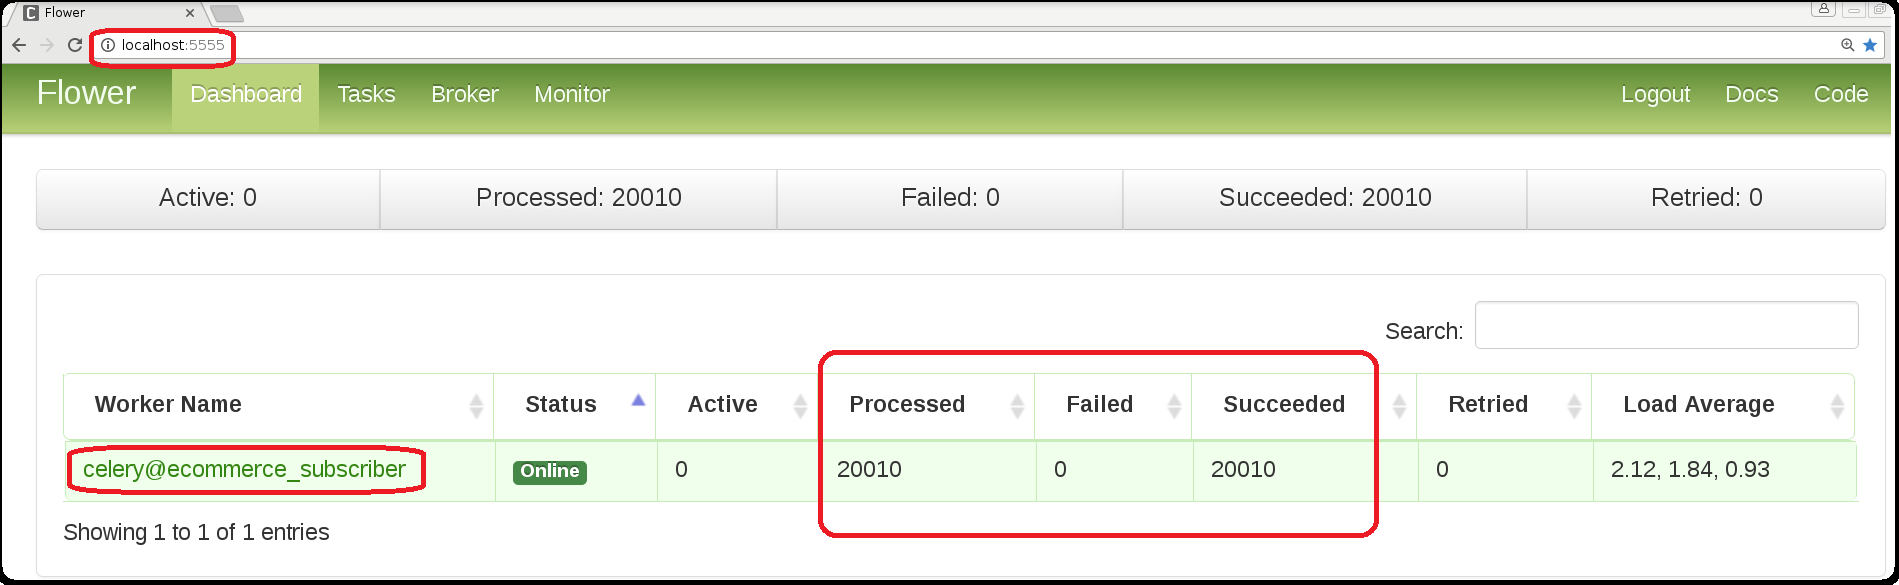
The Processed and Succeeded task counts for the celery@ecommerce_subscriber should increment each time a User Conversion Event is published by the ecomm relay to the ecomm worker.
http://localhost:5555/dashboard (login: admin/admin)
View specific task details:
Stop the Ecomm Demo
Restart the docker containers to a good, clean state.
Stop:
stop-redis-and-rabbitmq.sh
Stopping redis and rabbitmq
Stopping celrabbit1      ... done
Stopping celredis1       ... done
Stopping celflowerredis  ... done
Stopping celflowerrabbit ... done
Start:
start-redis-and-rabbitmq.sh
Starting redis and rabbitmq
Creating celrabbit1 ... done
Verify the Relay Service Automatically Healed
Want to try the load test again now that we just simulated a broker outage for all of the messaging and monitoring containers?
./start-mixin-load-test.py
or
docker-compose -f compose-start-mixin-load-test.yml up
If not, then stop the ecomm relay and ecomm worker terminal sessions using: ctrl + c
Running an Ecommerce JSON-to-Celery Relay Service - Example 2
This example uses just kombu producers and consumers instead of the kombu.ConsumerProducerMixin to run the same relay as the example above.
Start Ecommerce Celery Worker
Start a Celery worker for an existing ecommerce application from a hypothetical Django or Flask server.
Note: Please run this from the base directory for the repository and source the virtual env: source venv/bin/activate
./start-ecomm-worker.sh

-------------- celery@ecommerce_subscriber v4.1.0 (latentcall)
---- **** -----
--- * ***  * -- Linux-4.7.4-200.fc24.x86_64-x86_64-with-fedora-24-Twenty_Four 2017-12-14 00:33:02
-- * - **** ---
- ** ---------- [config]
- ** ---------- .> app:         ecommerce-worker:0x7f0c23f1c550
- ** ---------- .> transport:   amqp://rabbitmq:**@localhost:5672//
- ** ---------- .> results:     redis://localhost:6379/10
- *** --- * --- .> concurrency: 3 (prefork)
-- ******* ---- .> task events: OFF (enable -E to monitor tasks in this worker)
--- ***** -----
-------------- [queues]
                .> celery           exchange=celery(direct) key=celery


[tasks]
. ecomm_app.ecommerce.tasks.handle_user_conversion_events

[2017-12-14 00:33:02,243: INFO/MainProcess] Connected to amqp://rabbitmq:**@127.0.0.1:5672//
[2017-12-14 00:33:02,260: INFO/MainProcess] mingle: searching for neighbors
[2017-12-14 00:33:03,293: INFO/MainProcess] mingle: all alone
[2017-12-14 00:33:03,337: INFO/MainProcess] celery@ecommerce_subscriber ready.
[2017-12-14 00:33:05,275: INFO/MainProcess] Events of group {task} enabled by remote.
Or with docker compose:
docker-compose -f compose-start-ecomm-worker.yml up
Starting ecommworker ... done
Attaching to ecommworker
Notice the worker is named celery@ecommerce_subscriber this is the identifier for viewing the Celery application in Flower:
http://localhost:5555/worker/celery@ecommerce_subscriber (login: admin/admin)
Start Ecomm Relay
This process will consume JSON dictionary messages on the user.events.conversions RabbitMQ queue and pass the message to the ecomm Celery app as a ecomm_app.ecommerce.tasks.handle_user_conversion_events Celery task.
Please start this in a new terminal that has sourced the virtual env: source venv/bin/activate
./start-ecomm-relay.py
2017-12-14 00:33:36,943 - ecomm-relay-loader - INFO - Start - ecomm-relay
2017-12-14 00:33:36,944 - message-processor - INFO - ecomm-relay START - consume_queue=user.events.conversions rk=reporting.accounts callback=relay_callback
2017-12-14 00:33:36,944 - kombu-subscriber - INFO - setup routing
Or with docker compose:
docker-compose -f compose-start-ecomm-relay.yml up
WARNING: Found orphan containers (ecommworker) for this project. If you removed or renamed this service in your compose file, you can run this command with the --remove-orphans flag to clean it up.
Creating ecommrelay ... done
Attaching to ecommrelay
Publish a User Conversion Event to the Ecomm Relay
This will use Kombu to publish a JSON dictionary message to the user.events.conversions RabbitMQ queue which is monitored by the ecomm relay.
Please start this in a new terminal that has sourced the virtual env: source venv/bin/activate
publish-user-conversion-events-rabbitmq.py
INFO:publish-user-conversion-events:Start - publish-user-conversion-events
INFO:publish-user-conversion-events:Sending user conversion event msg={'product_id': 'XYZ', 'stripe_id': 999, 'account_id': 777, 'created': '2017-12-14T00:33:55.826534', 'subscription_id': 888} ex=user.events rk=user.events.conversions
INFO:kombu-publisher:SEND - exch=user.events rk=user.events.conversions
INFO:publish-user-conversion-events:End - publish-user-conversion-events sent=True
Or with docker compose:
docker-compose -f compose-publish-user-conversion-events-rabbitmq.yml up
WARNING: Found orphan containers (ecommrelay, ecommworker) for this project. If you removed or renamed this service in your compose file, you can run this command with the --remove-orphans flag to clean it up.
Starting ucepubrmq ... done
Attaching to ucepubrmq
Verify the Ecomm Relay Processed the Conversion Message
The logs for the ecomm relay should show something similar to:
2017-12-14 00:33:55,865 - ecomm-relay-loader - INFO - Sending broker=amqp://rabbitmq:rabbitmq@localhost:5672// body={'org_msg': {'stripe_id': 999, 'created': '2017-12-14T00:33:55.826534', 'product_id': 'XYZ', 'subscription_id': 888, 'account_id': 777}, 'stripe_id': 876, 'version': 1, 'account_id': 999, 'msg_id': '7a73a74d-f539-4634-8a03-2aa2a5fd8d5e', 'created': '2017-12-14T00:33:55.863870', 'product_id': 'JJJ', 'subscription_id': 321}
2017-12-14 00:33:55,928 - ecomm-relay-loader - INFO - Done with msg_id=7a73a74d-f539-4634-8a03-2aa2a5fd8d5e result=True
Verify the Ecomm Celery Application Processed the Task
The logs for the ecomm Celery worker should show something similar to:
[2017-12-14 00:33:55,919: INFO/MainProcess] Received task: ecomm_app.ecommerce.tasks.handle_user_conversion_events[9ee85235-0ffb-4c46-9cd7-0bd2c153bd9b]
[2017-12-14 00:33:55,921: INFO/ForkPoolWorker-1] task - user_conversion_events - start body={'subscription_id': 321, 'stripe_id': 876, 'org_msg': {'subscription_id': 888, 'stripe_id': 999, 'created': '2017-12-14T00:33:55.826534', 'product_id': 'XYZ', 'account_id': 777}, 'version': 1, 'created': '2017-12-14T00:33:55.863870', 'product_id': 'JJJ', 'account_id': 999, 'msg_id': '7a73a74d-f539-4634-8a03-2aa2a5fd8d5e'}
[2017-12-14 00:33:55,921: INFO/ForkPoolWorker-1] task - user_conversion_events - done
[2017-12-14 00:33:55,926: INFO/ForkPoolWorker-1] Task ecomm_app.ecommerce.tasks.handle_user_conversion_events[9ee85235-0ffb-4c46-9cd7-0bd2c153bd9b] succeeded in 0.0055257950007217005s: True
View the Ecomm Celery Worker Tasks in Flower
The Processed and Succeeded task counts for the celery@ecommerce_subscriber should increment each time a User Conversion Event is published by the ecomm relay to the ecomm worker.
http://localhost:5555/dashboard
View specific task details:
Stop the Ecomm Demo
In the ecomm relay and ecomm worker terminal sessions use: ctrl + c to stop the processes.
Restart the docker containers to a good, clean state.
Stop:
stop-redis-and-rabbitmq.sh
Stopping redis and rabbitmq
Stopping celrabbit1      ... done
Stopping celredis1       ... done
Stopping celflowerredis  ... done
Stopping celflowerrabbit ... done
Start:
start-redis-and-rabbitmq.sh
Starting redis and rabbitmq
Creating celrabbit1 ... done
Creating celrabbit1 ... done
Creating celredis1 ... done
Creating celflowerredis ... done
Celery Bootstep with RabbitMQ Outage Example
This example uses Celery bootsteps (http://docs.celeryproject.org/en/latest/userguide/extending.html) to run a standalone, headless subscriber that consumes routed messages to two queues. It will set up a RabbitMQ topic exchange with a queue that is bound using a routing key and a separate direct queue for additional messages to process. Once the entities are available in RabbitMQ, Kombu publishes the message to the exchanges and RabbitMQ provides the messaging facility to route the messages to the subscribed Celery workers' queues. Once messages are being processed we will simulate a broker failure and see how resilient Celery bootsteps are to this type of disaster.
-
Stop and Start the docker containers
./stop-redis-and-rabbitmq.sh
Stopping redis and rabbitmq
Stopping celredis1       ... done
Stopping celflowerrabbit ... done
Stopping celflowerredis  ... done
Stopping celrabbit1      ... done
./start-redis-and-rabbitmq.sh
Starting redis and rabbitmq
Creating celrabbit1 ... done
Creating celredis1 ...
Creating celflowerredis ...
Creating celrabbit1 ...
-
List the Queues
list-queues.sh
Listing Queues broker=localhost:15672
name
durable
auto_delete
consumers
messages
messages_ready
messages_unacknowledged
celeryev.a1ccb5f7-4f76-4e26-9cdc-bf5438ba5362
False
True
1
0
0
0
-
Publish a message
run_rabbitmq_publisher.py
INFO:run-rabbitmq-publisher:Start - run-rabbitmq-publisher
INFO:run-rabbitmq-publisher:Sending msg={'created': '2017-12-14T18:08:29.481313', 'account_id': 456} ex=reporting rk=reporting.accounts
INFO:kombu-publisher:SEND - exch=reporting rk=reporting.accounts
INFO:run-rabbitmq-publisher:End - run-rabbitmq-publisher sent=True
Or with docker compose:
docker-compose -f compose-run-rabbitmq-publisher.yml up Creating kombupubrmq ... done Attaching to kombupubrmq kombupubrmq | 2017-12-15 07:31:23,802 - run-rabbitmq-publisher - INFO - Start - run-rabbitmq-publisher kombupubrmq | 2017-12-15 07:31:23,802 - run-rabbitmq-publisher - INFO - Sending msg={'account_id': 456, 'created': '2017-12-15T07:31:23.802616'} ex=reporting rk=reporting.accounts kombupubrmq | 2017-12-15 07:31:23,899 - kombu-publisher - INFO - SEND - exch=reporting rk=reporting.accounts kombupubrmq | 2017-12-15 07:31:23,903 - run-rabbitmq-publisher - INFO - End - run-rabbitmq-publisher sent=True kombupubrmq exited with code 0 -
Confirm the message is ready in the RabbitMQ Queue
Note the
messagesandmessages_readycount increased while themessages_unacknowledgeddid not. Which is because we have not started the subscriber to process ready messages in thereporting.accountsqueue.list-queues.sh
Listing Queues broker=localhost:15672
name
durable
auto_delete
consumers
messages
messages_ready
messages_unacknowledged
celeryev.a1ccb5f7-4f76-4e26-9cdc-bf5438ba5362
False
True
1
0
0
0
reporting.accounts
True
False
0
1
1
0
-
List the Exchanges
list-exchanges.sh
Listing Exchanges broker=localhost:15672
name
type
durable
auto_delete
direct
True
False
amq.direct
direct
True
False
amq.fanout
fanout
True
False
amq.headers
headers
True
False
amq.match
headers
True
False
amq.rabbitmq.log
topic
True
False
amq.rabbitmq.trace
topic
True
False
amq.topic
topic
True
False
celery.pidbox
fanout
False
False
celeryev
topic
True
False
reply.celery.pidbox
direct
False
False
reporting
topic
True
False
-
Consume that message by starting up the Celery Rabbitmq subscriber module
This will consume messages from the
reporting.accountsandreporting.subscriptionsqueues.celery worker -A run_rabbitmq_subscriber -n rabbitmq_bootstep -c 3 --loglevel=INFO -Ofair
Or with docker compose:
docker-compose -f compose-run-celery-rabbitmq-subscriber.yml up
Creating celeryrabbitmqsubscriber ... done
Attaching to celeryrabbitmqsubscriber
-
Confirm the worker's logs show the message was received
2017-12-14 10:10:25,832: INFO callback received msg body={'account_id': 456, 'created': '2017-12-14T18:08:29.481313'} from_ex=reporting from_rk=reporting.accounts -
View the Rabbit Subscriber
celery@rabbitmq_bootstepin FlowerRabbit Flower server (login admin/admin)
-
Verify the message is no longer in the Queue and Celery is connected as a consumer
With the Celery RabbitMQ worker still running, in a new terminal list the queues. Verify there is a consumer on the
reporting.accountsandreporting.subscriptionsqueues.list-queues.sh
Listing Queues broker=localhost:15672
name
durable
auto_delete
consumers
messages
messages_ready
messages_unacknowledged
celery.rabbit.sub
True
False
1
0
0
0
False
True
1
0
0
0
celeryev.a1ccb5f7-4f76-4e26-9cdc-bf5438ba5362
False
True
1
0
0
0
celeryev.f85fe29a-b729-48fa-a17d-b7e12c14dba8
False
True
1
0
0
0
reporting.accounts
True
False
1
0
0
0
reporting.subscriptions
True
False
1
0
0
0
-
Start the Queue watcher
In a new terminal activate the virtual env
source venv/bin/activate.watch-queues.sh
The watch will poll RabbitMQ for the queues every second and before the load tests start should look empty:
name
durable
auto_delete
consumers
messages
messages_ready
messages_unacknowledged
celery.rabbit.sub
True
False
1
0
0
0
False
True
1
0
0
0
celeryev.a1ccb5f7-4f76-4e26-9cdc-bf5438ba5362
False
True
1
0
0
0
celeryev.f85fe29a-b729-48fa-a17d-b7e12c14dba8
False
True
1
0
0
0
reporting.accounts
True
False
1
0
0
0
reporting.subscriptions
True
False
1
0
0
0
-
Start the Accounts and Subscriptions Load Tests
This will require two separate terminal sessions with the virtual env activated
source venv/bin/activate.In terminal 1 start the Accounts load test
start-load-test-rabbitmq.py
Or with docker compose:
docker-compose -f compose-start-load-test-rabbitmq.yml up
WARNING: Found orphan containers (subsloadtest, celeryrabbitmqsubscriber) for this project. If you removed or renamed this service in your compose file, you can run this command with the --remove-orphans flag to clean it up.
Creating loadtestrmq ... done
Attaching to loadtestrmq
In terminal 2 start the Subscriptions load test
start-subscriptions-rabbitmq-test.py
Or with docker compose:
docker-compose -f compose-start-subscriptions-rabbitmq-test.yml up
WARNING: Found orphan containers (celeryrabbitmqsubscriber) for this project. If you removed or renamed this service in your compose file, you can run this command with the --remove-orphans flag to clean it up.
Creating subsloadtest ... done
Attaching to subsloadtest
-
Verify the Queues are filling up
After a few seconds, the queues should be filling up with Account and Subscription messages that are being actively processed.
name
durable
auto_delete
consumers
messages
messages_ready
messages_unacknowledged
celery.rabbit.sub
True
False
1
0
0
0
False
True
1
0
0
0
celeryev.a1ccb5f7-4f76-4e26-9cdc-bf5438ba5362
False
True
1
0
0
0
celeryev.f85fe29a-b729-48fa-a17d-b7e12c14dba8
False
True
1
0
0
0
reporting.accounts
True
False
1
31157
31154
3
reporting.subscriptions
True
False
1
30280
30277
3
-
Verify the Celery Bootstep Subscriber is processing messages
By default the Celery subscriber workers are processing 1 message at a time per consumer. In this example we started 3 workers so there are 3 messages that are unacknowledged at a time. Confirm messages are being processed
from_rk=reporting.subscriptionsandfrom_rk=reporting.accounts. This means the Celery workers are processing messages that have routing keys from the different queues.2017-12-14 10:24:12,168: INFO callback received msg body={'data': {}, 'created': '2017-12-14T18:21:46.178164', 'msg_id': '66e0d69aa0_1'} from_ex= from_rk=reporting.subscriptions 2017-12-14 10:24:12,168: INFO callback received msg body={'data': {}, 'created': '2017-12-14T18:21:46.845445', 'msg_id': 'd64e18e7be_1'} from_ex= from_rk=reporting.accounts 2017-12-14 10:24:12,169: INFO callback received msg body={'data': {}, 'created': '2017-12-14T18:21:46.178278', 'msg_id': '712132669a_1'} from_ex= from_rk=reporting.subscriptions 2017-12-14 10:24:12,170: INFO callback received msg body={'data': {}, 'created': '2017-12-14T18:21:46.845478', 'msg_id': '2174427099_1'} from_ex= from_rk=reporting.accounts 2017-12-14 10:24:12,182: INFO callback received msg body={'data': {}, 'created': '2017-12-14T18:21:46.178345', 'msg_id': '1d4a251145_1'} from_ex= from_rk=reporting.subscriptions 2017-12-14 10:24:12,183: INFO callback received msg body={'data': {}, 'created': '2017-12-14T18:21:46.178380', 'msg_id': 'b62922b333_1'} from_ex= from_rk=reporting.subscriptions 2017-12-14 10:24:12,184: INFO callback received msg body={'data': {}, 'created': '2017-12-14T18:21:46.178404', 'msg_id': 'adc1b1988e_1'} from_ex= from_rk=reporting.subscriptions 2017-12-14 10:24:12,184: INFO callback received msg body={'data': {}, 'created': '2017-12-14T18:21:46.845491', 'msg_id': '91ac6c413c_1'} from_ex= from_rk=reporting.accounts 2017-12-14 10:24:12,184: INFO callback received msg body={'data': {}, 'created': '2017-12-14T18:21:46.845505', 'msg_id': '0ffd4abf90_1'} from_ex= from_rk=reporting.accounts 2017-12-14 10:24:12,185: INFO callback received msg body={'data': {}, 'created': '2017-12-14T18:21:46.845519', 'msg_id': '5a11d2aa97_1'} from_ex= from_rk=reporting.accounts 2017-12-14 10:24:12,185: INFO callback received msg body={'data': {}, 'created': '2017-12-14T18:21:46.178843', 'msg_id': '77dd35ade4_1'} from_ex= from_rk=reporting.subscriptions 2017-12-14 10:24:12,186: INFO callback received msg body={'data': {}, 'created': '2017-12-14T18:21:46.178944', 'msg_id': '2317ff179d_1'} from_ex= from_rk=reporting.subscriptions 2017-12-14 10:24:12,186: INFO callback received msg body={'data': {}, 'created': '2017-12-14T18:21:46.179021', 'msg_id': 'acce2d2672_1'} from_ex= from_rk=reporting.subscriptions -
Stop the Docker containers
Note: you can stop the docker containers while the tests are still publishing messages if you want. They should gracefully reconnect once the broker is restored.
./stop-redis-and-rabbitmq.sh
Stopping redis and rabbitmq
Stopping celflowerredis  ... done
Stopping celflowerrabbit ... done
Stopping celrabbit1      ... done
Stopping celredis1       ... done
-
Confirm Celery was disconnected
2017-12-14 10:27:00,213: INFO callback received msg body={'data': {}, 'created': '2017-12-14T18:21:46.995821', 'msg_id': 'a138cf8d8c_1'} from_ex= from_rk=reporting.accounts 2017-12-14 10:27:00,213: INFO callback received msg body={'data': {}, 'created': '2017-12-14T18:21:46.461333', 'msg_id': '406df22df7_1'} from_ex= from_rk=reporting.subscriptions 2017-12-14 10:27:00,214: INFO callback received msg body={'data': {}, 'created': '2017-12-14T18:21:46.461346', 'msg_id': 'a473232ee4_1'} from_ex= from_rk=reporting.subscriptions 2017-12-14 10:27:00,214: INFO callback received msg body={'data': {}, 'created': '2017-12-14T18:21:46.461361', 'msg_id': '12219ca1fd_1'} from_ex= from_rk=reporting.subscriptions 2017-12-14 10:27:00,330: WARNING consumer: Connection to broker lost. Trying to re-establish the connection... Traceback (most recent call last): File "/home/driver/dev/celery-connectors/venv/lib/python3.5/site-packages/celery/worker/consumer/consumer.py", line 320, in start blueprint.start(self) File "/home/driver/dev/celery-connectors/venv/lib/python3.5/site-packages/celery/bootsteps.py", line 119, in start step.start(parent) File "/home/driver/dev/celery-connectors/venv/lib/python3.5/site-packages/celery/worker/consumer/consumer.py", line 596, in start c.loop(*c.loop_args()) File "/home/driver/dev/celery-connectors/venv/lib/python3.5/site-packages/celery/worker/loops.py", line 88, in asynloop next(loop) File "/home/driver/dev/celery-connectors/venv/lib/python3.5/site-packages/kombu-4.1.0-py3.5.egg/kombu/async/hub.py", line 354, in create_loop cb(*cbargs) File "/home/driver/dev/celery-connectors/venv/lib/python3.5/site-packages/kombu-4.1.0-py3.5.egg/kombu/transport/base.py", line 236, in on_readable reader(loop) File "/home/driver/dev/celery-connectors/venv/lib/python3.5/site-packages/kombu-4.1.0-py3.5.egg/kombu/transport/base.py", line 218, in _read drain_events(timeout=0) File "/home/driver/dev/celery-connectors/venv/lib/python3.5/site-packages/amqp-2.2.2-py3.5.egg/amqp/connection.py", line 471, in drain_events while not self.blocking_read(timeout): File "/home/driver/dev/celery-connectors/venv/lib/python3.5/site-packages/amqp-2.2.2-py3.5.egg/amqp/connection.py", line 476, in blocking_read frame = self.transport.read_frame() File "/home/driver/dev/celery-connectors/venv/lib/python3.5/site-packages/amqp-2.2.2-py3.5.egg/amqp/transport.py", line 226, in read_frame frame_header = read(7, True) File "/home/driver/dev/celery-connectors/venv/lib/python3.5/site-packages/amqp-2.2.2-py3.5.egg/amqp/transport.py", line 409, in _read raise IOError('Socket closed') OSError: Socket closed 2017-12-14 10:27:00,341: ERROR consumer: Cannot connect to amqp://rabbitmq:**@127.0.0.1:5672//: [Errno 104] Connection reset by peer. Trying again in 2.00 seconds... 2017-12-14 10:27:02,369: ERROR consumer: Cannot connect to amqp://rabbitmq:**@127.0.0.1:5672//: [Errno 111] Connection refused. Trying again in 4.00 seconds... -
Start the Docker containers
./start-redis-and-rabbitmq.sh
Starting redis and rabbitmq
Creating celrabbit1 ... done
Creating celredis1 ...
Creating celflowerrabbit ...
Creating celflowerredis ...
-
Verify the Celery workers reconnected
2017-12-14 10:28:50,841: INFO Connected to amqp://rabbitmq:**@127.0.0.1:5672//
2017-12-14 10:28:50,872: INFO mingle: searching for neighbors
2017-12-14 10:28:51,925: INFO mingle: all alone
-
Start the multi-queue load test publishers again
In terminal 1:
./start-subscriptions-rabbitmq-test.py
Or with docker compose:
docker-compose -f compose-start-load-test-rabbitmq.yml up
In terminal 2:
./start-load-test-rabbitmq.py
Or with docker compose:
docker-compose -f compose-start-subscriptions-rabbitmq-test.yml up
-
Verify Celery is processing messages from both queues again
2017-12-14 10:32:19,325: INFO callback received msg body={'data': {}, 'created': '2017-12-14T18:31:07.315190', 'msg_id': '22ede22ba6_1'} from_ex= from_rk=reporting.subscriptions
2017-12-14 10:32:19,326: INFO callback received msg body={'data': {}, 'created': '2017-12-14T18:31:07.315213', 'msg_id': '26f1103534_1'} from_ex= from_rk=reporting.subscriptions
2017-12-14 10:32:19,329: INFO callback received msg body={'data': {}, 'created': '2017-12-14T18:31:05.232153', 'msg_id': '10d7a731ca_1'} from_ex= from_rk=reporting.accounts
2017-12-14 10:32:19,333: INFO callback received msg body={'data': {}, 'created': '2017-12-14T18:31:05.232174', 'msg_id': 'ae75ede630_1'} from_ex= from_rk=reporting.accounts
2017-12-14 10:32:19,336: INFO callback received msg body={'data': {}, 'created': '2017-12-14T18:31:07.315225', 'msg_id': '0e86894ae3_1'} from_ex= from_rk=reporting.subscriptions
2017-12-14 10:32:19,337: INFO callback received msg body={'data': {}, 'created': '2017-12-14T18:31:05.232186', 'msg_id': '2066f80569_1'} from_ex= from_rk=reporting.accounts
2017-12-14 10:32:19,337: INFO callback received msg body={'data': {}, 'created': '2017-12-14T18:31:07.315240', 'msg_id': 'ea82241224_1'} from_ex= from_rk=reporting.subscriptions
2017-12-14 10:32:19,337: INFO callback received msg body={'data': {}, 'created': '2017-12-14T18:31:07.315264', 'msg_id': 'accbebead8_1'} from_ex= from_rk=reporting.subscriptions
2017-12-14 10:32:19,339: INFO callback received msg body={'data': {}, 'created': '2017-12-14T18:31:05.232198', 'msg_id': '8788b7fa97_1'} from_ex= from_rk=reporting.accounts
Stop the Celery Bootstep example
In all example terminal sessions, use: ctrl + c to stop any processes you no longer want to run.
Restart the docker containers to a good, clean state for the next example.
Stop:
stop-redis-and-rabbitmq.sh
Stopping redis and rabbitmq
Stopping celrabbit1      ... done
Stopping celredis1       ... done
Stopping celflowerredis  ... done
Stopping celflowerrabbit ... done
Start:
start-redis-and-rabbitmq.sh
Starting redis and rabbitmq
Creating celrabbit1 ... done
Redis Message Processing Example
This example uses Celery bootsteps (http://docs.celeryproject.org/en/latest/userguide/extending.html) to run a standalone, headless subscriber that consumes messages from a Redis key which emulates a RabbitMQ queue. Kombu publishes the message to the Redis key.
-
Check that the Redis has no keys
redis-cli
127.0.0.1:6379> keys *
(empty list or set)
127.0.0.1:6379>
-
Publish a message
run_redis_publisher.py
2017-12-09 08:20:04,026 - run-redis-publisher - INFO - Start - run-redis-publisher
2017-12-09 08:20:04,027 - run-redis-publisher - INFO - Sending msg={'account_id': 123, 'created': '2017-12-09T08:20:04.027159'} ex=reporting.accounts rk=reporting.accounts
2017-12-09 08:20:04,050 - redis-publisher - INFO - SEND - exch=reporting.accounts rk=reporting.accounts
2017-12-09 08:20:04,052 - run-redis-publisher - INFO - End - run-redis-publisher sent=True
Or with docker compose:
docker-compose -f compose-run-redis-publisher.yml up Creating kombupubredis ... done Attaching to kombupubredis kombupubredis | 2017-12-15 07:44:47,047 - run-redis-publisher - INFO - Start - run-redis-publisher kombupubredis | 2017-12-15 07:44:47,047 - run-redis-publisher - INFO - Sending msg={'account_id': 123, 'created': '2017-12-15T07:44:47.047355'} ex=reporting.accounts rk=reporting.accounts kombupubredis | 2017-12-15 07:44:47,127 - kombu-publisher - INFO - SEND - exch=reporting.accounts rk=reporting.accounts kombupubredis | 2017-12-15 07:44:47,132 - run-redis-publisher - INFO - End - run-redis-publisher sent=True kombupubredis exited with code 0 -
Consume messages using the subscriber module
celery worker -A run_redis_subscriber --loglevel=INFO -Ofair
Or with docker compose:
docker-compose -f compose-run-celery-redis-subscriber.yml up
WARNING: Found orphan containers (kombupubredis) for this project. If you removed or renamed this service in your compose file, you can run this command with the --remove-orphans flag to clean it up.
Creating celeryredissubscriber ... done
Attaching to celeryredissubscriber
-
Confirm the Celery worker received the message
2017-12-09 08:20:08,221: INFO callback received msg body={u'account_id': 123, u'created': u'2017-12-09T08:20:04.027159'} -
View the Redis Subscriber in Flower
Redis Flower server (login admin/admin)
-
Look at the Redis keys
redis-cli
127.0.0.1:6379> keys *
1) "_kombu.binding.celeryev"
2) "_kombu.binding.celery"
3) "_kombu.binding.celery.pidbox"
4) "_kombu.binding.reporting.accounts"
5) "unacked_mutex"
127.0.0.1:6379>
Redis Kombu Subscriber
If you do not want to use Celery, you can use the KombuSubscriber class to process messages. This class will wait for a configurable amount of seconds to consume a single message from the subscribed queue and then stop processing.
-
Check the Redis keys
redis-cli
127.0.0.1:6379> keys *
1) "_kombu.binding.reporting.accounts"
2) "_kombu.binding.celery.redis.sub"
127.0.0.1:6379>
-
Run the Redis Publisher
run_redis_publisher.py 2017-12-09 11:46:39,743 - run-redis-publisher - INFO - Start - run-redis-publisher 2017-12-09 11:46:39,743 - run-redis-publisher - INFO - Sending msg={'account_id': 123, 'created': '2017-12-09T11:46:39.743636'} ex=reporting.accounts rk=reporting.accounts 2017-12-09 11:46:39,767 - redis-publisher - INFO - SEND - exch=reporting.accounts rk=reporting.accounts 2017-12-09 11:46:39,770 - run-redis-publisher - INFO - End - run-redis-publisher sent=True -
Run the Redis Kombu Subscriber
By default, this will wait for a single message to be delivered within 10 seconds.
kombu_redis_subscriber.py 2017-12-09 11:47:58,798 - kombu-redis-subscriber - INFO - Start - kombu-redis-subscriber 2017-12-09 11:47:58,798 - kombu-redis-subscriber - INFO - setup routing 2017-12-09 11:47:58,822 - kombu-redis-subscriber - INFO - kombu-redis-subscriber - kombu.subscriber queues=reporting.accounts consuming with callback=handle_message 2017-12-09 11:47:58,823 - kombu-redis-subscriber - INFO - callback received msg body={u'account_id': 123, u'created': u'2017-12-09T11:46:39.743636'} 2017-12-09 11:47:58,824 - kombu-redis-subscriber - INFO - End - kombu-redis-subscriber -
Check the Redis keys
Nothing should have changed:
127.0.0.1:6379> keys *
1) "_kombu.binding.reporting.accounts"
2) "_kombu.binding.celery.redis.sub"
127.0.0.1:6379>
RabbitMQ Kombu Subscriber
If you do not want to use Celery, you can use the KombuSubscriber class to process messages. This class will wait for a configurable amount of seconds to consume a single message from the subscribed queue and then stop processing.
-
List the Queues
If the docker containers are still running the previous RabbitMQ pub/sub test will still have the queues, exchanges and bindings still left over. If not then skip this step.
list-queues.sh
Listing Queues broker=localhost:15672
name
consumers
messages
messages_ready
messages_unacknowledged
celery.rabbit.sub
0
0
0
0
reporting.accounts
0
0
0
0
-
Run the RabbitMQ Subscriber
Please note this output assumes there are no messages in the queue already from a previous test. It will wait for 10 seconds before stopping.
kombu_rabbitmq_subscriber.py
2017-12-09 11:53:56,948 - kombu-rabbitmq-subscriber - INFO - Start - kombu-rabbitmq-subscriber
2017-12-09 11:53:56,948 - kombu-rabbitmq-subscriber - INFO - setup routing
2017-12-09 11:53:56,973 - kombu-rabbitmq-subscriber - INFO - kombu-rabbitmq-subscriber - kombu.subscriber queues=reporting.accounts consuming with callback=handle_message
2017-12-09 11:54:06,975 - kombu-rabbitmq-subscriber - INFO - End - kombu-rabbitmq-subscriber
Or with docker compose:
docker-compose -f compose-kombu-rabbitmq-subscriber.yml up
Recreating kombusubrmq ... done
Attaching to kombusubrmq
kombusubrmq    | 2017-12-15 07:51:35,444 - kombu-rabbitmq-subscriber - INFO - Start - kombu-rabbitmq-subscriber
kombusubrmq    | 2017-12-15 07:51:35,445 - kombu-subscriber - INFO - setup routing
kombusubrmq    | 2017-12-15 07:51:35,479 - kombu-subscriber - INFO - kombu-rabbitmq-subscriber - kombu.subscriber queues=reporting.accounts consuming with callback=handle_message
kombusubrmq    | 2017-12-15 07:51:45,489 - kombu-rabbitmq-subscriber - INFO - End - kombu-rabbitmq-subscriber
kombusubrmq exited with code 0
-
Run the RabbitMQ Publisher
run_rabbitmq_publisher.py
2017-12-09 11:56:42,793 - run-rabbitmq-publisher - INFO - Start - run-rabbitmq-publisher
2017-12-09 11:56:42,793 - run-rabbitmq-publisher - INFO - Sending msg={'account_id': 456, 'created': '2017-12-09T11:56:42.793819'} ex=reporting rk=reporting.accounts
2017-12-09 11:56:42,812 - rabbitmq-publisher - INFO - SEND - exch=reporting rk=reporting.accounts
2017-12-09 11:56:42,814 - run-rabbitmq-publisher - INFO - End - run-rabbitmq-publisher sent=True
Or with docker compose:
docker-compose -f compose-run-rabbitmq-publisher.yml up Starting kombupubrmq ... done Attaching to kombupubrmq kombupubrmq | 2017-12-15 07:51:50,931 - run-rabbitmq-publisher - INFO - Start - run-rabbitmq-publisher kombupubrmq | 2017-12-15 07:51:50,932 - run-rabbitmq-publisher - INFO - Sending msg={'account_id': 456, 'created': '2017-12-15T07:51:50.932501'} ex=reporting rk=reporting.accounts kombupubrmq | 2017-12-15 07:51:50,958 - kombu-publisher - INFO - SEND - exch=reporting rk=reporting.accounts kombupubrmq | 2017-12-15 07:51:50,960 - run-rabbitmq-publisher - INFO - End - run-rabbitmq-publisher sent=True kombupubrmq exited with code 0 -
Run the RabbitMQ Kombu Subscriber
By default, this will wait for a single message to be delivered within 10 seconds.
kombu_rabbitmq_subscriber.py
2017-12-09 11:57:07,047 - kombu-rabbitmq-subscriber - INFO - Start - kombu-rabbitmq-subscriber
2017-12-09 11:57:07,047 - kombu-rabbitmq-subscriber - INFO - setup routing
2017-12-09 11:57:07,103 - kombu-rabbitmq-subscriber - INFO - kombu-rabbitmq-subscriber - kombu.subscriber queues=reporting.accounts consuming with callback=handle_message
2017-12-09 11:57:07,104 - kombu-rabbitmq-subscriber - INFO - callback received msg body={u'account_id': 456, u'created': u'2017-12-09T11:56:42.793819'}
2017-12-09 11:57:07,104 - kombu-rabbitmq-subscriber - INFO - End - kombu-rabbitmq-subscriber
Or with docker compose:
docker-compose -f compose-kombu-rabbitmq-subscriber.yml up
Starting kombusubrmq ... done
Attaching to kombusubrmq
kombusubrmq    | 2017-12-15 07:51:55,366 - kombu-rabbitmq-subscriber - INFO - Start - kombu-rabbitmq-subscriber
kombusubrmq    | 2017-12-15 07:51:55,367 - kombu-subscriber - INFO - setup routing
kombusubrmq    | 2017-12-15 07:51:55,422 - kombu-subscriber - INFO - kombu-rabbitmq-subscriber - kombu.subscriber queues=reporting.accounts consuming with callback=handle_message
kombusubrmq    | 2017-12-15 07:51:55,423 - kombu-rabbitmq-subscriber - INFO - callback received msg body={'account_id': 456, 'created': '2017-12-15T07:51:50.932501'}
kombusubrmq    | 2017-12-15 07:51:55,424 - kombu-rabbitmq-subscriber - INFO - End - kombu-rabbitmq-subscriber
kombusubrmq exited with code 0
Running a Redis Message Processor
This will simulate setting up a processor that handles user conversion events using a Redis server.
-
Start the User Conversion Event Processor
start-kombu-message-processor-redis.py
2017-12-09 12:09:14,329 - loader-name - INFO - Start - msg-proc
2017-12-09 12:09:14,329 - msg-proc - INFO - msg-proc START - consume_queue=user.events.conversions rk=None
2017-12-09 12:09:14,329 - msg-sub - INFO - setup routing
2017-12-09 12:09:14,351 - msg-sub - INFO - msg-sub - kombu.subscriber queues=user.events.conversions consuming with callback=process_message
Or with docker compose:
docker-compose -f compose-kombu-message-processor-redis.yml up
Creating kombumsgprocredis ... done
Attaching to kombumsgprocredis
kombumsgprocredis    | 2017-12-15 07:54:24,167 - loader-name - INFO - Start - msg-proc
kombumsgprocredis    | 2017-12-15 07:54:24,168 - message-processor - INFO - msg-proc START - consume_queue=user.events.conversions rk=None callback=process_message
-
Publish a User Conversion Event
From another terminal, publish a user conversion event
publish-user-conversion-events-redis.py
2017-12-09 12:09:16,557 - publish-user-conversion-events - INFO - Start - publish-user-conversion-events
2017-12-09 12:09:16,558 - publish-user-conversion-events - INFO - Sending user conversion event msg={'subscription_id': 456, 'created': '2017-12-09T12:09:16.558462', 'stripe_id': 789, 'account_id': 123, 'product_id': 'ABC'} ex=user.events rk=user.events.conversions
2017-12-09 12:09:16,582 - publish-uce-redis - INFO - SEND - exch=user.events rk=user.events.conversions
2017-12-09 12:09:16,585 - publish-user-conversion-events - INFO - End - publish-user-conversion-events sent=True
Or with docker compose:
docker-compose -f compose-publish-user-conversion-events-redis.yml up WARNING: Found orphan containers (kombumsgprocredis) for this project. If you removed or renamed this service in your compose file, you can run this command with the --remove-orphans flag to clean it up. Creating ucepubredis ... done Attaching to ucepubredis ucepubredis | 2017-12-15 07:54:40,539 - publish-user-conversion-events - INFO - Start - publish-user-conversion-events ucepubredis | 2017-12-15 07:54:40,539 - publish-user-conversion-events - INFO - Sending user conversion event msg={'account_id': 123, 'subscription_id': 456, 'stripe_id': 789, 'product_id': 'ABC', 'created': '2017-12-15T07:54:40.539324'} ex=user.events rk=user.events.conversions ucepubredis | 2017-12-15 07:54:40,619 - kombu-publisher - INFO - SEND - exch=user.events rk=user.events.conversions ucepubredis | 2017-12-15 07:54:40,623 - publish-user-conversion-events - INFO - End - publish-user-conversion-events sent=True ucepubredis exited with code 0 -
Confirm the Processor handled the conversion event
2017-12-09 12:09:16,587 - msg-proc - INFO - msg-proc proc start - msg body={u'subscription_id': 456, u'product_id': u'ABC', u'stripe_id': 789, u'account_id': 123, u'created': u'2017-12-09T12:09:16.558462'}
2017-12-09 12:09:16,587 - msg-proc - INFO - No auto-caching or pub-hook set exchange=None
2017-12-09 12:09:16,588 - msg-proc - INFO - msg-proc proc done - msg
Or with the docker compose version should log:
kombumsgprocredis | 2017-12-15 07:54:24,167 - loader-name - INFO - Start - msg-proc kombumsgprocredis | 2017-12-15 07:54:24,168 - message-processor - INFO - msg-proc START - consume_queue=user.events.conversions rk=None callback=process_message kombumsgprocredis | 2017-12-15 07:54:24,168 - kombu-subscriber - INFO - setup routing kombumsgprocredis | 2017-12-15 07:54:40,625 - message-processor - INFO - msg-proc proc start - msg body={'account_id': 123, 'subscription_id': 456, 'stripe_id': 789, 'product_id': 'ABC', 'created': '2017-12-15T07:54:40.539324'} kombumsgprocredis | 2017-12-15 07:54:40,627 - message-processor - INFO - No auto-caching or pub-hook set exchange=None -
Check the Redis keys for the new User Conversion Events key
redis-cli
127.0.0.1:6379> keys *
1) "_kombu.binding.reporting.accounts"
2) "_kombu.binding.user.events"
3) "_kombu.binding.celery.redis.sub"
4) "_kombu.binding.user.events.conversions"
127.0.0.1:6379>
Run a Message Processor from RabbitMQ with Relay Publish Hook to Redis
This could also be set up for auto-caching instead of this pub-sub flow because this delivers a post-processing json dictionary into a Redis key (publish hook), and let's be honest Redis is great at caching all the datas.
-
Clear out the
reporting.accountsRedis keyEither run
kombu_redis_subscriber.pyuntil there's no more messages being consumed or you can restart the docker containers with thestop-redis-and-rabbitmq.shandstart-redis-and-rabbitmq.sh, but the point is verify there's nothing in thereporting.accountskey (could just delete it with theredis-cli). -
Start the Kombu RabbitMQ Message Processor
start-kombu-message-processor-rabbitmq.py
2017-12-09 12:25:09,962 - loader-name - INFO - Start - msg-proc
2017-12-09 12:25:09,962 - msg-proc - INFO - msg-proc START - consume_queue=user.events.conversions rk=reporting.accounts
2017-12-09 12:25:09,962 - msg-sub - INFO - setup routing
2017-12-09 12:25:09,987 - msg-sub - INFO - msg-sub - kombu.subscriber queues=user.events.conversions consuming with callback=process_message
Docker compose can start this too:
docker stop worker;docker rm worker;
docker-compose -f compose-kombu-message-processor-rabbitmq.yml up
-
Send a User Conversion Event to RabbitMQ
publish-user-conversion-events-rabbitmq.py 2017-12-09 12:25:35,167 - publish-user-conversion-events - INFO - Start - publish-user-conversion-events 2017-12-09 12:25:35,167 - publish-user-conversion-events - INFO - Sending user conversion event msg={'subscription_id': 888, 'created': '2017-12-09T12:25:35.167891', 'stripe_id': 999, 'account_id': 777, 'product_id': 'XYZ'} ex=user.events rk=user.events.conversions 2017-12-09 12:25:35,185 - publish-uce-rabbitmq - INFO - SEND - exch=user.events rk=user.events.conversions 2017-12-09 12:25:35,187 - publish-user-conversion-events - INFO - End - publish-user-conversion-events sent=True -
Verify the Kombu RabbitMQ Message Processor Handled the Message
Notice the
pub-hookshows the relay-specific log lines2017-12-09 12:25:35,188 - msg-proc - INFO - msg-proc proc start - msg body={u'subscription_id': 888, u'product_id': u'XYZ', u'stripe_id': 999, u'account_id': 777, u'created': u'2017-12-09T12:25:35.167891'} 2017-12-09 12:25:35,188 - msg-proc - INFO - msg-proc pub-hook - build - hook msg body 2017-12-09 12:25:35,188 - msg-proc - INFO - msg-proc pub-hook - send - exchange=reporting.accounts rk=reporting.accounts sz=json 2017-12-09 12:25:35,210 - msg-pub - INFO - SEND - exch=reporting.accounts rk=reporting.accounts 2017-12-09 12:25:35,212 - msg-proc - INFO - msg-proc pub-hook - send - done exchange=reporting.accounts rk=reporting.accounts res=True 2017-12-09 12:25:35,212 - msg-proc - INFO - msg-proc proc done - msg -
Process the Redis
reporting.accountsqueueThis could also be cached data about the user that made this purchase like a write-through-cache.
kombu_redis_subscriber.py
2017-12-09 12:26:21,846 - kombu-redis-subscriber - INFO - Start - kombu-redis-subscriber
2017-12-09 12:26:21,846 - kombu-redis-subscriber - INFO - setup routing
2017-12-09 12:26:21,867 - kombu-redis-subscriber - INFO - kombu-redis-subscriber - kombu.subscriber queues=reporting.accounts consuming with callback=handle_message
2017-12-09 12:26:21,869 - kombu-redis-subscriber - INFO - callback received msg body={u'data': {}, u'org_msg': {u'subscription_id': 888, u'created': u'2017-12-09T12:25:35.167891', u'stripe_id': 999, u'product_id': u'XYZ', u'account_id': 777}, u'hook_created': u'2017-12-09T12:25:35.188420', u'version': 1, u'source': u'msg-proc'}
2017-12-09 12:26:21,870 - kombu-redis-subscriber - INFO - End - kombu-redis-subscriber
SQS - Experimental
I have opened a PR for fixing the kombu http client.
-
Export your AWS Key and Secret Key
export SQS_AWS_ACCESS_KEY=<ACCESS KEY>
export SQS_AWS_SECRET_KEY=<SECRET KEY>
-
Publish to SQS
kombu_sqs_publisher.py
2017-12-09 12:49:24,900 - kombu-sqs-publisher - INFO - Start - kombu-sqs-publisher
2017-12-09 12:49:24,901 - kombu-sqs-publisher - INFO - Sending user conversion event msg={'subscription_id': 222, 'product_id': 'DEF', 'stripe_id': 333, 'account_id': 111, 'created': '2017-12-09T12:49:24.901513'} ex=test1 rk=test1
2017-12-09 12:49:25,007 - botocore.vendored.requests.packages.urllib3.connectionpool - INFO - Starting new HTTPS connection (1): queue.amazonaws.com
2017-12-09 12:49:25,538 - botocore.vendored.requests.packages.urllib3.connectionpool - INFO - Starting new HTTPS connection (1): queue.amazonaws.com
2017-12-09 12:49:26,237 - kombu-sqs-publisher - INFO - SEND - exch=test1 rk=test1
2017-12-09 12:49:26,352 - kombu-sqs-publisher - INFO - End - kombu-sqs-publisher sent=True
Or with docker compose:
docker-compose -f compose-kombu-sqs-publisher.yml up
-
Subscribe to SQS
Please see the debugging section for getting this to function with kombu 4.1.0
https://github.com/jay-johnson/celery-connectors#temporary-fix-for-kombu-sqs
kombu_sqs_subscriber.py
2017-12-09 12:49:41,232 - kombu-sqs-subscriber - INFO - Start - kombu-sqs-subscriber
2017-12-09 12:49:41,232 - kombu-sqs-subscriber - INFO - setup routing
2017-12-09 12:49:41,333 - botocore.vendored.requests.packages.urllib3.connectionpool - INFO - Starting new HTTPS connection (1): queue.amazonaws.com
2017-12-09 12:49:41,801 - botocore.vendored.requests.packages.urllib3.connectionpool - INFO - Starting new HTTPS connection (1): queue.amazonaws.com
2017-12-09 12:49:42,517 - kombu-sqs-subscriber - INFO - kombu-sqs-subscriber - kombu.subscriber queues=test1 consuming with callback=handle_message
2017-12-09 12:49:42,671 - kombu-sqs-subscriber - INFO - callback received msg body={u'subscription_id': 222, u'created': u'2017-12-09T12:49:24.901513', u'stripe_id': 333, u'product_id': u'DEF', u'account_id': 111}
2017-12-09 12:49:42,773 - kombu-sqs-subscriber - INFO - End - kombu-sqs-subscriber
Or with docker compose:
docker-compose -f compose-kombu-sqs-subscriber.yml up
-
Verify the SQS Queue
test1is emptyaws sqs receive-message --queue-url https://queue.amazonaws.com/<YOUR QUEUE ID>/test1 echo $? 0
Simple Pub Sub with an Existing Celery Task
Start the Celery Worker as an Ecommerce Subscriber
Please run this from the base directory of the repository in a terminal that has sourced the virtual env: source venv/bin/activate.
./start-ecomm-worker.sh
-------------- celery@ecommerce_subscriber v4.1.0 (latentcall)
---- **** -----
--- * *** * -- Linux-4.7.4-200.fc24.x86_64-x86_64-with-fedora-24-Twenty_Four 2017-12-10 15:12:11
-- * - **** ---
- ** ---------- [config]
- ** ---------- .> app: ecommerce-worker:0x7fae3cfa2198
- ** ---------- .> transport: amqp://rabbitmq:**@localhost:5672//
- ** ---------- .> results: rpc://
- *** --- * --- .> concurrency: 4 (prefork)
-- ******* ---- .> task events: OFF (enable -E to monitor tasks in this worker)
--- ***** -----
-------------- [queues]
.> celery exchange=celery(direct) key=celery
[tasks]
. ecomm_app.ecommerce.tasks.handle_user_conversion_events
[2017-12-10 15:12:11,727: INFO/MainProcess] Connected to amqp://rabbitmq:**@127.0.0.1:5672//
[2017-12-10 15:12:11,740: INFO/MainProcess] mingle: searching for neighbors
[2017-12-10 15:12:12,776: INFO/MainProcess] mingle: all alone
[2017-12-10 15:12:12,828: INFO/MainProcess] celery@ecommerce_subscriber ready.
[2017-12-10 15:12:13,633: INFO/MainProcess] Events of group {task} enabled by remote.
Publish User Conversion Events to the Celery Ecommerce Subscriber
Please run this from a separate terminal that has sourced the virtual env: source venv/bin/activate.
-
Change to the
ecomm_appdirectorycd ecomm_app
-
Publish a task
This will use the Celery
send_taskmethod to publish the Celery task:ecomm_app.ecommerce.tasks.handle_user_conversion_eventsto RabbitMQ which is monitored by the Celery ecommerce worker../publish_task.py INFO:celery-task-publisher:Sending broker=amqp://rabbitmq:rabbitmq@localhost:5672// body={'subscription_id': 321, 'msg_id': '6d7ab602-f7cd-4d90-a0c5-5eb0cdcb41d9', 'version': 1, 'product_id': 'JJJ', 'account_id': 999, 'stripe_id': 876, 'created': '2017-12-10T15:16:08.557804'} INFO:celery-task-publisher:Done with msg_id=6d7ab602-f7cd-4d90-a0c5-5eb0cdcb41d9 result=True
Confirm the Celery Worker Processed the Conversion Message
[2017-12-10 15:16:08,593: INFO/MainProcess] Received task: ecomm_app.ecommerce.tasks.handle_user_conversion_events[9349e1be-fca5-40b5-86d3-0661fdd9fd06]
[2017-12-10 15:16:08,594: INFO/ForkPoolWorker-4] task - user_conversion_events - start body={'stripe_id': 876, 'version': 1, 'subscription_id': 321, 'created': '2017-12-10T15:16:08.557804', 'account_id': 999, 'product_id': 'JJJ', 'msg_id': '6d7ab602-f7cd-4d90-a0c5-5eb0cdcb41d9'}
[2017-12-10 15:16:08,595: INFO/ForkPoolWorker-4] task - user_conversion_events - done
[2017-12-10 15:16:08,619: INFO/ForkPoolWorker-4] Task ecomm_app.ecommerce.tasks.handle_user_conversion_events[9349e1be-fca5-40b5-86d3-0661fdd9fd06] succeeded in 0.025004414000250108s: True
Check the Ecommerce Subscriber in Flower
The Ecommerce Publisher and Subscriber are using RabbitMQ which is registered under the Flower url:
http://localhost:5555/ - (login: admin/admin)
There should be a Worker named:
celery@ecommerce_subscriber
There are also additional worker details available at:
http://localhost:5555/worker/celery@ecommerce_subscriber
View the registered ecommerce tasks for the worker:
http://localhost:5555/worker/celery@ecommerce_subscriber#tab-tasks
Debugging with rabbitmqadmin
The pip and development build will install rabbitmqadmin (https://raw.githubusercontent.com/rabbitmq/rabbitmq-management/v3.7.0/bin/rabbitmqadmin) version 3.7.0. It is a great utility for verifying RabbitMQ messaging and does not require having access to the RabbitMQ cluster's host nodes (or a machine with rabbitmqctl on it).
Please note: rabbitmqadmin uses the management HTTP port (not the amqp port 5672) which requires a broker to have the management plugin enabled to work if you're using this with an external RabbitMQ cluster.
Checking queues
Script in pip
list-queues.sh Listing Queues broker=localhost:15672 +--------------------+-----------+----------+----------------+-------------------------+ | name | consumers | messages | messages_ready | messages_unacknowledged | +--------------------+-----------+----------+----------------+-------------------------+ | celery | 0 | 0 | 0 | 0 | | reporting.accounts | 0 | 0 | 0 | 0 | +--------------------+-----------+----------+----------------+-------------------------+
Manual way
rabbitmqadmin.py --host=localhost --port=15672 --username=rabbitmq --password=rabbitmq list queues +--------------------+-----------+----------+----------------+-------------------------+ | name | consumers | messages | messages_ready | messages_unacknowledged | +--------------------+-----------+----------+----------------+-------------------------+ | celery | 0 | 0 | 0 | 0 | | reporting.accounts | 0 | 0 | 0 | 0 | +--------------------+-----------+----------+----------------+-------------------------+
Checking exchanges
Script in pip
list-exchanges.sh Listing Exchanges broker=localhost:15672 +---------------------+---------+ | name | type | +---------------------+---------+ | | direct | | amq.direct | direct | | amq.fanout | fanout | | amq.headers | headers | | amq.match | headers | | amq.rabbitmq.log | topic | | amq.rabbitmq.trace | topic | | amq.topic | topic | | celery | direct | | celery.pidbox | fanout | | celeryev | topic | | reply.celery.pidbox | direct | | reporting.accounts | topic | +---------------------+---------+
Manual way
rabbitmqadmin.py --host=localhost --port=15672 --username=rabbitmq --password=rabbitmq list exchanges name typa +---------------------+---------+ | name | type | +---------------------+---------+ | | direct | | amq.direct | direct | | amq.fanout | fanout | | amq.headers | headers | | amq.match | headers | | amq.rabbitmq.log | topic | | amq.rabbitmq.trace | topic | | amq.topic | topic | | celery | direct | | celery.pidbox | fanout | | celeryev | topic | | reply.celery.pidbox | direct | | reporting.accounts | topic | +---------------------+---------+
List Bindings
Script in pip
list-bindings.sh Listing Bindings broker=localhost:15672 +--------------------+--------------------+--------------------+ | source | destination | routing_key | +--------------------+--------------------+--------------------+ | | celery | celery | | | reporting.accounts | reporting.accounts | | celery | celery | celery | | reporting | reporting.accounts | reporting.accounts | +--------------------+--------------------+--------------------+
Manual way
rabbitmqadmin.py --host=localhost --port=15672 --username=rabbitmq --password=rabbitmq list bindings source destination routing_key +--------------------+--------------------+--------------------+ | source | destination | routing_key | +--------------------+--------------------+--------------------+ | | celery | celery | | | reporting.accounts | reporting.accounts | | celery | celery | celery | | reporting | reporting.accounts | reporting.accounts | +--------------------+--------------------+--------------------+
Development Guide
-
Install the development environment
virtualenv -p python3 venv && source venv/bin/activate && pip install -e .
-
Run tests
The tests require the docker containers to be running prior to starting.
python setup.py test
Debugging
pycURL Reinstall with NSS
For anyone wanting to use kombu SQS, I had to uninstall pycurl and install it with nss.
The error looked like this in the logs:
2017-12-09 12:28:46,811 - kombu-sqs-subscriber - INFO - kombu-sqs-subscriber - kombu.subscriber consume hit exception=The curl client requires the pycurl library. queue=test1
So I opened up a python shell
Python 2:
$ python Python 2.7.12 (default, Sep 29 2016, 13:30:34) [GCC 6.2.1 20160916 (Red Hat 6.2.1-2)] on linux2 Type "help", "copyright", "credits" or "license" for more information. >>> import pycurl Traceback (most recent call last): File "<stdin>", line 1, in <module> File "build/bdist.linux-x86_64/egg/pycurl.py", line 7, in <module> File "build/bdist.linux-x86_64/egg/pycurl.py", line 6, in __bootstrap__ ImportError: pycurl: libcurl link-time ssl backend (nss) is different from compile-time ssl backend (none/other) >>>
Python 3:
$ python
Python 3.5.3 (default, May 11 2017, 09:10:41)
[GCC 6.3.1 20161221 (Red Hat 6.3.1-1)] on linux
Type "help", "copyright", "credits" or "license" for more information.
>>> import pycurl
Traceback (most recent call last):
File "<stdin>", line 1, in <module>
ImportError: pycurl: libcurl link-time ssl backend (nss) is different from compile-time ssl backend (none/other)
>>>
Uninstalled and Reinstalled pycurl with nss
pip uninstall -y pycurl; pip install pycurl --compile --global-option="--with-nss" pycurl
Temporary fix for Kombu SQS
SQS Kombu Subscriber 'NoneType' object has no attribute 'call_repeatedly'
Until Kombu fixes the SQS transport and publishes it to pypi, the SQS subscriber will throw exceptions like below.
kombu_sqs_subscriber.py
2017-12-09 12:30:45,493 - kombu-sqs-subscriber - INFO - Start - kombu-sqs-subscriber
2017-12-09 12:30:45,493 - kombu-sqs-subscriber - INFO - setup routing
2017-12-09 12:30:45,602 - botocore.vendored.requests.packages.urllib3.connectionpool - INFO - Starting new HTTPS connection (1): queue.amazonaws.com
2017-12-09 12:30:46,046 - botocore.vendored.requests.packages.urllib3.connectionpool - INFO - Starting new HTTPS connection (1): queue.amazonaws.com
2017-12-09 12:30:46,832 - kombu-sqs-subscriber - INFO - kombu-sqs-subscriber - kombu.subscriber queues=test1 consuming with callback=handle_message
2017-12-09 12:30:46,989 - kombu-sqs-subscriber - INFO - callback received msg body={u'subscription_id': 222, u'created': u'2017-12-09T12:28:28.093582', u'stripe_id': 333, u'product_id': u'DEF', u'account_id': 111}
2017-12-09 12:30:46,994 - kombu-sqs-subscriber - INFO - kombu-sqs-subscriber - kombu.subscriber consume hit exception='NoneType' object has no attribute 'call_repeatedly' queue=test1
2017-12-09 12:30:46,994 - kombu-sqs-subscriber - INFO - End - kombu-sqs-subscriber
Restoring 1 unacknowledged message(s)
Notice the last line has put the message into SQS in-flight which means it has not been acknowledged or deleted.
You can verify this message is still there with the aws cli:
aws sqs receive-message --queue-url https://queue.amazonaws.com/<YOUR QUEUE ID>/test1
{
"Messages": [
{
"Body": "eyJib2R5IjogImV5SnpkV0p6WTNKcGNIUnBiMjVmYVdRaU9pQXlNaklzSUNKd2NtOWtkV04wWDJsa0lqb2dJa1JGUmlJc0lDSnpkSEpwY0dWZmFXUWlPaUF6TXpNc0lDSmhZMk52ZFc1MFgybGtJam9nTVRFeExDQWlZM0psWVhSbFpDSTZJQ0l5TURFM0xURXlMVEE1VkRFeU9qVXpPakEwTGpjME9UY3lOaUo5IiwgImhlYWRlcnMiOiB7fSwgImNvbnRlbnQtdHlwZSI6ICJhcHBsaWNhdGlvbi9qc29uIiwgInByb3BlcnRpZXMiOiB7InByaW9yaXR5IjogMCwgImJvZHlfZW5jb2RpbmciOiAiYmFzZTY0IiwgImRlbGl2ZXJ5X2luZm8iOiB7InJvdXRpbmdfa2V5IjogInRlc3QxIiwgImV4Y2hhbmdlIjogInRlc3QxIn0sICJkZWxpdmVyeV9tb2RlIjogMiwgImRlbGl2ZXJ5X3RhZyI6ICJkOGI3MjNiMi05MDVkLTQxZTEtODVlNy00NjUwZGY2NWU2MTgifSwgImNvbnRlbnQtZW5jb2RpbmciOiAidXRmLTgifQ==",
"ReceiptHandle": "AQEBDnxqT1+SOam1ZtMKPgh77a8bapLbcrI3PZRTqVZJokz0h7oMusuJPAB9jksH3BQHQyg3TyZXasBblpMcin3HTzh7ykTgAgawhMreOoWGGiaeEoOekaChn2yFpKDbVP1ZENRVcpAzeDXzCd52TITZbyLk8FY1PJB3XpAiih9SH/R0FPj3JnU0WTxjTAWtBnSlUUGXFc3CczJi61YsJS+bTZs8JIgDaICMF+zMhnV+rV4zXDObTVFM3OaMdf/puqZ9yRd3fM1GsOxZaDNRDGYKml/UK0tn32gtqPSuUW905YamwnWQYB9mF338Jgx11rv78b5lLogpU/0t6E+0tD1Lkr/UR/M64NZI2eTwp6ZHNtqTNbkjd5VsBgB39b+wXFFn",
"MD5OfBody": "e72609877b90ad86df2f161c6303eaf0",
"MessageId": "684328b4-a38c-4868-8550-e0d46599a0c2"
}
]
}
If you're feeling bold, you can run off my PR fix branch as well:
pip uninstall -y kombu ; rm -rf /tmp/sqs-pr-fix-with-kombu; git clone https://github.com/jay-johnson/kombu.git /tmp/sqs-pr-fix-with-kombu && pushd /tmp/sqs-pr-fix-with-kombu && git checkout sqs-http-get-client && python setup.py develop && popd
With the SQS fix applied locally (works on python 2 and 3 on my fedora 24 vm):
2017-12-09 12:47:12,177 - kombu-sqs-subscriber - INFO - Start - kombu-sqs-subscriber
2017-12-09 12:47:12,177 - kombu-sqs-subscriber - INFO - setup routing
2017-12-09 12:47:12,295 - botocore.vendored.requests.packages.urllib3.connectionpool - INFO - Starting new HTTPS connection (1): queue.amazonaws.com
2017-12-09 12:47:12,736 - botocore.vendored.requests.packages.urllib3.connectionpool - INFO - Starting new HTTPS connection (1): queue.amazonaws.com
2017-12-09 12:47:13,454 - kombu-sqs-subscriber - INFO - kombu-sqs-subscriber - kombu.subscriber queues=test1 consuming with callback=handle_message
2017-12-09 12:47:13,592 - kombu-sqs-subscriber - INFO - callback received msg body={u'subscription_id': 222, u'created': u'2017-12-09T12:28:28.093582', u'stripe_id': 333, u'product_id': u'DEF', u'account_id': 111}
2017-12-09 12:47:13,689 - kombu-sqs-subscriber - INFO - End - kombu-sqs-subscriber
After running it you can confirm the message has been deleted and acknowledged with the aws cli:
aws sqs receive-message --queue-url https://queue.amazonaws.com/<YOUR QUEUE ID>/test1
echo $?
0
Testing
Start the Relay
./start-ecomm-relay.py
Start the Celery Worker
./start-ecomm-worker.sh
Load Test Celery Worker over RabbitMQ
This will send 50,000 messages over with the Celery send_task method. As long as the ecomm Celery worker is running the messages will be sent over.
python -m unittest tests/load_test_worker_rabbitmq.py
Load Test Relay
This will send 50,000 messages over the user.events.conversions RabbitMQ queue for the ecomm relay to process and then send to the ecomm worker.
python -m unittest tests/load_test_relay_rabbitmq.py
Cleanup Persistence
Docker compose creates files and directories as the host's root user. This makes cleaning up test runs annoying. So here's a tool to clean the persistence data and logs but it requires providing sudo or running as root.
Please, please, please be careful!
-
Shut them down to prevent writes to the volumes
stop-redis-and-rabbitmq.sh
-
Clean them up
sudo ./clean-persistence-data.sh

Using root to delete persistence directories: ./docker/data/rabbitmq/ ./docker/data/redis and logs: ./docker/logs/rabbitmq ./docker/logs/redis and files: ./docker/data/rabbitmq/.erlang.cookie

- deleting=./docker/data/rabbitmq
- deleting=./docker/logs/rabbitmq
- deleting=./docker/data/redis
- deleting=./docker/logs/redis
- deleting=./docker/data/rabbitmq/.erlang.cookie
-
Start them up again
start-persistence-containers.sh
Create your own self-signed Keys, Certs and Certificate Authority with Ansible
If you have openssl installed you can use this ansible playbook to create your own certificate authority (CA), keys and certs.
-
Create the CA, Keys and Certificates
cd ansible
ansible-playbook -i inventory_dev create-x509s.yml
-
Verify the Jupyter Client Cert
openssl x509 -in ../compose/ssl/client_cert.pem -text -noout
-
Verify the Jupyter Server Cert
openssl x509 -in ../compose/ssl/jupyter_server_cert.pem -text -noout
-
Using the certs
Docker makes testing ssl easier so the certs are created under the
compose/ssldirectory:tree ../compose/ssl ├── ca.pem ├── ca_private_key.pem ├── client_cert.pem ├── client.csr ├── client_key.pem ├── database_server_cert.pem ├── database_server.csr ├── database_server_key.pem ├── docker_server_cert.pem ├── docker_server.csr ├── docker_server_key.pem ├── extfile.cnf ├── jenkins_server_cert.pem ├── jenkins_server.csr ├── jenkins_server_key.pem ├── jupyter_server_cert.pem ├── jupyter_server.csr ├── jupyter_server_key.pem ├── kibana_server_cert.pem ├── kibana_server.csr ├── kibana_server_key.pem ├── nginx_server_cert.pem ├── nginx_server.csr ├── nginx_server_key.pem ├── pgadmin_server_cert.pem ├── pgadmin_server.csr ├── pgadmin_server_key.pem ├── phpmyadmin_server_cert.pem ├── phpmyadmin_server.csr ├── phpmyadmin_server_key.pem ├── rabbitmq_server_cert.pem ├── rabbitmq_server.csr ├── rabbitmq_server_key.pem ├── redis_server_cert.pem ├── redis_server.csr ├── redis_server_key.pem ├── restapi_server_cert.pem ├── restapi_server.csr ├── restapi_server_key.pem ├── webserver_server_cert.pem ├── webserver_server.csr └── webserver_server_key.pem
-
Set up your own extfile.cnf - Optional
You can change the source
extfile.cnfwhich is copied over to thecompose/ssldirectory when the playbook runs as needed.cat ./configs/extfile.cnf subjectAltName = DNS:*.localdev.com, DNS:rabbitmq.localdev.com, DNS:redis.localdev.com, DNS:jupyter.localdev.com, DNS:jenkins.localdev.com, DNS:www.localdev.com, DNS:api.localdev.com, DNS:db.localdev.com, DNS:pgadmin.localdev.com, DNS:phpmyadmin.localdev.com, DNS:kibana.localdev.com, DNS:lb.localdev.com, DNS:docker.localdev.com, IP:127.0.0.1 extendedKeyUsage = serverAuth
-
Customizing your own openssl.cnf and cert_openssl.cnf - Optional
You can change the source
openssl.cnfbefore creating the certs.cat ./configs/openssl.cnf [ req ] prompt = no default_bits = 2048 distinguished_name = req_distinguished_name # where to get DN for reqs [ req_distinguished_name ] C = US ST = WA L = Redmond O = SecureEverything OU = SecureEverythingOrgUnit CN = LocalDev
You can change the source
cert_openssl.cnfbefore creating the certs.cat ./configs/cert_openssl.cnf [req] days = 2000 serial = 1 distinguished_name = req_distinguished_name x509_extensions = v3_ca [req_distinguished_name] countryName = US stateOrProvinceName = WA localityName = Redmond organizationName = SecureEverything organizationalUnitName = SecureEverythingOrgUnit commonName = SecureEverything [ v3_ca ] subjectKeyIdentifier = hash authorityKeyIdentifier = keyid:always,issuer:always basicConstraints = CA:TRUE keyUsage = digitalSignature, nonRepudiation, keyEncipherment, dataEncipherment, keyAgreement, keyCertSign subjectAltName = DNS:*.localdev.com, DNS:redis.localdev.com, DNS:rabbitmq.localdev.com, DNS:jupyter.localdev.com, DNS:jenkins.localdev.com, DNS:www.localdev.com, DNS:api.localdev.com, DNS:db.localdev.com, DNS:pgadmin.localdev.com, DNS:phpmyadmin.localdev.com, DNS:kibana.localdev.com, DNS:lb.localdev.com, DNS:docker.localdev.com, email:admin@localdev.com issuerAltName = issuer:copy
I found this link helpful for understanding all the different configurable options: https://www.ibm.com/support/knowledgecenter/en/SSB23S_1.1.0.13/gtps7/cfgcert.html
Running JupyterHub with Postgres and SSL
-
Pull the default Jupyter image
All users will share this large 4.4 gb image
docker pull jupyter/scipy-notebook:latest
-
Append the following entries to your
/etc/hostsrow with127.0.0.1jupyter.localdev.com rabbitmq.localdev.com redis.localdev.com jenkins.localdev.com -
Verify
/etc/hostshas the entriescat /etc/hosts | grep localdev 127.0.0.1 localhost localhost.localdomain localhost4 localhost4.localdomain4 jupyter.localdev.com rabbitmq.localdev.com redis.localdev.com jenkins.localdev.com
-
From the base repository directory, change to the
composedirectorycd compose
-
Create the JupyterHub docker network
This should only be required if the
jupyterhub-networkdoes not already exist.docker network create jupyterhub-network
-
Create the JupyterHub docker data volume
This should only be required if the
jupyterhub-datadoes not already exist.docker volume create --name jupyterhub-data
Each user will need a data volume if they are not already created as well with naming scheme:
jupyterhub-user-<username>to persist notebooks.docker volume create --name jupyterhub-user-admin
-
Start JupyterHub
docker stop jupyterhub ; docker rm jupyterhub; docker-compose -f compose-jupyter.yml up
-
Login to JupyterHub
Please change these defaults before deploying to production:
- username:
admin - password:
admin
Please accept to "Proceed" passed the self-signed certificate warning.
https://jupyter.localdev.com/hub/login
- username:
-
Start the Admin user Jupyter instance
Click on Start My Server
-
Clone some great notebooks into the Admin Jupyter workspace
From a terminal with access to
dockerclone a repository with some amazing ipython notebooks:https://github.com/donnemartin/data-science-ipython-notebooks
docker exec -it jupyter-admin git clone https://github.com/donnemartin/data-science-ipython-notebooks.git /home/jovyan/work/data-science-ipython-notebooks
Cloning into '/home/jovyan/work/data-science-ipython-notebooks'...
remote: Counting objects: 2344, done.
remote: Total 2344 (delta 0), reused 0 (delta 0), pack-reused 2344
Receiving objects: 100% (2344/2344), 47.76 MiB | 16.95 MiB/s, done.
Resolving deltas: 100% (1317/1317), done.
Checking connectivity... done.
-
Browse the cloned notebooks
https://jupyter.localdev.com/user/admin/tree/work/data-science-ipython-notebooks
-
Open the one of the cloned notebooks
-
Select Kernel -> Restart & Run All
Confirm you can run all the cells in the notebook
-
Verify the notebook ran all the cells without any errors
Save the output and changes to the notebook with
ctrl + s. At the bottom of the notebook you should see the updated chart for thesepal widthandsepal-lengthsimilar to: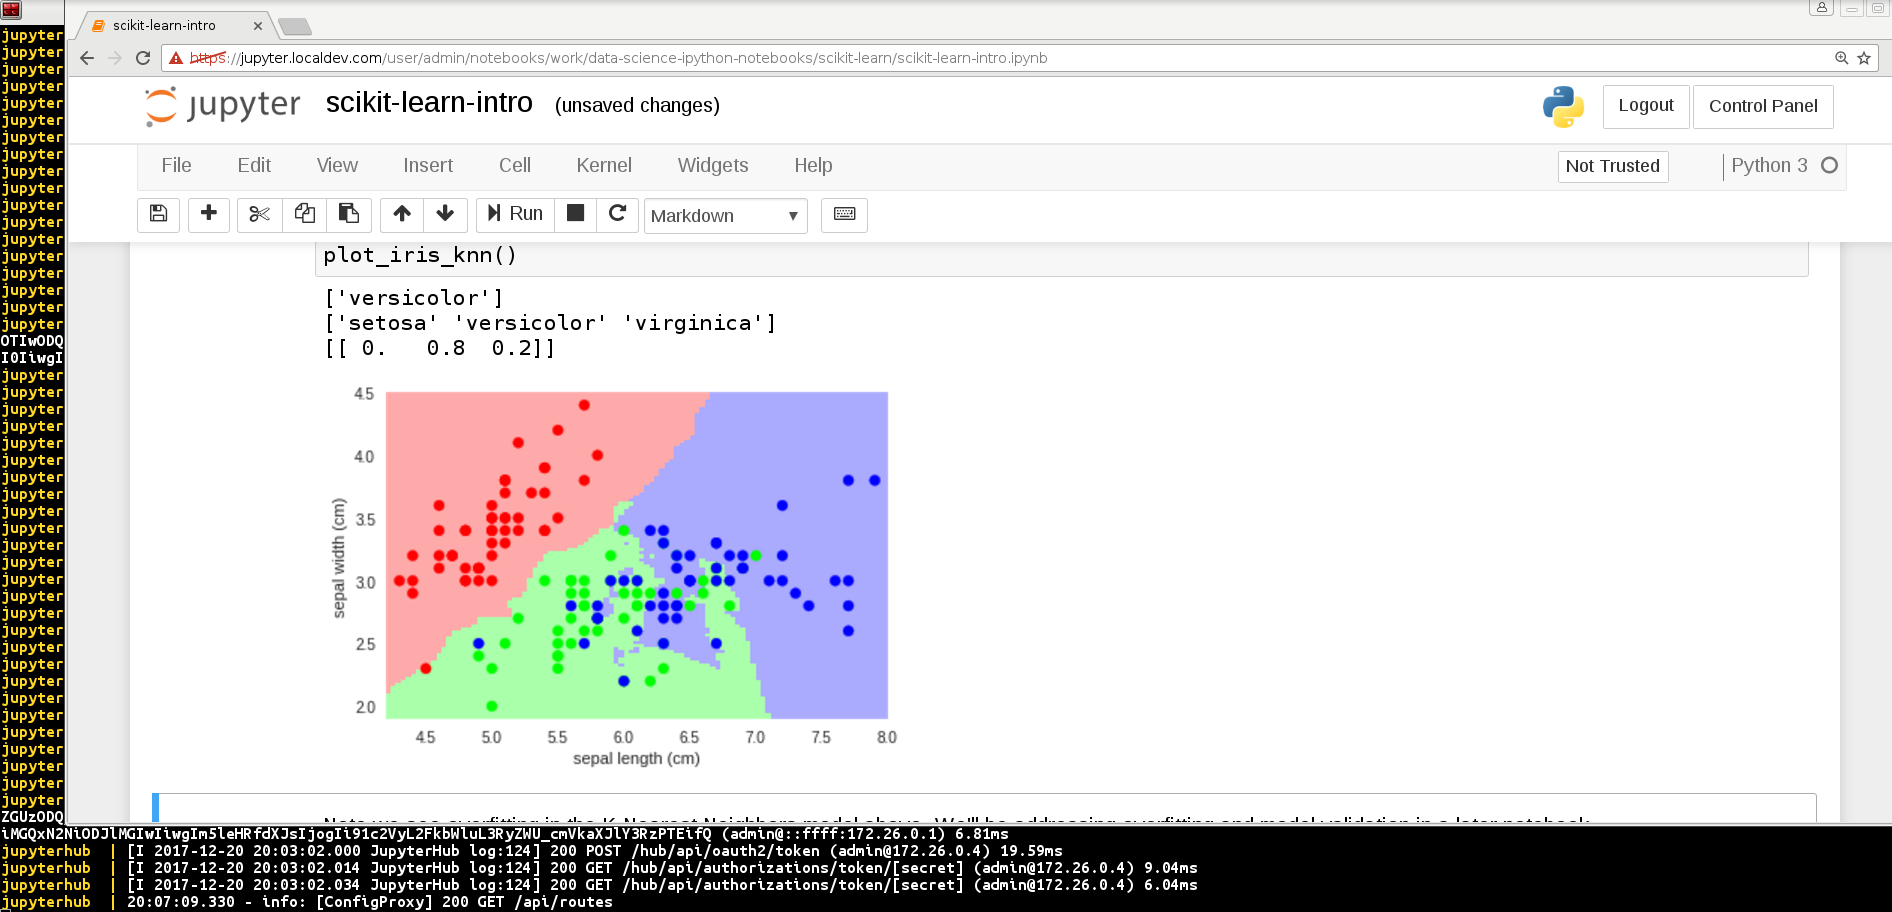
-
Verify the notebook was changed and updated
Browse to:
https://jupyter.localdev.com/user/admin/tree/work/data-science-ipython-notebooks/scikit-learn
The
scikit-learn-intro.ipynbshould be running and updated.
-
Stop the Admin Jupyter instance
The notebooks should persist a stop and start of a user's Jupyter container instance.
https://jupyter.localdev.com/hub/admin
It should look something like this:
-
Start the Admin Jupyter instance again
Click
start server -
Browse to the
scikit-learndirectory and confirm the files were not lost on the restarthttps://jupyter.localdev.com/user/admin/tree/work/data-science-ipython-notebooks/scikit-learn
Linting
pycodestyle --max-line-length=160 --exclude=venv,build,.tox,celery_connectors/rabbitmq/rabbitmqadmin.py
License
Apache 2.0 - Please refer to the LICENSE for more details
