
Kickster provides a basic Jekyll project setup packed with web best practises and useful optimization tools increasing your overall project quality. Kickster ships with automated and worry-free deployment scripts for GitHub Pages.
Used tools:
- Autoprefixer
- Circle CI
- Html-proofer
- Jekyll
- Jekyll Assets
- Jekyll Sitemap
- HTML5 Boilerplate (Influenced by)
- Yarn
If you haven't installed the following tools then go ahead and do so (make sure you have Homebrew installed):
brew install ruby
brew install npm
On windows, install Ruby and Node with the installers found here:
Install the gem:
gem install kickster
Execute gem and scaffold Kickster files:
kickster new site_name
Setup your environment:
cd site_name
bin/setup
You can push your project to any branch except gh-pages. For sitename.github.io repo users make sure to use another branch than master.
Run Jekyll:
bundle exec jekyll serve
If you do not want the Kickster setup but just the deploy scripts then copy them from the bin folder.
Run this in the root project folder in your console:
bin/deploy
Don't forget to enable your repository on Circle CI and update the _config.yml file with your url!
Automated deployment is by default not included in your Kickster generated Jekyll project. Please follow the steps below to include automated deployment.
Note that changes will only deploy when your code is merged into master.
Copy the automated script inside the /bin folder of your project (make sure the file has execute permissions!).
Replace your circle.yml file with this one. And adjust the following 2 lines with your information:
- USER_NAME: <your-github-username>
- USER_EMAIL: <your-github-email>
Make sure you enabled your repository on Circle CI. After that we have to create a Read/Write deployment key. All 3 steps can be found here.
In short:
-
Create a ssh key on your computer:
ssh-keygen -t rsa -b 4096 -C "your_email@example.com"(leave the passphrase empty). -
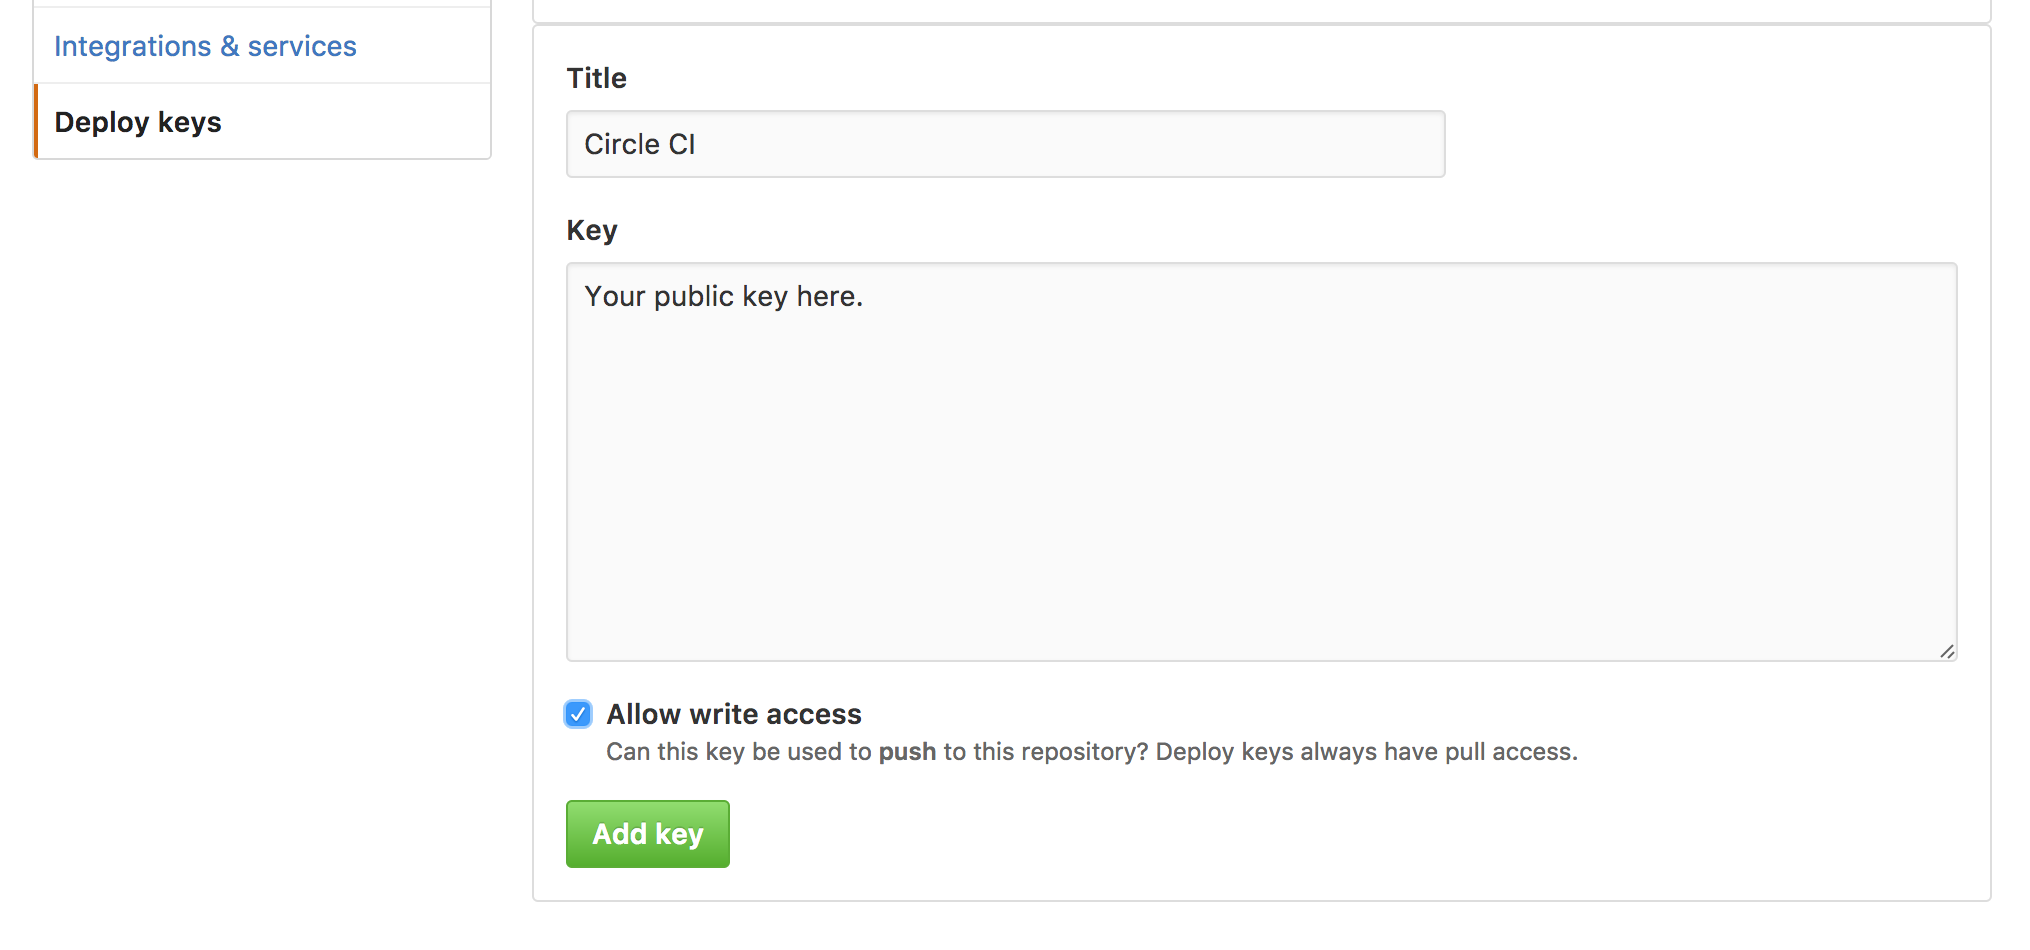
Create a new deploy key in your GitHub project and paste the public key in there and make sure you "Allow write access".
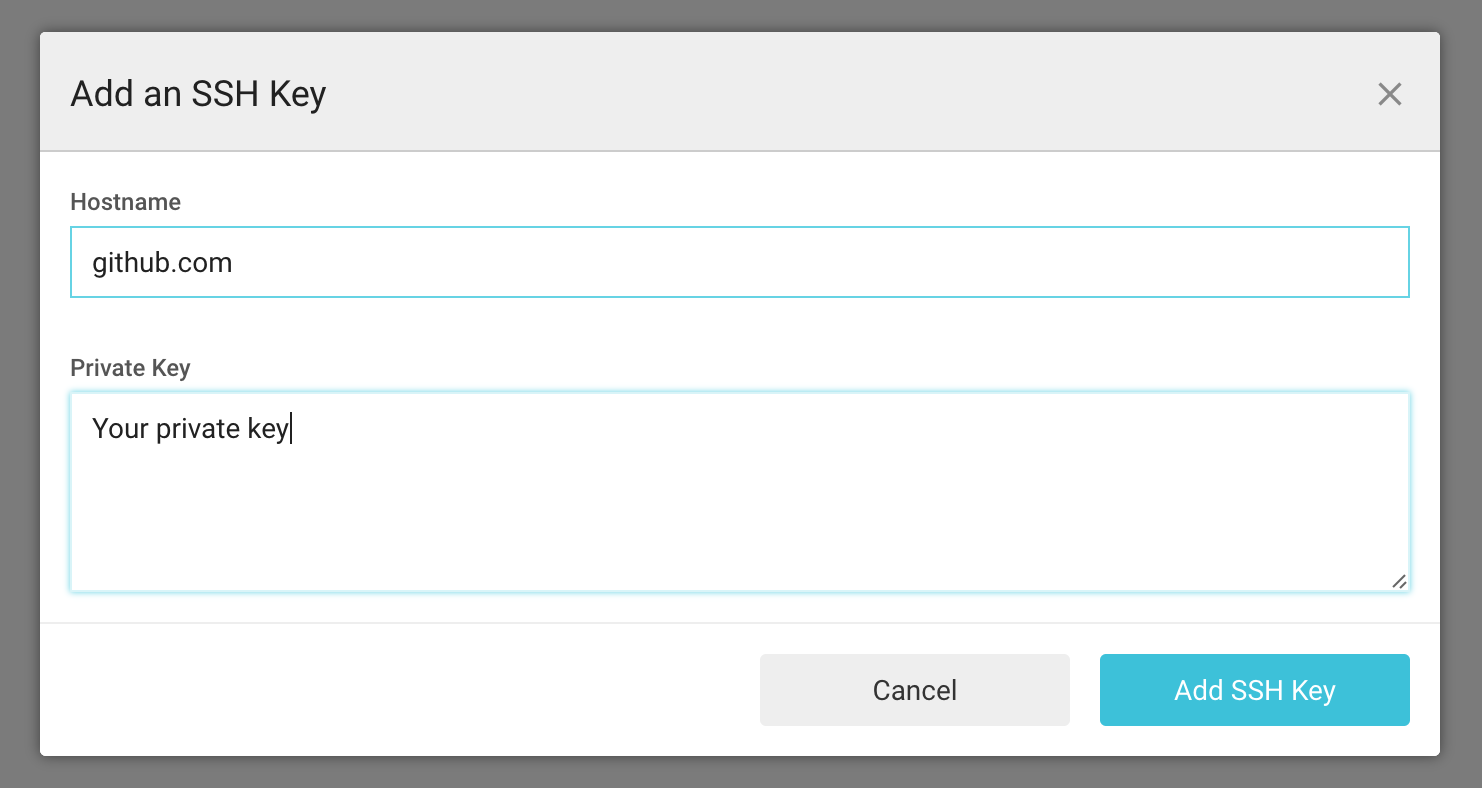
 3. Create a new SSH key in the "SSH Permissions" tab under your project settings in Circle CI and paste the private key in there with the hostname:
 github.com.
That's it, start pushing changes and enjoy your automated deployments from now on!
Want to use Travis CI? Click here to view all info on how to setup.
Need help with setting up Kickster? Join me on Gitter and I help you out.
If you found a bug please report it in GitHub issues.
MIT License
- Fork it ( https://github.com/[my-github-username]/kickster/fork )
- Create your feature branch (
git checkout -b my-new-feature) - Commit your changes (
git commit -am 'Add some feature') - Push to the branch (
git push origin my-new-feature) - Create a new Pull Request
Big thanks to @wouterw for helping out with his Ruby magic.


