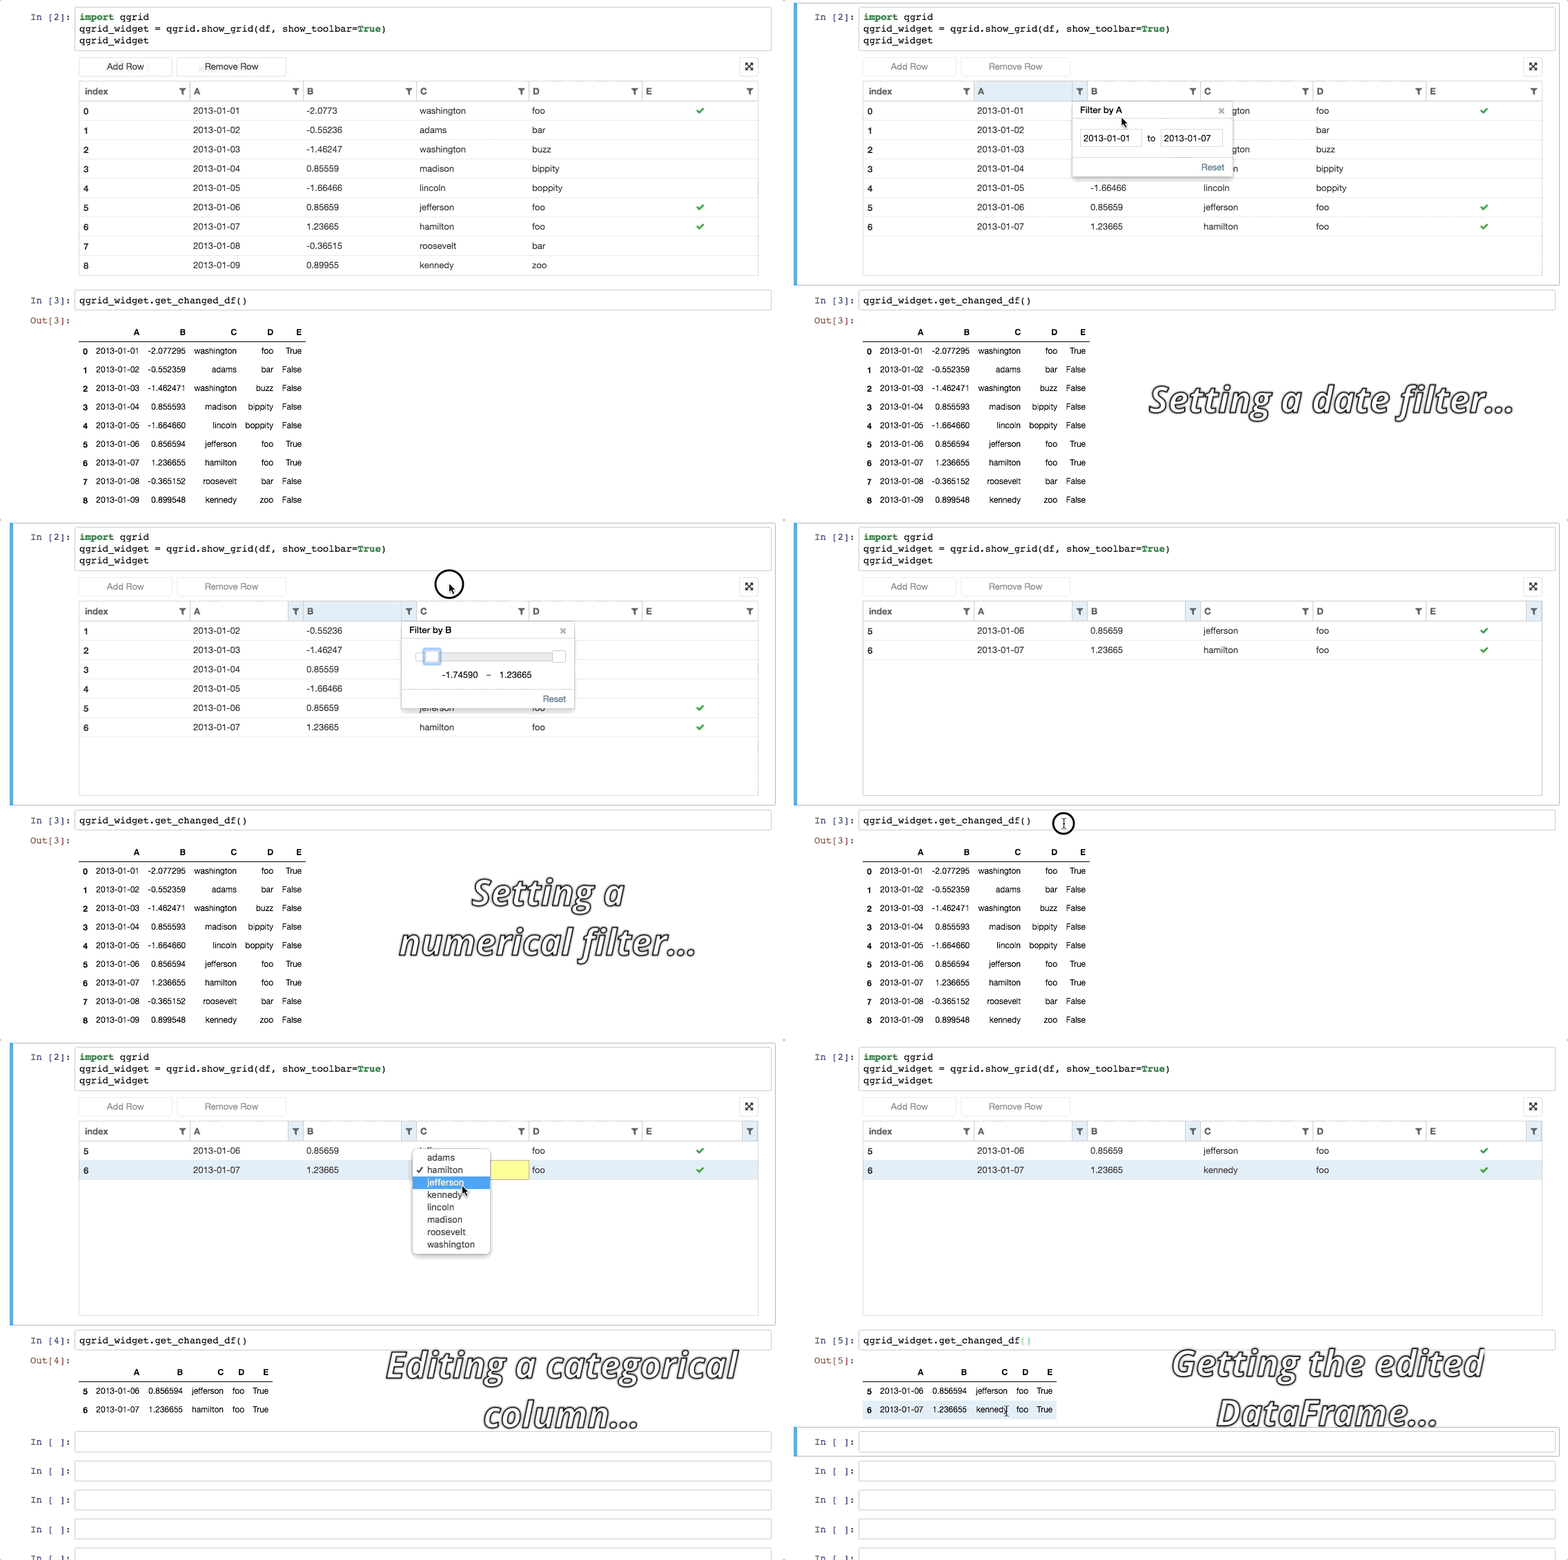
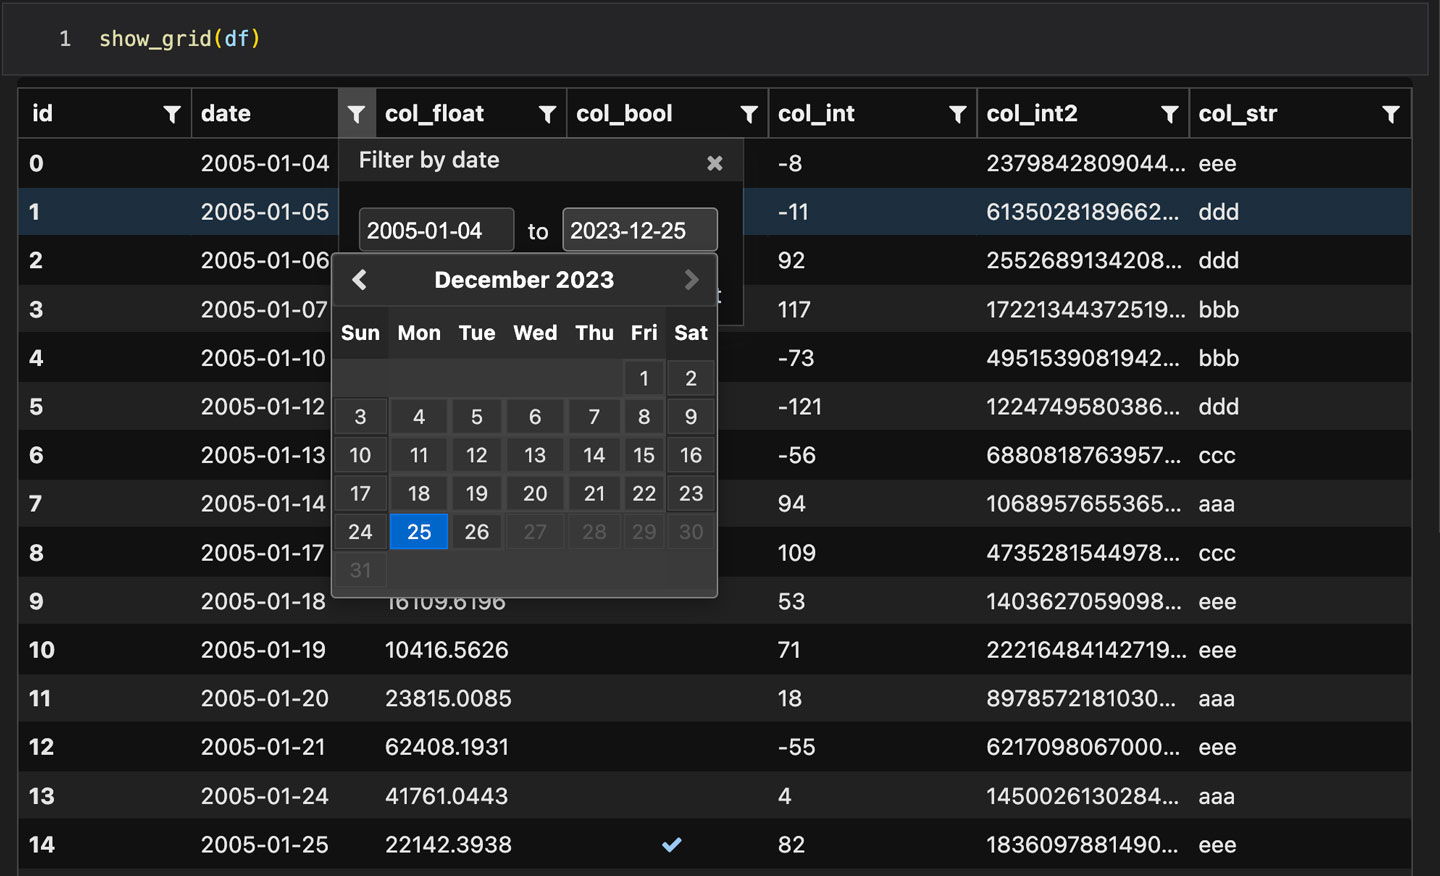
Qgrid is a Jupyter widget that utilizes SlickGrid to render pandas DataFrames within JupyterLab/Notebook. This allows you to explore your DataFrames with intuitive scrolling, sorting, and filtering controls, as well as edit your DataFrames by double clicking cells. Initially developed by Quantopian, Qgrid ceased maintenance in 2020. QgridNext aims to continue maintaining and improving it for future Jupyter versions.
QgridNext is compatible with recent versions of Jupyter:
| QgridNext | JupyterLab | Notebook | Voila |
|---|---|---|---|
| v2.0 | v3 - v4 | v5 - v7 | v0.2 - v0.5 |
The test environments are provided in the test_envs folder. You can try the widget in these environments easily.
QgridNext v2.0 significantly improves compatibility and addresses bugs found in Qgrid v1.3.1.
- Support JupyterLab 4;
- Released as a prebuilt extension (now can be installed with one step);
- UI improvements:
- Fix infinitely expanding width of the container in voila <= 0.3;
- Prevent unexpected scrolling when clicking rows in Chrome for JupyterLab;
- Adapt canvas size when the sidebar width changes in JupyterLab;
- Fix poorly displayed left/right button of date picker;
- Correct text color in dark mode;
- Standardize HTML tags to fix poorly displayed filters;
- ...
- Building bug fixes:
- Fix inconsistent pkg name for embeddable qgrid bundle;
- Fix data_files finding that results in incomplete extension setup;
- Fix building errors for Node >= 18;
- Other fixes:
- Ensure
Defaults.grid_optiondict instance are not shared across widget instances; - Remove full-screen mode for voila compatibility;
- Remove deprecated QGridWidget alias, only QgridWidget is allowed;
- Replace deprecated usages for traitlets, pandas and jquery;
- Support
string[python|pyarrow]-typed columns; - ...
- Ensure
- (v2.0.3) Add dark theme support for JupyterLab, Notebook, and VSCode-Jupyter, automatically adapting to the environment's theme.
Installing with pip:
pip install qgridnextQgridNext supports Python 3.7+ and depends on the following packages:
- pandas >= 0.20
- ipywidgets >= 7
- numpy
- traitlets
Rendering your DataFrame:
from qgridnext import show_grid
show_grid(your_df)
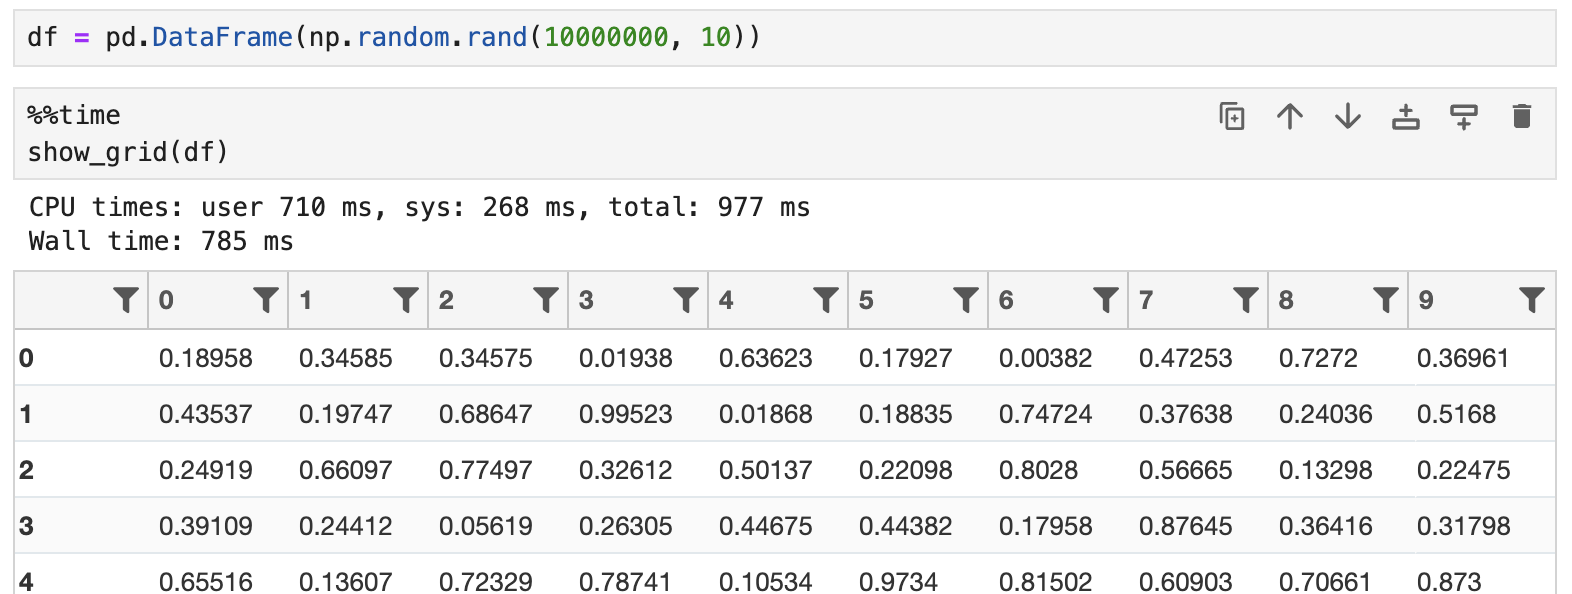
QGrid loads DataFrame lazily, which ensures efficiency for rendering large DataFrames. For example, it can render a DataFrame with 10,000,000 rows in 1 second:
Column-specific options: Qgrid has the ability to set a number of options on a per column basis. This allows you to do things like explicitly specify which column should be sortable, editable, etc. For example, to prevent editing on all columns except for a column named 'A', you can do the following:
col_opts = { 'editable': False }
col_defs = { 'A': { 'editable': True } }
show_grid(df, column_options=col_opts, column_definitions=col_defs)
Row-specific options: Currently, Qgrid supports disabling row editing on a per-row basis, enabling row editability based on specific criteria:
def can_edit_row(row):
    return row['status'] == 'active'
show_grid(df, row_edit_callback=can_edit_row)
Updating an existing Qgrid widget: You can update an existing Qgrid widget's state using APIs like edit_cell, change_selection, toggle_editable, and change_grid_option.
Use on and off methods to attach/detach event handlers. They're available on both the qgrid module (see qgrid.on) and individual QgridWidget instances (see qgrid.QgridWidget.on).
Example:
def handle_json_updated(event, qgrid_widget):
    # Exclude 'viewport_changed' events since that doesn't change the DataFrame
    if (event['triggered_by'] != 'viewport_changed'):
        print(qgrid_widget.get_changed_df())

# qgrid_widget = show_grid(...)
qgrid_widget.on('json_updated', handle_json_updated)
Alternatively, the traditional observe method is available but not recommended due to its less granular event control:
def handle_df_change(change):
    print(change['new'])

qgrid_widget.observe(handle_df_change, names=['_df'])
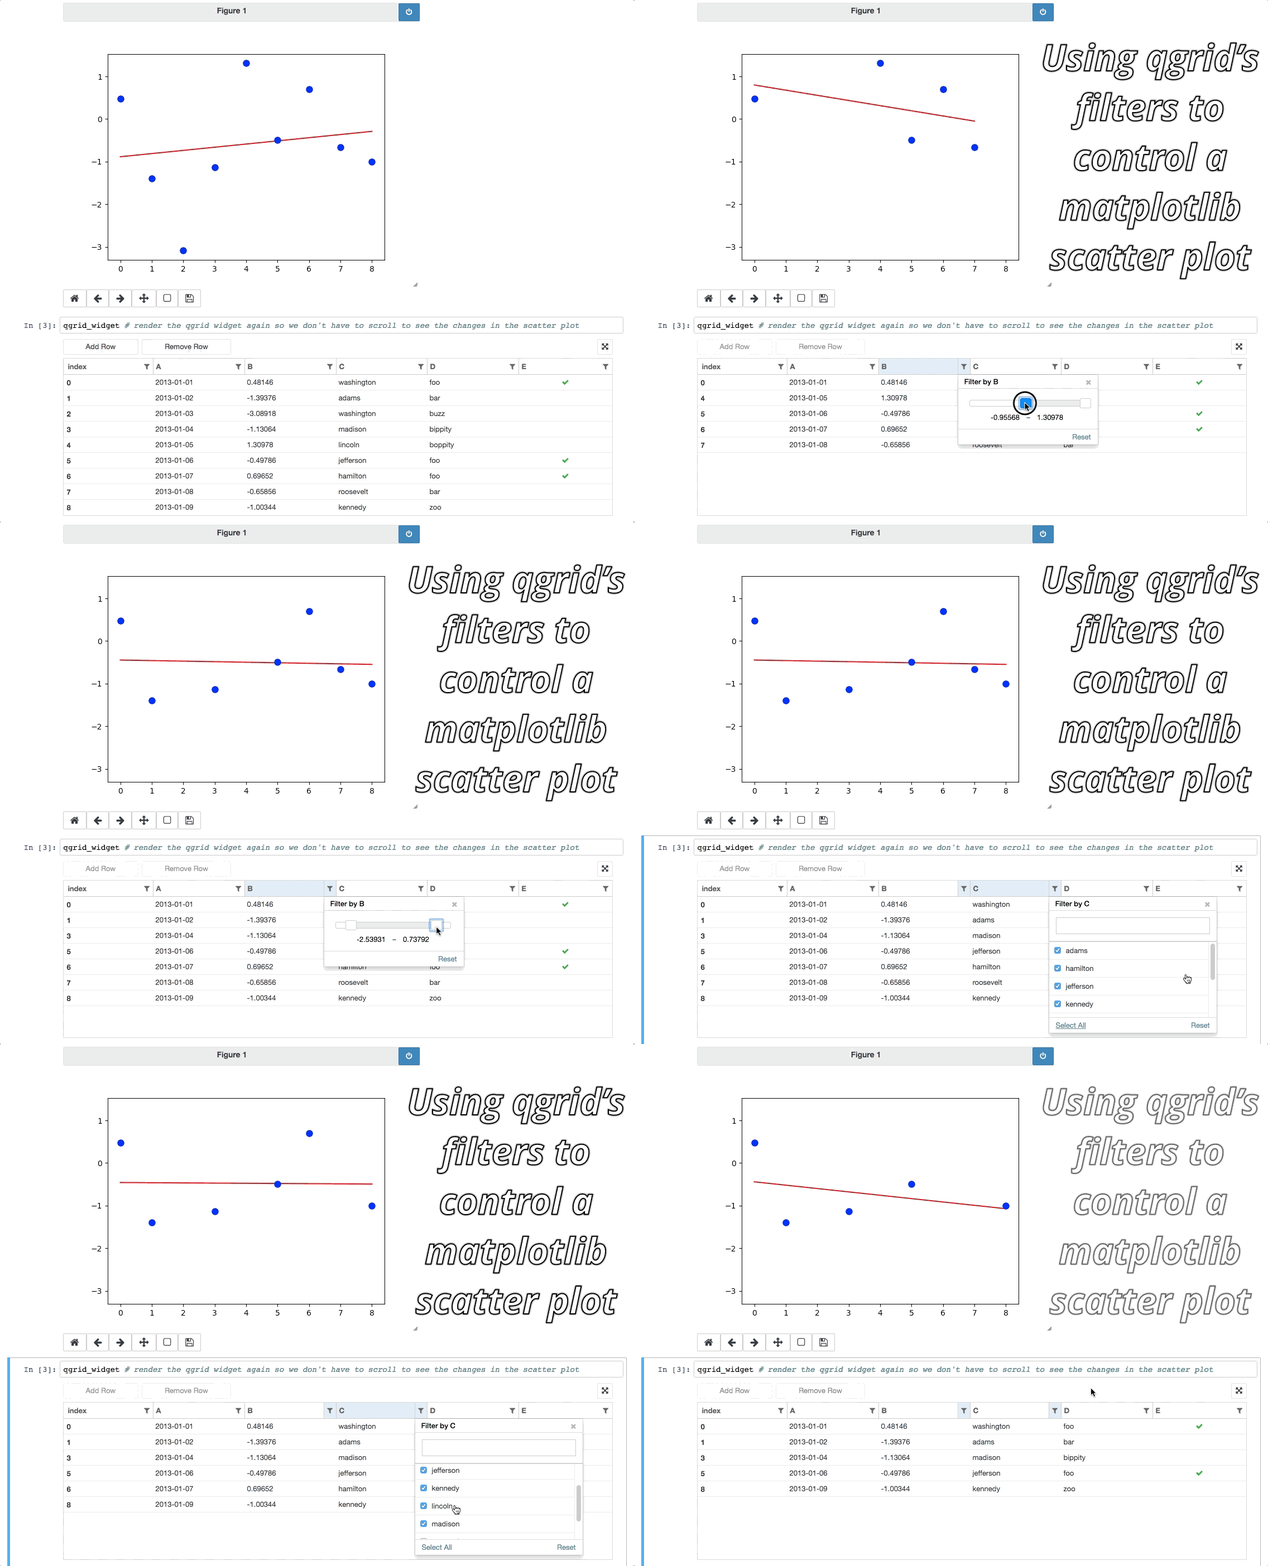
Event handlers enable interesting integrations with other widgets/visualizations, like using qgrid to filter a DataFrame also displayed by another visualization.
For more examples, see the events notebook.
Multiple test environments are provided in test_envs. You can perform automated tests by pytest, or manually test it in your browser.
If the widget does not appear, first check if the extension is installed and enabled:
jupyter labextension list
jupyter labextension enable qgridnext  # enable it if it's disabled
If you encounter an error message like displaying widget: model not found or Loading widget..., it may indicate a version incompatibility between your ipywidgets and JupyterLab. In most cases, upgrading the ipywidgets version will solve the problem. You can also refer to the environment configurations listed in test_envs.
When upgrading, it's necessary to restart the kernel and refresh the webpage. In some cases, clearing your browser's cache may also be helpful.
Utilizing the test environments (test_envs) is recommended for efficiently diagnosing any issues within your current setup. If the widget works correctly within the test environment but not in your own, it's likely due to version incompatibilities, which can be resolved by adjusting the versions in your environment accordingly.
Note: JupyterLab 4 and NodeJS are required to build the extension package. You can use dev.yml in test_envs for a quick setup.
git clone https://github.com/zhihanyue/qgridnext
cd qgridnext
pip install -ve .  # Install package in development mode
pip install -ve . installs the package into your python environment as a symlink. It also creates symlinks of built JS extensions for your Jupyter environments automatically (implemented by our custom command in setup.py). After making any changes to the JS code, just rebuild it by:
npm --prefix ./js installWhen uninstalling it, you need to clean up the JS symlinks via script unlink_dev.py:
pip uninstall qgridnext
python ./unlink_dev.pyAll contributions, bug reports, bug fixes, documentation improvements, enhancements, demo improvements and ideas are welcome.


